By Dustin Simpson
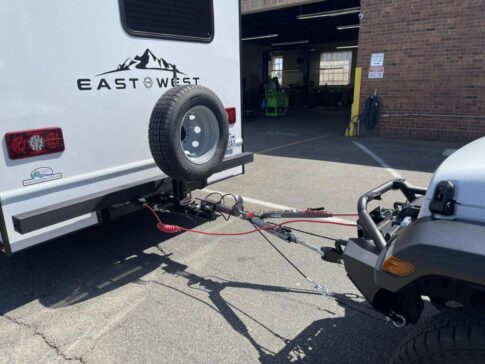
Join me “In The RV Shop” as we discuss how carrying a spare tire for your RV is a smart and essential precaution, as it can provide a quick solution in case of a flat tire. Here are some important considerations regarding having a spare tire for your RV:
Size and compatibility
Ensure that the spare tire is the correct size and type for your RV. RVs may have different tire sizes, including those for the tow vehicle and the trailer. The spare tire should match the size of the tires currently in use.
Proper inflation
Regularly check the inflation pressure of the spare tire to ensure it is ready for use in case of an emergency. Insufficient inflation can compromise its effectiveness. It’s a good idea to have a portable compressor to fill your tires while on the road.
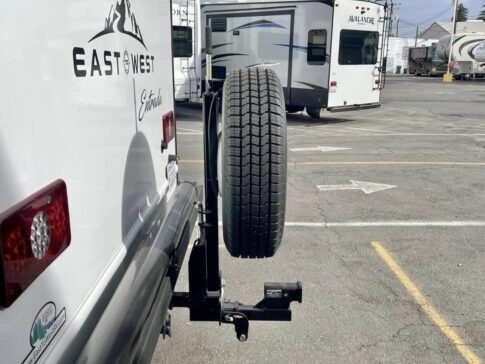
Storage location
Know where the spare tire is stored on your RV. It may be located in an exterior compartment, underneath the RV, or on the rear bumper. Familiarize yourself with the location and access procedures.
Tools and equipment
Carry the necessary tools and equipment to change a tire, including a jack, lug wrench, and any additional tools specific to your RV’s tire-changing process. Verify that these tools are in good condition and accessible.
Inspect regularly
Periodically inspect the spare tire for signs of wear, damage, or dry rot. If the spare tire is mounted on the exterior of the RV, exposure to the elements can contribute to deterioration.
Tire changing instructions
Familiarize yourself with the tire-changing instructions provided by your RV manufacturer. The process may vary based on the RV’s design and the location of the spare tire.
Be mindful of the weight of the spare tire and its impact on your RV’s overall weight. Ensure that your RV is within its weight limits, accounting for the spare tire and any additional cargo.
Emergency roadside assistance
While having a spare tire is crucial, it’s also wise to have a backup plan in case you encounter difficulties or are unable to change the tire yourself. Consider subscribing to an emergency roadside assistance service that can provide professional help when needed.
Tire maintenance
Practice regular tire maintenance for all tires on your RV, including the spare. This includes checking tire pressure, inspecting for damage, and rotating tires as recommended by the tire manufacturer.
Having a properly maintained spare tire and the necessary toolscan provide peace of mind during your travels. Regular inspections and staying prepared for emergencies contribute to a safer and more enjoyable RV experience.
A past video on the Travels & Travails channel about selling a Scamp and buying a Casita pulled in more than 700,000 views. A lot of the pushback was in the 17-foot Casita vs. 13-foot Scamp debate. So the team created the video at the end of this post, which compares the full Scamp line and the Casita 17. Which trailer wins by category, and why?
Price, sizes, and floor plans
On price, Scamp starts lower. The Scamp 13 runs from about $20,000 to just under $26,000. The Scamp 16 lands near $26,000, and the roomier Scamp 19 starts around $35,000.
The Casita 17 is also around $26,000, but Casita has financing, so it takes the win on price and buying flexibility.
Size is where Scamp opens things up. Casita sells one size, a 17-foot trailer with five floor plans. Scamp offers 13-foot, 16-foot, and 19-foot models, with 17 floor plans total. The Scamp 19 also has a fifth-wheel setup.
Scamp is the easy winner for variety.
Tanks, lead times, and towing
Scamp uses a 9-gallon black tank across the 13, 16, and 19 models, and it vents out the side. Casita vents through the roof. That matters if a toilet overflows. On a Scamp, the overflow can run outside down the trailer wall. On a Casita, it stays inside. Scamp also offers a dry-flush toilet, which may suit campers who don’t want that small marine setup, especially in the six-sleeper Scamp 19.
Here is the rest of the tank picture:
Casita/Scamp
Water heater: 6 gallons/4-gallon on-demand
Fresh water: 16 gallons, upgrade to 23/12 gallons/12 gallons
Gray water: 32 gallons/21 gallons
Casita wins for tanks.
It also wins lead time, at about 12 to 18 months versus roughly 23 to 24 months for Scamp. (Note, according to another video I watched from Scamp, that lead time has significantly improved, so this is no longer a clear win for Casita.)
Both brands use a 3,500-pound axle, but Scamp is lighter. A Scamp 16 weighs about 1,750 to 2,000 pounds dry. A Casita runs 2,210 pounds dry in standard trim and 2,480 pounds in deluxe trim. Tongue weight is lower on Scamp, too: 185 to 220 pounds versus 295 to 395 on Casita.
Ground clearance, build, and fridge
Casita pulls ahead in rougher campsites. Buyers can add a high-lift axle and 15-inch tires, and that extra clearance matters off the beaten path. Scamp 13 and 16 models use smaller tires and don’t offer a high-lift axle, though the Scamp 19 does get 15-inch tires.
Their builds are close, but the floors differ. Casita uses wood encased in fiberglass. Scamp uses wood coated with fiberglass resin, which leaves the wood exposed underneath. Both can potentially suffer water damage, but Casita’s floor gets more protection.
The refrigerator category also leans toward Casita. Every Casita model gets a 4-cubic-foot fridge with a small freezer. Scamp 13 and 16 models get a 1.9-cubic-foot fridge with no freezer, while some Scamp 19 layouts get larger units.
Interior and options
Scamp wins on interior character. The deluxe models get birch or oak cabinetry, which feels warmer and more home-like than fiberglass cabinets and MDF doors. Scamp also offers clever layouts, including sofa bunks and a child-size dinette bed in one 13-foot floor plan.
Still, Casita has one layout advantage that matters to a lot of RV buyers: twin beds. That setup avoids the midnight climb-over.
On options, it ends in a tie. Both offer paid upgrades like air conditioning, furnace, awning, TV, and AGM batteries. Scamp adds a dry-flush toilet and generator option, while Casita offers standard roof vent fans, standard dual propane tanks, and upgrades like a larger fresh tank.
Final thoughts
The video says that, category by category, Casita comes out ahead. It wins on financing, tanks, lead times, construction, refrigerator size, and ground clearance. However, since this comparison was made, Scamp’s lead times have improved a lot.
Scamp still has real charm. The wood cabinets stand out. Still, for this matchup, Casita is the winner… unless you have your heart set on that 19’ 5th wheel. In that case, we need to compare Scamp vs. Escape. But that’s a post for another time.
America’s Original RV Newsletter. Since 2001 Issue 1262
Today’s thought
“A hero is someone who has given his or her life to something bigger than oneself.” —Joseph Campbell
Need an excuse to celebrate? Today is National Wyoming Day! We love you, Wyoming!
On this day in history: 1607 – Jamestown, the first permanent English colony in North America, is founded.
COMING TOMORROW: OUR MEMORIAL DAY EDITION OF RV DAILY TIPS. But first…
… Ernie Pyle’s heartwarming story of the death of Captain Waskow
Famed World War II newspaper correspondent Ernie Pyle wrote this haunting and enduring tale of the death of Captain Henry Waskow and how his fellow soldiers said goodbye. For the Memorial Day holiday (and always), this will touch your heart. Grab a tissue.
RVtravel.com readers share what they love most about their RVs
Last week, we asked RVtravel.com readers: What do you love most about your RV? The answers came from owners of fifth wheels, motorhomes, travel trailers, camper vans, and even a vintage Ultra Van. While the RVs themselves were all different, the reasons people love them often weren’t. Here are some of our favorite responses (and photos).
The big mistake I made that ended with an RV rat infestation!
By Nanci Dixon
I was all ready to write an article about getting ready for a long trip—things like sanitizing water lines, checking that everything works, cleaning and clearing out things no longer needed. But life lessons got in the way of that article. I realized I made one big, big mistake when it came to storing our RV… and now I’m dealing with cat-sized rats!
Follow these important steps to protect your home while you’re gone RVing
Most RVers can’t wait to get out on the road. Thieves can’t wait for you to leave, either! It’s estimated that a home burglary occurs every 18 seconds in the United States. But thieves aren’t your only worry. What if a water leak develops? Or the HVAC system malfunctions and causes a fire? Here are a few tips for protecting your home while you’re away.
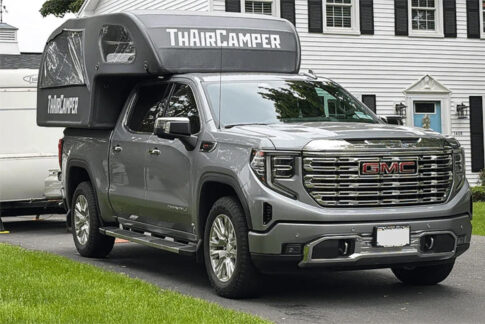
Today’s RV review… Meet the ThAirCamper inflatable truck camper
By Tony Barthel
Today’s RV review looks at the ThAirCamper for pickup trucks. What you have here is a very simple inflatable pickup camper that fits, and is appropriate for, a variety of trucks, including some mid-sized pickups. It’s a very simple solution but it may not be for everybody. And, yes, everything is inflatable! Check this out.
No more flies, mosquitoes or other flying insects in your RV again!
RVer Shay Matthews writes, “If you don’t have one of these Zevo insect traps yet, get one! This photo was after four days of camping in our trailer.” The Zevo flying insect traps plug into any electrical outlet to attract all flying insects like fruit flies, gnats and mosquitoes. It works 24/7.” Learn more or order here.
A LITTLE TRIVIA FOR YOU: In the last week, RVtravel.com newsletters were read mostly in United States, with Canada a distant second. But hundreds of other readers got their daily dose of news and information from, in order: New Zealand, the U.K., Australia, Ireland, Germany, Mexico, France and dozens of other countries around the world.
Tanner Toons With Tanner Woods
You may share this Tanner Toon, unaltered, on your website, blog or social media with our compliments. The musings from Tanner Woods’ creative mind appear in this newsletter every Saturday and Sunday and in many RV Daily Tips newsletters through the week. Sign up for our RV Daily Tips Newsletter so you don’t miss them.
RVers debate: Are those yellow speed signs the law or just suggestions?
By Gail Marsh
If you have ever taken an exit ramp or maneuvered a sharp curve, you’ve probably spotted a yellow sign with a lower speed posted on it. Discussion of these signs camp up at a recent campfire. RVers clearly didn’t agree on the meaning of their meaning or how RVers should react to them. Are those speed limits the law or merely suggestions? Find out here.
Why you should make an RV shakedown trip an annual event
By Gail Marsh
We’ve been RVing for years, so why do we need a shakedown trip? Aren’t those trips for RV “newbies”? Well, yes. However, an annual RV shakedown trip is one of the easiest ways to save yourself from a miserable first big trip of the season, and I believe you should take one once a year. Here’s why.
Why I write for RVtravel.com
By Nanci Dixon
Recently, at one of our RVtravel.com staff and writers’ meetings (yes, we are real RV people, not artificial intelligence [AI] “androids”!), someone asked why we write for RVtravel.com and not other publications. They were referencing publications where the pay might be better, but the articles don’t need to be as accurate or truthful. I only had to reflect for a moment.
Our amazing readers RVtravel.com readers reveal the special times in their lives
By Chuck Woodbury
Awhile back, I asked you to write me about some of your special life moments or accomplishments of which few, if anybody you know, were aware. Here are your stories with recent additions. Keep ’em coming. Don’t be shy!
Tony’s tips Experiencing the Overland Expo. Yes, you should go
If you’ve ever been to almost any RV show out there, then you have an idea what it’s like—endless rows of RVs, often organized by manufacturer, with RV salespeople hovering around like the proverbial land sharks Jimmy Buffett sang about. Five times a year, there’s a different sort of RV show: the Overland Expo. This is a monster event where tens of thousands of people attend to look at the latest in overlanding gear and rigs. Here’s why I think you’ll enjoy it.
An electric mousetrap that works
Keep rodents out of your RV with the Owltra electronic rodent trap—a clean, humane and RV-friendly solution. Powered by 4 AA batteries, the pet-safe trap delivers a quick, high-voltage zap for instant elimination, no chemicals or glue. Dump with no mess. Cheri Sicard recommends it.
PHOTO OF THE WEEK
Where is this?
The world’s largest electrical outlet is a colossal 10-foot-tall, 6-foot-wide pop-art sculpture attached to the exterior of a substation in which state? California, Texas, Connecticut or Oklahoma? Answer below. Photo credit: michaelsiemsen, Reddit
Reader poll Have you ever had mice, rats, or other critters get into your RV?
Starlink Mini RV charger powers Starlink Mini and other devices
For RVers relying on a Starlink Mini, staying connected during long trips or off-grid adventures can be a challenge. The new JR-CL30 4-in-1 Starlink Mini RV charger delivers stable power to your Starlink Mini while charging other devices at the same time. Learn more here.
Travel destinations
Route 66 is the “Mother Road”, but what’s America’s “Father Road”?
A while back, I wrote about the true mother of the “Mother Road.” One of our readers, Steve H., commented and suggested that perhaps there’s a “Father Road,” as well. Turns out, Steve has a valid point. There is a “Father Road”!
Enjoy quirky stops? Visit Tennessee’s Salt and Pepper Shaker Museum
If you like roadside attractions that are a little weird (in the best possible way), visit the Salt and Pepper Shaker Museum in Gatlinburg, TN. The museum calls itself the world’s only salt and pepper shaker museum and boasts a collection of more than 20,000 sets from around the world. This is incredible!
Highlights from this week’s RV Daily Tips Newsletter
In the RV shop with Dustin Why EternaBond tape may not be the solution for RV roof maintenance
Here, we dive into the truth about RV roof repairs and explore why EternaBond tape or similar products may not always be the best solution for maintaining your RV’s roof. Join me and my wife, Ashley, owners of an RV business, as we share our professional insights and discuss why proper roof maintenance requires more than just a quick fix.
? MYSTERY PRODUCT OF THE DAY ? These are very cool! When was the last time you bought new ___ for yourself? Or your special someone? Now would be a good time! Look at the other designs, too. Some of them are hilarious!
PHOTO ANSWER: The world’s largest electrical outlet is attached to the exterior of the Pacific Gas and Electric substation in Petaluma, California.
RV tire safety Tire inspection: How to get it done properly
By Roger Marble Almost every thread on “tire life in RV usage” has said something about “tire inspection.” What hasn’t been properly or completely covered is the “how to” and “who can” do a competent job of inspecting tires. Well, in this post, I am going to try.
RV gadgets and gizmos Instant Pot vs. knock-off brand: Is the name brand worth it?
Multi-cookers do it all—slow cook, pressure cook, saute, steam, make rice, make yogurt, and much more. But can a knock-off brand that’s less than half the price of the famous Instant Pot be just as good? We put it to the test. Get the results of the Instant Pot vs. knock-off brand comparison here.
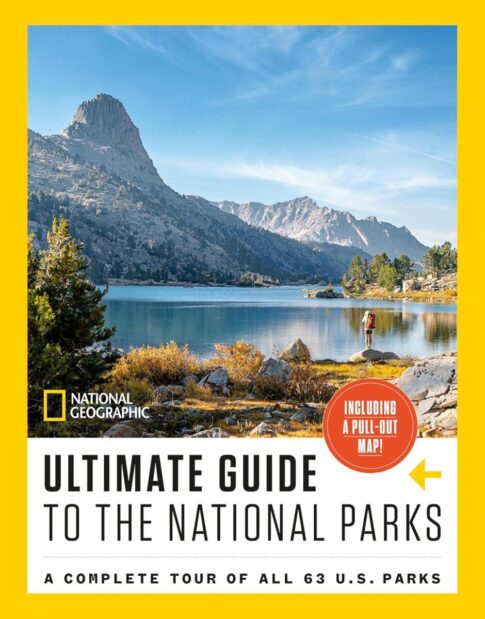
Brand-new National Park book has everything you need
We all know that National Geographic puts out beautiful, thoughtful work, so it’s no surprise that its brand-new 2026 book, National Geographic Ultimate Guide to the National Parks: A Complete Tour of All 63 U.S. Parks, is no exception. This is a travel guide to 400+ parks, areas, trails, historic sites, seashores, campgrounds, and much more. Learn more or order.
Trivia
In 1915, during World War I, Lieutenant Colonel John McCrae was overcome with sorrow when he saw red poppies blooming all over Europe. Seeing a cluster of poppies blanketing Flanders Field in Belgium inspired McCrae to write the famous poem “In Flanders Fields.” This moving poem is written from the point of view of those buried beneath the soil. Overcome with emotion after reading McCrae’s poem, teacher and YMCA overseas secretary Moina Michael started the tradition of wearing a silk or paper poppy in honor of fallen American soldiers. Because of Moina, the red poppy became the symbol of remembrance in 1920 and still continues today.
FREE IS GOOD! Get free New York travel guides online or by mail at I Love NY. Did you know there are 11 Vacation Regions to explore? Lots to choose from!
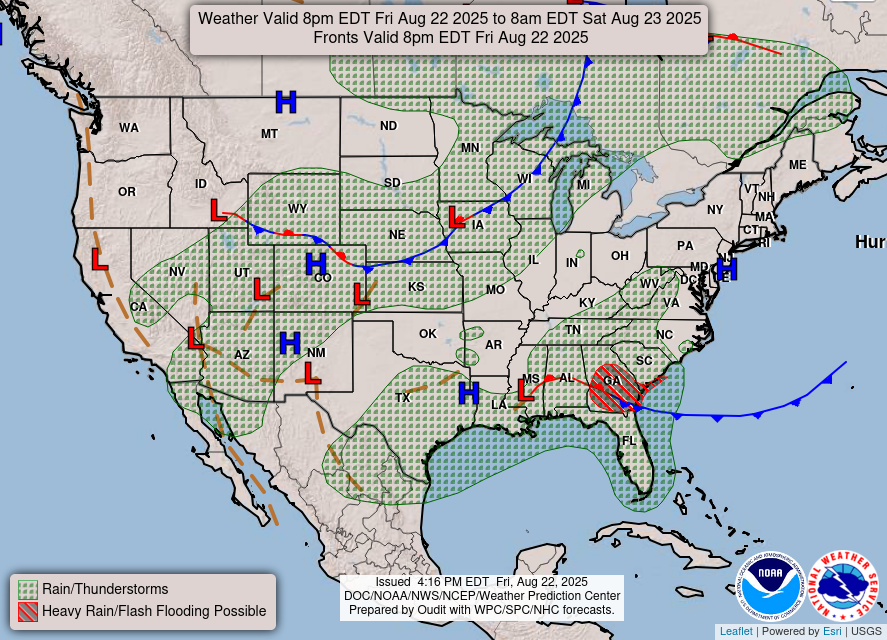
Today’s weather forecast across the nation THIS MAP UPDATES TWICE A DAY
Enjoy Kate Smith singing a “brand-new song,” in the 1943 movie “This is the Army”, which will go on to become one of the most popular patriotic songs of all time.
By Gail Marsh
Most RVers can’t wait to get out on the open road. Thieves can’t wait for you to leave home, either! It’s estimated that a home burglary occurs every 18 seconds in the United States. That’s an alarming number! But thieves aren’t your only worry. What if a water leak develops? Or the HVAC system malfunctions and causes a fire? Here are a few tips for protecting your home while you’re gone RVing.
DIY high-tech tips to protect your home
Many remarkable technological advances in home protection have occurred over the past few years. Of course, you can hire a professionally installed security system with 24/7 monitoring, but great DIY products are on the market, too. The good news is that the cost of DIY high-tech protection has come down in price. Here’s just a sampling of high-tech protection for you to consider.
• Smart alarms. This is the one we have. It monitors our home for smoke and carbon monoxide. A remote notification will appear on our phones if there is a problem. Check Amazon for many other options. You can also purchase smart products that will alert you by email or phone if a water leak is detected in your home. Knowing that you have a problem enables you to alert authorities or a trusted neighbor to check things out for you.
• Smart plugs. We bought several of these to attach to various lights and appliances throughout our home. You can set a timer to automatically turn on/off lights, radio/TVs, fans, and more, or control the settings with your cell phone. If a potential thief is “casing” your home, it will appear as if someone is inside, using the lights, TV, and more—especially if the plugs react randomly.
• Interior cameras. Several interior camera features include recording capability, motion detection, night vision, two-way audio, and connectivity to your cell phone. All will offer you peace of mind while away from home.
• Exterior cameras. Weather-resistant outdoor cameras come in a variety of makes and models. Even less expensive models feature motion detection, full-color night vision, sirens, and more. Most have cell phone monitoring, as well.
• Smart door locks. These products are a little pricier but do provide many perks along with deadbolt protection. For example, some smart door locks work off an app that you can use to set and change codes whenever someone needs access to your home. (Like the gal who comes once a week to water indoor plants.) Other smart lock models “ping” your cell phone when motion is detected, and some allow for two-way communication.
Low-tech tips
You don’t necessarily need to be a “techie” in order to keep your home safe while RVing. There are many non-tech tips that work, too.
• Trusted neighbor. Ask a neighbor to check on your home periodically, especially to check the sides and back of the house. (A thief will usually enter a home in the spot least visible from the street.) Invite the neighbor to park a car in your driveway, to give the appearance that someone is home, too. I’m sure they’ll be happy to help you protect your home while you’re gone.
• Lawn care. Ask someone to mow your yard, rake leaves, shovel snow, etc., while you’re away. Do everything you can to give the impression that someone is home.
• Lock it up. Make sure ladders, tools, etc., are locked securely inside the garage or house. (You don’t want to make things easier for a would-be thief.) Lock your large garage door(s) by disabling the remote door opener if you have one. If your garage has a side or back door to the outside, be sure it’s also securely locked.
Double-check all windows and doors in your home to make sure they are also locked. (Double-cylinder deadbolts are highly recommended by security experts.) If you have sentimental or expensive items that you won’t be taking with you, make sure to store them in a bank lock box or home safe. And don’t forget to secure the doggie door or other pet entrance into your home. Some thieves are adept at contortion-like maneuvers when highly motivated. If you have a fenced yard, be sure to lock the gate(s).
• Stop deliveries. Stop all mail, UPS, newspaper, or other home delivery for the time you’ll be away from your home. Ask a trusted neighbor to pull any fliers left at your door (like political pamphlets) or on your lawn (from a lawn care provider).
• Don’t announce your plans. Do not post your vacation plans on social media. It’s a good idea not to broadcast your plans except for people who need to know.
• Remove your “hidden” key. Many folks keep an extra house key in a potted plant, fake rock, or (please say it isn’t so) under the welcome mat. (Yipes!) If you plan to be away, it’s best to bring that “hidden key” inside the house. Maybe forever.
• Clean the keypad. Dingy fingerprints on your coded entry system can be a dead giveaway to a burglar. Clean it off just to be safe.
• Protect electronics. Unplug the computer, TVs (except if set on a timer), and other appliances or make sure they are safely connected to a surge protector.
• Turn water off. We always have the city turn off our water while we’re gone. It not only saves us money, but it ensures that no water leaks or burst pipes will cause damage. When we get home we’ll ask the city to turn the water back on. That way, we’re home to see (or hear) any leaks that may occur when the water pressure surges back through the pipes.
What are some additional steps you take to protect your home while RVing? Share your tips in the comments below.
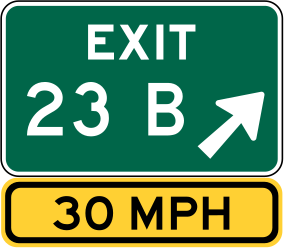
If you have ever taken an exit ramp or maneuvered a sharp curve, you’ve probably spotted a yellow sign with a lower speed posted on it.
These yellow speed signs became the topic of discussion at a recent campfire. RVers clearly didn’t agree on the meaning of these signs or how RVers should react to them.
It’s the law!
Arnie began, “My wife and I disagree. You know those yellow speed signs posted near sharp curves and exits? I say those speed signs require drivers to slow down to the posted speed.”
“Well, if it’s on a highway sign, it’s the law. Right?” Bryce joined in. “If the sign says 25 mph, you’d better slow down or risk getting a ticket.”
It’s a suggestion
Megan disagreed. “No, no, no. Didn’t you take driver’s ed? Yellow speed signs are merely a suggested speed. It’s probably best to follow the recommended speed, especially if you’re driving a big RV. Not because you’ll otherwise earn a ticket, but simply because that’s the suggested speed for safely maneuvering the curve.”
Arnie’s wife chimed in, “See, Arnie. I told you it was only a suggestion.”
“Tell that to the patrol officer.” Arnie huffed. “And plan to pay a fine.”
What’s right?
According to the Manual on Uniform Traffic Control Devices (MUTCD), the short answer is this: The number on a yellow speed sign is a recommended safe speed, not a posted speed limit.
Under the MUTCD, advisory speed plaques are part of the warning-sign system. Warning signs exist to alert drivers to conditions that might not be obvious ahead and may call for a speed reduction.
What’s the difference?
The MUTCD says yellow warning signs give notice of situations that might not be readily apparent. White regulatory signs are the ones that give notice of traffic laws or regulations.
The yellow advisory speed plaque is specifically described as something that supplements a warning sign. It’s not supposed to be installed as a standalone sign. In other words, the yellow number is there to guide you, not to function as a white regulatory speed limit sign.
Who sets the advisory speed?
For exit ramps and highway curves, the MUTCD says the advisory speed should come from an engineering study and be based on recommended engineering practices.
The Federal Highway Administration also notes that advisory exit speed signs are meant to appear far enough ahead for drivers to slow down and make the maneuver safely. That’s why these signs often show up on curves, interchanges, and deceleration lanes rather than as general speed limits for the entire roadway.
Ticketed offense
Can you be ticketed for going faster than the yellow advisory sign’s noted speed? No. Not just for ignoring the plaque by itself. The enforceable part comes from the broader traffic laws in that state or locality. Not from the advisory plaque acting as a speed-limit sign.
NHTSA (National Highway Traffic Safety Administration) says speed still affects safety even when a driver is at or under the posted limit. FMCSA (Federal Motor Carrier Safety Administration) lists curves, intersections, wet roads, reduced visibility, and heavy traffic as examples. So, if an RV or tow vehicle enters a curve too fast and loses control, the issue can become unsafe driving, reckless driving, or another condition-based violation depending on the state and the facts. For that, you can be ticketed.
Bottom line
For RVers, the smart move is to treat the yellow advisory number as a real safety cue, even though it is not a standalone legal speed limit.
Your rig is less forgiving than a passenger car when the road tightens up, the pavement changes, or the exit ramp banks harder than it looks from the freeway. The yellow speed sign is basically telling you what speed you should have before the turn starts, not after you’re already in it.
Yellow advisory speed signs on exits and curves are generally not legally enforceable as posted speed limits. However, they can still matter a lot if you drive too fast for the conditions. The safest rule is simple: Slow down before the curve.
How do you react to yellow advisory speed signs when driving your RV? Tell us in the comments below.
If you like roadside attractions that are a little weird (in the best possible way), visit the Salt and Pepper Shaker Museum in Gatlinburg, TN.
The museum calls itself the world’s only salt and pepper shaker museum and boasts a collection of more than 20,000 sets from around the world.
Getting there
Getting to the Salt and Pepper Shaker Museum is simple enough for RV travelers already headed toward the Smokies. From Pigeon Forge, head toward Gatlinburg. Turn left at Stop Light #3 on Hwy 321. Then, go up the hill about half a mile to Winery Square.
The museum’s address is 461 Brookside Village Way in Gatlinburg. Hours of operation run Monday through Saturday from 10 a.m. to 4 p.m. and Sunday from 10 a.m. to 2 p.m.
Inside the Salt and Pepper Shaker Museum, visitors can expect to see shelves upon shelves of salt and pepper shakers that range from tiny novelty figures to themed sets and more traditional designs. Yes, 20,000 pairs of them!
The museum’s collection highlights the way these everyday table items became collectible art. You’ll see sets in all kinds of colors, shapes, and materials.
For RVers, this stop works especially well because it’s quick, inexpensive, and easy to pair with a bigger Gatlinburg day. The tourism office encourages visitors to use the free trolley to easily get around this bustling area.
If you need a nearby place to park your rig, here are some good choices:
• Twin Creek RV Resort is inside the Gatlinburg city limits. It borders Great Smoky Mountains National Park and offers trolley service to Gatlinburg and Dollywood.
• Greenbrier Campgroundhas RV sites with full hookups, Wi-Fi, cable, pull-through sites, and riverfront spots along the Little Pigeon River.
• Adventure Bound Gatlinburg sits on Highway 321 just minutes from the park entrance and provides a pool, a 500-foot waterslide, and a fishing pond.
You should go!
The Salt and Pepper Shaker Museum is a fun (and quirky) stop for RVers visiting Gatlinburg, TN. The modest admission fee and huge one-of-a-kind collection make this museum a memorable place for RVers to visit.
A while back, I wrote about the true mother of the “Mother Road.” One of our readers, Steve H., commented and suggested that perhaps there’s a “Father Road,” as well.
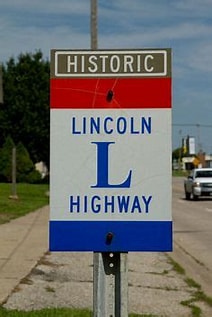
Turns out, Steve has a valid point. The Lincoln Highway has a strong claim to being America’s “Father Road” because it opened in 1913. Route 66 did not officially begin until 1926. Want to learn more about the “Father Road”? Read on!
A bit of history
The idea of a cross-country roadway began with Carl G. Fisher. Fisher was not an engineer or government official. He was a businessman, entrepreneur, and visionary. Fisher believed the automobile would completely change American life. (He was certainly right!)
Fisher understood that cars would never reach their full potential if Americans were still trying to drive through mud, ruts, and disconnected local roads. Fisher envisioned a durable, improved road stretching from New York City to San Francisco. He called his idea a “Coast-to-Coast Rock Highway.”
Fisher already had a reputation for turning giant ideas into reality. He helped create the Indianapolis Motor Speedway and later became one of the developers responsible for transforming Miami Beach into a famous resort destination.
The Lincoln Highway may have been his boldest project because, in 1912, the United States barely had interconnected roads outside cities and towns. Most “highways” were dirt and often impassable after rain. Cross-country travel was dominated by railroads.
To make his dream happen, Fisher gathered support from some of the most powerful names in the automobile world. Industrial leaders, including Henry Bourne Joy of Packard and Frank Seiberling of Goodyear, joined him in forming the Lincoln Highway Association in 1913. The organization’s mission was simple but ambitious: Create a continuously improved highway from the Atlantic to the Pacific that would be open to all travelers without tolls.
Funding the highway
Funding the highway was a massive challenge. Some major figures supported the effort, including Theodore Roosevelt, Thomas Edison, and President Woodrow Wilson. Henry Ford, however, famously refused to contribute because he believed roads should be funded publicly rather than privately.
Even though the association never raised enough money to fully build the highway itself, it succeeded in something more important. It convinced Americans that modern paved roads mattered.
The Lincoln Highway Association promoted “seedling miles.” These were short stretches of concrete road built in rural areas to demonstrate how much better paved highways performed compared to dirt roads. Once people experienced these improved sections, pressure grew for states and the federal government to invest in better highways nationwide.
The Lincoln Highway helped pave the way for the American road-trip culture. Without the push from Fisher and the association, the United States may have taken much longer to develop national highway networks.
ENJOY STORIES LIKE THIS?Never miss out! Since 2001, RVtravel.com has been the #1 website for RVers in North America. Written by the RVing experts, for RVers. Learn more or subscribe to our newsletters here.
Why “Lincoln Highway”?
The Lincoln Highway was named after President Abraham Lincoln as a patriotic tribute. When the highway was announced in 1913, the country was approaching the 50th anniversary of Lincoln’s death. Organizers wanted a name that symbolized national unity from coast to coast.
“Father Road” route
East of the Mississippi, the Lincoln Highway was stitched together from existing roads. In the West, it followed older travel corridors such as the Mormon Trail, the Overland Stage Line, the Pony Express route, and Donner Pass. That’s why the Lincoln Highway feels a bit more adventurous than the numbered highways that later replaced it.
Today’s Lincoln Highway
If you live in one of the Lincoln Highway states, it’s worth checking your own backyard for a surviving segment. The “Father Road” is an easy add-on to a weekend drive or a full-on bucket-list trip. Who knows? You may discover a museum, a monument, or a town that still leans into the old road’s history. You can find resources for each individual statehere.
You should go!
Route 66 may be the better-known “Mother Road,” but the Lincoln Highway got there first. If Route 66 is the classic American road trip story, the “Father Road,” or Lincoln Highway, is the earlier draft. It proved that a coast-to-coast auto route could actually work.
Have you traveled along the Lincoln Highway? Tell us in the comments below.
By Cheri Sicard In the video at the bottom of this article, Robin Barrett of Creativity RV shares a tale of a dump station drama!
Robin tells of a recent experience at a free dump station in Yuma, Arizona, where some RVers had to wait three (count ’em, three!) hours because one idiot was holding up the line.
After about an hour, Robin started filming. She said RVers were coming in from all directions, and people were understandably losing their minds.
Don’t be that guy!
Robin shares the video along with important dump station do’s and don’ts so that you are NEVER the source of dump station drama!
It all started when the culprit pulled into the dump station facing the wrong way. This confused subsequent folks who got in line in other directions. Who knows what the dude was doing for so long, but after an hour, there were lines going in every direction, a big RV traffic jam, and a lot of angry people.
Supposedly, the culprit had a 60-gallon tank, and he was using a filter on the already slow water connection to fill it. Robin says this still does not account for all the time he spent monopolizing the dump station.
People yelling at him seemed to only make him slow his roll! What a JERK!
Robin timed how long it took the other people in line to dump. In my opinion, all of them are slow. I know that I can easily be in, dump, and out of a dump station in under 10 minutes. Most were done in less than 20 minutes. None were as slow as the dump station dunce who held up the line for three hours!
Robin ends the video with dump station tips to get you in and out in no time, along with alternative sources for fresh water in case that is all you need.
Have you been to an RV show? (Perhaps that should be a poll.🤔) But if you’ve ever been to almost any RV show out there, then you have an idea what it’s like—endless rows of RVs, often organized by manufacturer, with RV salespeople hovering around like the proverbial land sharks Jimmy Buffett sang about.
“Fins to the left, fins to the right and you’re the only bait in town.”
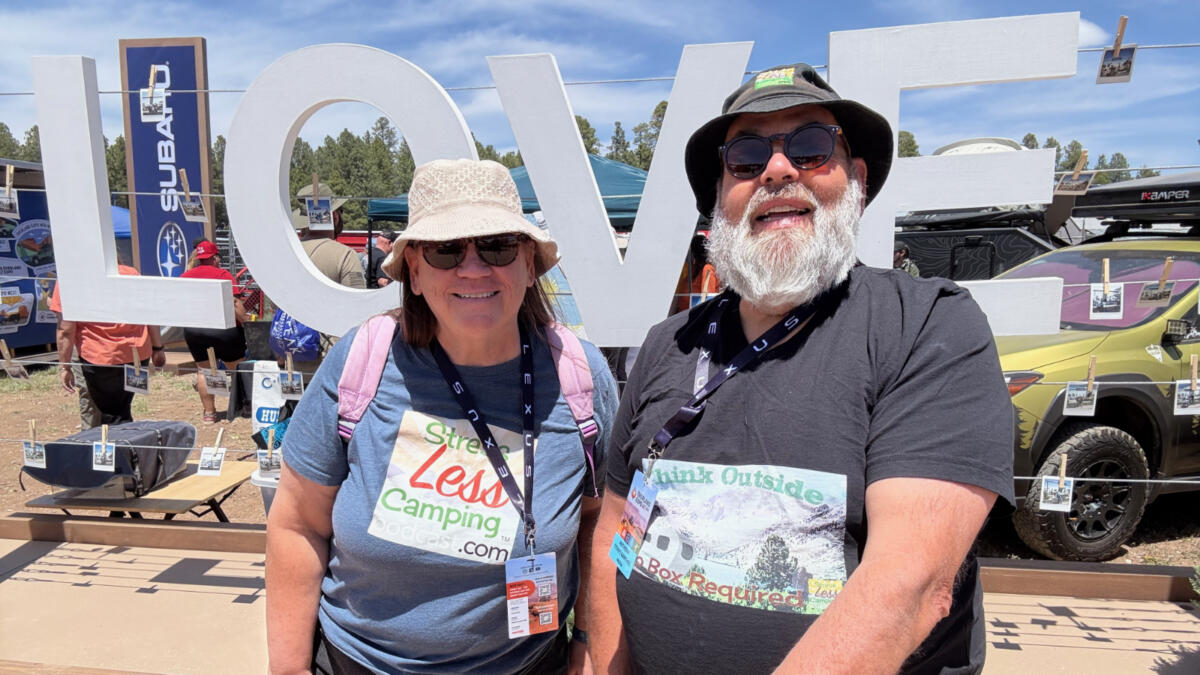
Peggy and Tony Barthel
Overland Expo five times a year
Five times a year, there’s a different sort of RV show: the Overland Expo. This is a monster event where tens of thousands of people attend to look at the latest in overlanding gear and rigs. In fact, Winnebago chose to debut its new Winnebago ARKA model at the show.
Yes. There are RVs at Overland Expo (OE) along with RV dealers and manufacturers, of course. But there are also all sorts of other things to support the overlanding experience. And many of these supporting things cross over into regular RV life.
I suspect, based on the comments, that many of us are not likely to take a heavily-modified four-wheel-drive vehicle way, way into the back country where few humans have traipsed in the past. Yes. I have a vehicle that can. No, I haven’t gone very far off the beaten path with it.
I love the way the show is done
The reason I love this show is just the way it’s done. There are all kinds of people who have invented all kinds of things, from camp chairs to portable toilets to fire pits. I was told the number of fire pits at the show this year was off the charts. Propane, wood, charcoal—and ways of cooking over said fires, too.
Perhaps few among us are going to hike into the woods and stay there for days on end. But there are all sorts of clothing options that are weather-resistant, and that, too, plays into the RV lifestyle. Who hasn’t had the misfortune of having to dump tanks or level an RV on a rainy day?
Camping at Overland Expo
Another thing they have there is camping. You can actually camp on the grounds. And you’re camping with other like-minded individuals who love this lifestyle.
There used to be camping at the Florida RV show that was relatively integrated with that show, but that’s been changed. I know you can camp at the Hershey Show and, if I go again this year, that’s what I’m going to do.
I have not camped at Overland Expo. I’ve only been told that it’s a very communal experience.
Gadgets, gizmos, and gear a-plenty at Overland Expo West
New technologies
Something else there’s a lot of at Overland Expo are new technologies in all sorts of camping-related systems. This is where I saw several 12-volt and 48-volt air conditioning systems. It’s where I first saw SDG’s RV mini-split system, which happened to be installed in a Grand Design Class B van. That was at the show, too.
In fact, that system is the one you’ll find in the Winnebago ARKA, too. Imagine—RVs that didn’t have the big lump of an air conditioner on the roof?
Though Ember RV was showing their Overland Series trailers and running the air conditioners. On solar and battery power. This is what I do, too. Seeing it last year at Overland Expo West was reinforcing my thoughts that this is entirely possible.
Not slick marketing folks
Something else I noticed at OE was that you can go and totally nerd out with the people in the booths. It’s not the slick marketing folks with their polished shoes and brand-name shirts, for the most part. Instead, it’s people who actually go camping, which might be why there aren’t that many traditional RV companies there.
But, from what I’ve been told, several RV decision makers were actually roaming the aisles of the show without their name tags. Perhaps curiosity is in the air, too.
Gadgets and gizmos to modify vehicles for overlanding
Something that is reportedly common among true overlanders is that they love to take their vehicles and modify them to make them better at the task of adventuring. So, there are all sorts of gadgets and gizmos to accomplish that, from suspension upgrades to wheel and tire companies. In fact, even Subaru has a big presence here, and there’s a huge community of Subaru owners, too.
And many of the systems that enable us to go and stay off the grid are also the systems that allow RVs to run more efficiently, even in the campground.
You should go
If you have the chance, I’d encourage you to attend an Overland Expo event and just look at the new technologies, the cool gadgets, the clothes, and attend some of the workshops and seminars.
Truth be told, last year I was in Flagstaff and just loved the event, so I got passes for this past year and, well, I didn’t go. Life-related nonsense got in the way, and I combined the cost of fuel and all of that to make the decision to stay home.
And then I talked to friends who were there, including fellow podcasters Jason Epperson from RV Milesand Kenny Phillips from Beyond the Wheel. So, now I’ve got FOMO—Fear of Missing Out—pretty badly and I’ll be back next year to cover the event. Perhaps you, too, might consider joining me in Flagstaff or you may choose to attend one of these shows. I heartily recommend the experience.
If you’ve spent any amount of time RVing, you’ve probably heard the stories. A mouse sneaks in through a tiny opening and turns a storage compartment into its personal condo. A squirrel decides your engine bay looks like a great place to build a nest. Or, if you’re especially unlucky, you discover a family of rats has moved in and made themselves completely at home.
This week, Nanci Dixon shared a painful lesson she learned after leaving her RV stored. After getting busy with other projects and letting her usual checks slide, she ended up facing an infestation of pack rats—big ones. Really big ones. Let’s just say they weren’t the cute, cartoon variety.
The truth is, RVs can be incredibly inviting to critters. They offer shelter from the weather, cozy hiding places, and sometimes even access to food, water, or nesting materials. And it doesn’t seem to matter whether your RV is parked in the woods, a storage lot, your driveway, or even a campground.
Many RVers have their own stories. Some discovered chewed wiring. Others found nests in air conditioners, under sinks, or inside engine compartments. A few have opened a cabinet door only to receive the surprise of a lifetime. And while mice and rats get most of the attention, they’re hardly the only unwanted guests. Squirrels, chipmunks, raccoons, snakes, birds, ants, wasps, and even bats have been known to make themselves at home in RVs.
Of course, some RVers seem blessed with good luck. They park their RV for months at a time and never find so much as a single mouse dropping. Others wage a constant battle with traps, deterrents, peppermint oil, steel wool, and every other critter-fighting tactic imaginable.
We’ve been RVing for years, so why do we need a shakedown trip? Aren’t those trips for RV “newbies”?
Well, yes. However, an annual RV shakedown trip is one of the easiest ways to save yourself from a miserable first big trip of the season, and I believe you should take one once a year.
In storage
Our Vilano fifth wheel RV sat in storage much longer than in years past. Due to my travel buddy’s wonky knee, we skipped our annual trip south this winter. That means we haven’t traveled in our RV for several months. We winterized the rig in September, and that’s the last time we spent any real time in it.
If your rig has been in a similar situation, or you haven’t traveled in your rig for a few months, you may want to consider a shakedown trip, too.
Definition
Let’s begin with a definition. A “shakedown trip” is simply a short overnight or two at a campground near your home. Or, if you are fortunate to have full hookups at your stix-n-brix home, a shakedown trip doesn’t involve any real travel. You simply spend a day or two of “pretend camping.”
A shakedown trip lets you make sure your RV still behaves the way it should before you depend on it for a longer vacation. Think of it as a low-stress systems check that gives you a chance to find problems early, when they are still manageable and much cheaper to deal with.
It matters!
The biggest reason a shakedown trip matters is that RVs do not like to sit untouched for months. Seals may dry out, batteries can weaken, appliances get rusty in the memory department, and the owner often needs a refresher, too.
A short local trip helps you catch any surprises while you are still close to home and not already committed to a long haul across state lines. Staying local keeps the trip lower-stress, and you’ll consume less fuel, to boot!
What to do
A good shakedown trip should exercise as many RV systems as possible. Operate the auto leveling system, extend the slides, run the water system, test electrical hookups, verify propane appliances, check the air conditioner and vents, open and close windows, and use every outlet, as well.
Tires deserve special attention before you start out on an extended trip. Check the condition of each tire and also check the pressure. Also, make sure your carbon monoxide detector, smoke alarm, LP detector, and fire extinguishers are working.
This practice run is a smart way to confirm that the gear still works after storage or disuse. It provides peace of mind knowing that your RV’s major systems are in working order before the season starts.
And more
A shakedown trip is also the right time to refresh the little things that make a trip go smoothly. Check that your vehicle insurance card and registration are current and use your pre-trip checklist. Add any missing details to update your list and place the list where you can easily locate it.
The best shakedown trip is usually short, simple, and close enough to home that you can discover surprises before they negatively affect the whole season. One or two nights nearby is enough for most RVers.
That first shakedown trip can tell you whether you packed enough of the right gear, whether your RV routines still feel smooth, and whether any maintenance items need attention before your summer travels.
Cleaning, too
I use our annual shakedown trip to clean the interior of our RV. I open all of the windows and keep them open as I clean. A quick dust and vacuum removes any accumulated dead insects, dirt, and cobwebs. I use this opportunity to wipe down the refrigerator and countertops, too.
If our plans call for RV travel within a week, I’ll make the bed and pack towels into closets. Canned foods and spices will once again find their place, and I double-check that drawers and doors are secured and ready for travel.
Long-term payoff
A shakedown trip provides long-term payoff. When you keep notes on what worked, what failed, and what you fixed before the real trips begin, you build better maintenance records and make it easier to stay on top of future service. Maintaining quality records can help maximize resale value, which is one more reason this annual habit is worth the time and effort.
Bottom line
An annual RV shakedown trip is one of those small habits that protects your investment. It gives you a chance to catch leaks, dead batteries, tire trouble, appliance issues, and setup mistakes before they turn into road trip disasters. For RVers who want a calmer start to the season, it’s hard to beat a short practice run before the long summer miles begin.
Do you take an annual preseason shakedown trip? Tell us in the comments below.
By Dustin Simpson
In this video, we dive into the truth about RV roof repairs and explore why EternaBond tape or similar products may not always be the best solution for maintaining your RV’s roof.
Join me and my wife, Ashley, owners of an RV business, as we share our professional insights and discuss why proper roof maintenance requires more than just a quick fix.
Why EternaBond tape isn’t always the ideal solution
1. Temporary fix vs. long-term solution
EternaBond tape is often seen as a quick, easy fix for RV roof leaks, but it’s important to understand that it may not provide a long-lasting solution. While it can be effective for sealing small cracks and gaps temporarily, it doesn’t address the root cause of roof damage and may fail over time as the roof expands and contracts.
2. Limited durability under extreme conditions
The tape may not withstand extreme weather conditions, especially in areas with fluctuating temperatures. As your RV roof expands and contracts with heat and cold, the tape can lose its adhesion or crack, leading to leaks that were initially sealed.
3. Incomplete roof repair
Using EternaBond tape on an RV roof doesn’t fix underlying issues, such as damaged roofing materials, improper installation, or structural problems. Simply covering the problem with tape may allow moisture to accumulate underneath, leading to mold or rotting in the long term.
4. Aesthetic and structural concerns
While tape may seal leaks, it can often look unappealing and may not blend in with your RV’s exterior. Additionally, improper application or overuse of tape could damage the surface of your roof, compromising its overall appearance and functionality.
The proper way to maintain your RV roof
1. Inspect regularly
Regular roof inspections are key to identifying any damage or wear before it becomes a significant problem. Look for cracks, worn seals, or signs of water damage. Early detection is essential for avoiding costly repairs down the road.
2. Clean and treat your roof
Keeping your roof clean is essential for maintaining its integrity. Use the proper cleaning products to remove dirt, debris, and mildew. Applying UV protectant treatments will help protect the roofing material from sun damage and extend the lifespan of your roof.
3. Professional repairs when necessary
For more significant damage, a professional repair may be required. This could involve resealing the entire roof or replacing damaged sections. A proper roof repair ensures that your RV is protected from leaks and water damage.
4. Use the right materials
When performing any roof maintenance or repair, always use materials designed specifically for RV roofs. This ensures that the repair is durable, effective, and compatible with your roof’s materials.
Key takeaways
EternaBond tape is a useful tool for emergency repairs but should not be relied upon as a permanent solution for your RV roof maintenance.
Always prioritize regular inspections, proper cleaning, and professional repairs to maintain the longevity of your roof.
In the long term, investing in high-quality materials and professional services will save you money and time, preventing future issues and potential damage.
Conclusion
While EternaBond tape can offer a temporary fix for small leaks, it’s important to understand that it is not the best long-term solution for maintaining your RV’s roof. For lasting protection, regular maintenance and proper repairs are essential.
We use cookies to ensure that we give you the best experience on our website. By continuing to use our site, you consent to accepting cookies. We NEVER have or will sell reader's data. For more info, please see our privacy policy page.

 Tools and equipment