RVs are great for living but sometimes, when the grandkids or in-laws show up, things can get a little tight for sleeping. What can you do with all those extra relatives for sleeping? Hang ’em up. No — not the relatives! Let them sleep on a hanging cot.
A few years back, Brian at TheSamba.com came up with a hanging cot scheme and ever since, RVers have been brainstorming to make the original idea work even better. Here’s one of the latest incarnations, costing less than $35 to build.
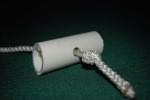
.jpg) Though originally designed for putting up in the front seat of a van, the hanging cot can be adapted to work in a car, truck or RV. The design calls for the use of schedule 40 steel pipe — making it very easy to scale for your needs. A pipe’s schedule just refers to the wall thickness of the pipe. The original intention was to make this for children to sleep on. With the materials indicated, the cot will hold up to 150 lbs. It seems reasonable to expect that with some tweaking, the hanging cot could be used for an adult who’s a bit heavier.
Though originally designed for putting up in the front seat of a van, the hanging cot can be adapted to work in a car, truck or RV. The design calls for the use of schedule 40 steel pipe — making it very easy to scale for your needs. A pipe’s schedule just refers to the wall thickness of the pipe. The original intention was to make this for children to sleep on. With the materials indicated, the cot will hold up to 150 lbs. It seems reasonable to expect that with some tweaking, the hanging cot could be used for an adult who’s a bit heavier.
As many folks who use this have pointed out, it also serves as a great stash for gear when not used for sleeping.
Hopefully you have access to a sewing machine — you’ll definitely need it!
RV hanging cot parts list
• 1 1/4″ Schedule 40 Pipe (some choose steel pipe)
• 2x 50″ Schedule 40 Pieces (measure your chosen hanging cot area before cutting)
• 2x 24″ Schedule 40 End Pieces (could be wider if necessary)
• 4x corner pieces made from T-joints with one leg cut off and a slit for the strap to go through (slits and trimming of T-joints optional, based on application)
• Screws for attaching long pieces to corners (option of using glue, many prefer to be able to remove and clean canvas)
• Straps/rope for suspending cot
• 3/4″ pipe to string rope/straps through to hold hanging cot in the air (some have used radiator hose to prevent damage to vehicle door)
• Canvas/fabric for sleeping hammock
 Construction instructions (overview)
• Cut Schedule 40 pipe to fit your desired area
• Cut your T-joint pieces
• Fabricate frame without fastening
• Lay out and sew canvas/fabric to fit snugly inside your hanging cot frame
• Slide canvas onto frame and fasten joints with screws/glue
• Route straps so weight on the hanging cot holds end pieces in place
• Some campers have taken the design a step farther by installing a pouch for their accessories that hangs from the bottom of the rack
doityourselfrv.com thanks Jason D. of Gulfport, MS, for his suggestion!