Owning an RV can be a big financial investment. Keeping it financially secure only makes sense. But when it comes to buying insurance, it can be a bit tricky–the terms can be so daunting. Just what are you shopping for, and what does it cover? In this and our next installment, we’ll walk through some of the seemingly mysterious terms that come with RV insurance.
 First, a word of advice: RVs are a special breed–not just any old insurance company will adequately cover an RV. It would be rare if the same company that covers your car or truck will be able to provide good coverage for your RV. Searching the Internet for “RV insurance” will help you track down specialty companies. Now, on to those terms.
Agreed Value
You think your RV is worth X amount of dollars. Get in an accident and total it out, you may find the settlement check is a lot smaller than what you thought. Agreed value coverage means you and the insurance company agree, up front, on what your RV is worth when you buy the insurance. You’ll need to hire an appraiser to have an agreed value.
Attached Accessories
Just because your RV awning is a “part” of your RV doesn’t mean your insurance company will cover damages. Here’s an example: We encountered a terrific rain storm on one RV trip, and despite having “set” the awning to run off rain, the torrent was so strong it filled the awning fabric so full the arms bent, and the whole awning was totaled. Happily, our insurance company covered it as part of our standard policy.
Not every company is so generous. Read the fine details, and you may need to opt in for the “attached accessories” coverage that handles not only awnings, but TV antennas, satellite dishes–maybe even roof mounted solar panels. Ask plenty of questions.
Diminishing Deductibles
If you’re a good and safe driver, selecting the diminishing deductibles means that every year you go without a claim the deductible that you have chosen for comprehensive and collision decreases every year until they reach zero. It could save you a lot of scratch.
Emergency Expense Coverage
Getting into a wreck with your rig is traumatic enough. Now imagine watching as your motorhome is towed away to the scrap yard and you’re stuck in the middle of nowhere. Emergency expense coverage should pay for motels, meals, and alternative transportation to get you home, or back into your rig if it’s fixable. Some RV towing insurance polices already include this as a benefit. Don’t pay twice for the same coverage.
Full-Timer Liability Coverage
Given up on the “sticks and bricks” home and moved into your RV full time? Congratulations! You no longer have liability insurance. Sure, you’ll have liability insurance on your vehicle insurance, but what is something bad happens to someone while visiting your RV or camp site? In this litigious society, covering your tail with liability insurance is a must. It does more than “vacation liability coverage,” which we’ll describe later.
Full-Timers RV Insurance
This is a term some companies use, and it can be a bit murky. One outfit describes it this way: “In addition to full-timers liability, there is other coverage that protects those that are spending more than six months a year living in their RV. Coverage for things such as stored personal contents, and additional living expenses coverage is available with full-timers RV insurance coverage.” You’ll need to read and question the fine print where this is offered.
Guaranteed Loss Replacement
This is NOT the same as “agreed value coverage. As your RV ages and loses market value, the payoff if the rig is totaled goes down accordingly. Guaranteed loss replacement means you have a total loss, typically within the first five years, you get a new RV of like kind and quality. Generally speaking, if the RV is older than five years and is totaled, then the purchase price of the unit will be paid.
Next time, we’ll round out the list with other policy talk.
#nrv
 Buying RV insurance can be like a trip into unknown country. It’s best if you have a map. In part 1, “Buying RV insurance: Sort out the terms,” we sorted out about half the “options” you might purchase with a policy. This time we’ll talk about the rest of them.
 Get a hanging laundry bag. We’ve seen a couple of different inspirations on this idea. One hangs on a closet road like a coat hanger; the other hangs over the back of a door.
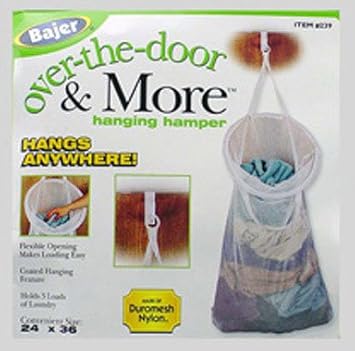 One couple put a laundry bag in an under-counter cabinet, but found they were to lazy to pick up the bag to put the clothes in it. As a result, the clothes just wound up being piled on top of the bag–making a big hassle on laundry day. Solution? They put grommets on the rim of the laundry bag and hung them on cup hooks placed under the countertop, leaving the “front” of the bag gaping open, ready to accept dirty donations.
 Our new friend has plenty of company. Many RVers will tell you about their first trips on the road, and how what should have been a relaxing time turned into a major case of nerves when trying to figure out where to drop the hook. Here’s how many of your fellow travelers have shaken off the willies and learned to make traveling fun.
 “You must not know it, but you’ve got a real problem with your spring shackles,” he warned. Russ walked around the street side of the trailer with the man, and squatted down for a look. The young fellow was quite insistent that there was a problem that could really damage the springs. “You really ought to have that fixed,” he said.
 A sway control device added to your trailer will help reduce many of these sway problems. The most common sway control is a friction sway control that links your tow vehicle to the trailer that reduces that nasty pivoting between trailer and tow rig. These units are inexpensive–we’ve seen them for less than $50 up to a little under $200 and you may be able to do the installation yourself.
 We use “stick on” levels available at many hardware stores and most all RV supply houses. They’re inexpensive–less than $3 for two. However, we don’t rely on the double stick tape as heat and weather conditions can cause the tape to lose its sticky and the level can go “off” pretty easy. For a couple bucks more a pair you can buy “screw on” levels, but why bother? Use a small drill bit to bore screw holes at each end of the level, then using small stainless screws to hold them in place.
 When asked where they found their RV, a surprisingly large number of folks say, “On craigslist! Yep, that widely known Internet classified service has lead to many a happy transaction for both buyers and sellers. Still, some are concerned about being scammed. Should you decide to go RV shopping on craigslist, watch these tips:
 Here are some tips that can make fellow campers (and park personnel) a lot happier:
 Which leads us to the point: Fitting out your RV doesn’t mean you need to buy everything “new.” Outfitting the RV galley is a snap with a visit to a thrift shop or by combing through a few garage sales. Take a look at your kitchen in the house, note what you regularly use, and make a list. You’ll soon find you’ll have just about everything you need for a fraction of the price of buying it new. With those gadgets installed in your RV galley, you’ll never have to worry about forgetting something you need for a road trip.
 Since we work on the road, we even dedicated a computer printer to the travel rig. We built a plywood shelf, stained and finished it, and mounted it under the dinette table on the wheel well. The printer lives on the shelf there, out of the way, but close to where we work when using our laptops. To complete our “office” we bought a high school “locker organizer” that has multiple pockets for pens, stapler, note pads, etc. We hang the organizer on the wall by the dinette, next to a cork board where we can pin lists.
 Are you a music lover? We installed a new automotive-type stereo system to replace the old cassette/radio unit in our rig. The new one allows us to play music recorded onto USB flash cards. We simply build out own “mix” of music from our CDs at home and carry the tiny flash cards in the RV loaded up with our favorite tunes.
 The typical RV toilet uses gravity, rather than water power, to remove those unwanted bowl contents from sight. Most RV toilets have a pedal near the floor, some have a lever mounted somewhere higher up–usually high up toward the back. In general, pushing the foot pedal down partway–or moving the lever partway–will release water into the bowl. Some RV toilets may have two pedals near the floor, one empties the bowl, the other adds water. All this, provided you have the RV hooked up to a “city water” supply or your water pump is turned on (and a supply of fresh water is in the fresh water tank). Step all the way down, or move the hand lever all the way to the opposite position–a valve in the bottom of the bowl opens and the contents vanish.