Home Blog Page 2166

Space heater does the job . . . using only 200 watts!

By Chuck Woodbury
Editor, RVtravel.com

Can you imagine a space heater that uses a mere 200 watts? It seems like a crazy thought. But the fact is, there is such a thing. I own one. I discovered it about two months ago. When I first heard about it I was skeptical. I thought, “No way will an electric heater that uses so little power work!” I was wrong.

The space it heats is “your space.” It won’t heat an entire room.

The Lasko MyHeat Personal Ceramic Heater is of special interest, I think, to us RVers, who often must be careful about our energy use, for example when we’re hooked up to 15-amp or 20-amp service, where every ounce of juice we save counts.

The small heater is sturdy, about two-thirds the size of most cube space heaters and weighs a mere 1.6 pounds. Most of us carry space heaters in our RVs — 84 percent of us according to a recent survey at RVtravel.com. But those heaters typically use 1,500 watts on high and 750 watts on low. They do a great job supplementing our built-in RV heaters, and even on their own when it’s not too cold.

The MyHeat™ is meant to be placed on your desk or perhaps at your feet — very close by. If it’s more than a couple of feet away its small fan won’t push enough air to do any good. But placed close enough, the heated air is about the same temperature as a larger, full-powered space heater. I keep mine about 18 inches from me.

On my present trip, I have placed my little heater on my desk while I worked. It provided just enough warmth that I didn’t need to run my on-board heater or my regular space heater beyond initially warming up my RV in the morning, or when not at my desk. This little heater would be especially suitable for couples where one person is always colder than the other.

I made a short video about the heater, which you can watch below.

The MyHeat™ Model 100 (black) retails for $49.99, but I found it at Wal-Mart for $17.02 and at Amazon.com for $15.99.

Air-Dryr helps prevent mold and mildew

0
As seasons change, damp outdoor conditions can bring mold, mildew and corrosion issues inside. The Air-Dryr from Davis Instruments is an inexpensive and effective way to combat these problems.

air-dryr-737Air-Dryr is the perfect choice for winterization of vacation cabins, boats, and RVs. Constant air circulation reduces condensation in enclosed spaces that are sealed up during the fall and winter.

Great in basements, closets and lockers, the Air-Dryr can be used year-round in the home. Storage units, tack rooms, pump rooms, gun cabinets and even piano rooms can benefit from continually circulating air as well.

Designed to operate anywhere, 24 hours a day, the Air-Dryr uses natural convection to circulate the air. There aren’t any switches, fans or thermostats required. No fan motor to fail and completely silent operation are key features.

The Air-Dryr should be placed on the floor in any damp, enclosed space and plugged into a 110 volt outlet. The damp air is heated to the point moisture is held in suspension, above dew point, then released through the top vents of the device. As warmed air rises, cooler damp air is drawn in, where it too is heated.

Costing no more to operate than the burning of a light bulb, the Air-Dryr makes no sound. Safe to the touch, a thermal cutoff turns the unit off should air flow be impeded. Slim and stable, it can be placed out of the way in confined spaces. The Air-Dryr’s neutral, beige polycarbonate housing delivers strength and durability.

The rectangular Air-Dryr 500 effectively handles up to 500 cu. ft. of space, measures 14″ L x 5″ W x 4.5″ H, draws only 0.6 amps, 70W. The circular Air-Dryr 1000, is for larger spaces up to 1,000 cu. ft., measures 13.5″ in diameter and 4.25″ H, draws only 1.1 amps, 130W. You can find the Air-Dryr on Amazon.

Information obtained from press release.

Does the AEROplus wind deflector really improve gas mileage?

By Chris Dougherty
Certified RV technician

When Australian caravan accessories manufacturer Purple Line contacted us to try out their new AEROplus wind deflector, I met the project with a bit of skepticism. After all, I wondered how attaching this thing would improve my fuel economy and handling as the company claimed it would. As I began to learn more about the product, including laboratory testing, I became more interested in trying it.

There was a problem, though, which would make my test far more challenging. The AEROplus was designed for SUVs and caravans in the U.K., and our test vehicle was a 2012 Ford F-350 with a Leer commercial cap with roof rack (and plenty of equipment inside) and a 2013 Coleman 34-foot travel trailer. The combined weight as tested was 19,980 pounds. What could this little thing do for me, I wondered?

Well, I am here to tell you, again, as I have with some other products we’ve tested: This thing works.

When I received the test unit, the first thing I did was assemble the brackets. A quick look at their online video before doing this is a help, and plan for a lot of wrench time tightening the nylock nut that holds the main brackets down. This only needs to be done once, however, and the rest of the install is easy for most … but not all.

The Leer DCC commercial cap is a toolbox that mounts to the bed of the pickup truck, and comes in various heights with custom storage cabinets on the sides, and an aluminum ladder rack on the roof. I thought with this rack it would be easy to install, and I was wrong. The AEROplus, designed for SUV roof racks, would not fit this rack directly. I thought this would be the end of the test, or I would have to find another SUV and trailer to test the unit on.

Well, Paul Liner, the managing director of Purple Line, wouldn’t settle for that. He wanted us to do a real world test here in the U.S. So, we looked at a number of options, from fabricating a new rack, or re-engineering the existing one, to replacing the whole assembly. Well, we put our heads together and came up with a combination of all the above. Paul supplied the parts I needed, and I fabricated the rest.

So, we wondered, how do we conduct the test? I have done fuel economy tests lots of times, but I didn’t want to just do a “controlled” test this time. In fact, Purple Line had the AEROplus tested extensively by the Motor Industry Research Association known now only as MIRA Ltd., a leading automotive design and test organization in the U.K. and the University of Johannesburg Technolab. We wanted to see how this worked on a “real RV trip.”

So we decided to do a round-trip in Massachusetts, from Springfield to Brewster, which is on Cape Cod. On the way to the Cape we would have the AEROplus unit installed; the way home would be without. To calculate the mileage we would simply use the truck’s computer as a guide from point to point, instead of using fueling points the old fashioned way. What we really wanted to see was if the truck and trailer handled differently on a long trip.

The trip was mostly interstate travel between Springfield and the Cape, using I-90 and I-495, and the trip was Aug. 29, the Friday leading into Labor Day weekend. We were pleasantly surprised by not only delightful weather but light traffic on I-495 headed down to Cape Cod. On I-90, however, we encountered relatively heavy traffic including many trucks, but the speed was maintained at 65 mph.

As a side note, the F-350, which is pretty stout, is also equipped with Torklift upper overload bumpers and a Reese weight distributing hitch system attached to their class five hitch. Even with all this, towing this size trailer could be, at times, stressful. Not that it handled badly most of the time, mind you, but I always knew the trailer was there, and trucks could do a pretty good job of sucking the trailer around. All things considered, I’ve towed much worse, so I guess I figured it just couldn’t be improved.

Well, I was wrong … again.

With the AEROplus installed, and at highway speed, I noticed quite a difference in the tow. In fact, my wife even noticed I was considerably more relaxed driving “the team.” Except for occasional porpoising, which has nothing to do with the aerodynamics of the vehicle, the trailer had largely stabilized. There was minimal buffeting by crosswinds, trucks, or the drag that develops between a tow vehicle and trailer. Counter- steering, or making steering adjustments to account for wind buffeting and trailer sway, reduced dramatically in my highway testing. In other words, it did what it was designed to do.

The return trip a few days later, Tuesday, without the AEROplus in place was back to the norm, and being midweek, we again encountered truck traffic on I-90. The drag and buffeting was back, and in our setup, while not being “hair-raising” by any means, did make the drive less enjoyable and more “tiring” or stressful.

Now, that said, the AEROplus counts on having air movement to work in order to create the slipstream to stabilize the trailer. While there is no way for me to quantify this, imagine a chart with one side representing the increase in stability, and the other being the increase in speed. The stability factor would rise as the speed increases. At slower speeds, the effect, while still there, is less noticeable but is needed less at slower speeds. We were also doing this test with a 34-foot long trailer, which is about as long as a travel trailer gets. Shorter and lighter trailers, which most people have, will probably benefit from a more pronounced effect than we did.

Fuel economy was also slightly improved with the unit in place. I normally get around 9.9 mpg towing this trailer on the highway. On the trip out I got 10.7, and on the way home about 10. Not a huge increase in mileage, but anything helps. The company says that a 15-percent increase was seen in the MIRA testing; however, Caravan World Magazine saw a 13-percent increase, the University saw a 6.3 percent increase, and we saw a 7 percent increase. We did have some hilly terrain, however, and we had a particularly large and heavy truck and trailer combination.

All in all, the AEROplus performed well, with an almost complete reduction in turbulence and buffeting between the trailer and truck, a definite increase in lateral stability even when driving in high-speed truck and bus traffic, and some fuel savings, which was a bonus.

More information AEROplus Wind Deflector is available at the company’s website. It may be ordered at Amazon.com.

Tools for RVers: Leatherman New Wave multi-tool

By Chris Dougherty
Certified RV technician

I recently recommended the Leatherman tool as a good tool to have along as an RVer. Well, upon doing some research I found the new Leatherman New Wave has taken their tool to a whole new level, and now is especially good for RVers. The New Wave:

• Is a full-sized 17-tool multi-tool in one package
• Includes 2 pliers, wire cutters, 2 knives, saw, scissors, 2 files, 2 drivers, bottle opener, 2 double-ended bits and more
• Is 100 percent stainless steel construction
• Includes lanyard attachment and combination leather/nylon sheath
• Is backed by a 25-year limited warranty

What’s great for RVers is that the company offers a set of bits that fit the driver which include every type of bit imaginable, including the square Robertson bits that are found in RVs!

These tools aren’t cheap — but you won’t find better quality and they’re the kind of thing that lasts for generations. Both items are available on Amazon.

A rundown of heated hoses for RVs

By Chris Dougherty
Certified RV technician

For 10 years I was a fulltimer, and spent most of each year, including most of the winter, in the Northeast U.S., and I dealt with transferring water into my heated tanks as I needed it — this usually was on a weekly basis. What I would have done for a heated hose back then! Since winter RVing is becoming more and more popular, and coaches are being designed and built with four-season use in mind, heated hoses are a great accessory if you’re going to RV when the snow falls.

There are three companies making drinking-water-safe heated hoses for the RV market now. Pirit Hose and Camco are the biggest, as well as Internet sellers like nofreezewaterhose.com. All three of these hoses will handle at least -30F, and there aren’t too many RVs that can put up with that kind of cold for very long comfortably.I must emphasize that not all heated hoses should be used with RVs! There are heated utility hoses on the market that are made of materials that are not potable or drinking water safe. So for your health and water quality, only use hoses for your RV or boat that are “drinking water safe” and are made from Food and Drug Administration-approved materials. Heated RV water hoses are made basically two ways: Either the heating apparatus is molded into the hose, or the hose is wrapped with a tape. Also, the self-regulated heating system in two of them makes for much better heating and better uniformity of heating along the surface of the hose.

These hoses require a good source of power, and when it’s that cold the power must be consistent to prevent freezing. For instance, the 12-foot Pirit hose uses 90 watts, or 1.75 amps, and their 100-foot hose requires 500 watts or 4.5 amps. The power source must be a grounded, GFCI-protected 120VAC supply. Extension cords must be used with care and must be sized larger than the hose cord itself due to continual high-amp loading. Remember, volts drop and amps go up with long cord runs, especially if the cord isn’t big enough. If you’re spending up to $250 for the hose, spend the extra $50-$100 to get the right heavy-duty extension cord you need.

Only the hose is protected from freezing, so you will need to make sure the connections on both ends are protected from freezing as well. This can be done at the spigot in a number of ways, including heat tape, etc. Your RV must be insulated and heated sufficiently to handle the cold weather! A heated hose does no good if the pipes in your RV freeze up.

Each of the manufacturers says that if the hose freezes up for some reason, plug it in and let it sit for 30 minutes to thaw, which indicates that they are somewhat resistant to freeze damage at least. What the hose is connected to isn’t, however. Each of the three hoses mentioned has some minor differences. The Camco hose is a self-regulated hose, which means it has no thermostat to fail, which is nice. Also their hose has dual female ends with a double male adaptor so you can use the hose with the plug at whichever end you want. Their hose is made in the USA and comes in 12-, 25- and 50-foot lengths, and is tested to -40F. The heating element is molded into the hose.

The Pirit hose is a thermostatically controlled hose, with the thermostat on one end of the hose. This can be a problem if the thermostat end of the hose is in a temperature controlled environment such as a building or the RV compartment. Available in 12-, 25-, 50- and 100-foot lengths, the company claims their abrasion-resistant hose is tested to -42F, which is the coldest of the three.

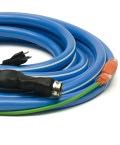
The nofreezewaterhose.com hose is also a self-regulated hose, and of the ones listed is the only one that’s “insulated,” according to the company. That said, it’s only tested to -30F, and the element is wrapped around a heavy-duty, 3/4-inch drinking water hose, not molded into it, which  means the “insulation” is holding the element to the hose.

In the case of both the Pirit and the nofreezewaterhose.com hoses, the plug and cord are fixed at one end of the hose. The nofreezewaterhose.com can be ordered “water-in” or “water-out,” to have the cord at one end or the other, where the Pirit cord is fixed to the female end. This is where the Camco design shines, in that with the hose adaptor, your plug can be at either end. Sure, you can adapt any hose to reverse it, but with this one you need only one adaptor.

One last thing: I do not recommend using these hoses all the time because it’s not necessary and they can be expensive. Just use them when they’re needed. When the temps will stay above freezing, use a standard RV water hose.

It’s fall! Time to check your RV’s roof

By Chris Dougherty
Certified RV technician

When autumn arrives, it’s a good idea to spend a little time on RV roof maintenance. First, make sure the roof is clean, using a cleaner recommended for your roof. There are many RV roof cleaners that are safe to use, and some store-bought cleaners will work also.

Once that’s done, inspect the roof and all seals for damage. This includes the slideouts. Look for tears and signs the roof may be suffering other damage like soft spots or where it may be separating from the roof decking or from the seams.

Take a look at all the apparatus on the roof for damage, including vents, sewer vents, antennas, air conditioner shroud and so on. If any of these are cracked or broken they must be fixed right away.

With the appropriate sealant like Dicor rubber roof sealant, repair any problem areas on any of the seams of the roof, like around the vents, antennas and the termination seams at the front and rear of the coach. Don’t forget the seam all the way down the sides of the coach! I recently inspected a rig that had leak damage all the way down that seam on both sides of the coach. Eternabond tape is a great way to seal the seams on the roof and the slideout box.

Tools for RVers: DeWalt heavy duty stapler/brad nailer

By Chris Dougherty
Certified RV technician

There are two things that are used frequently in RVs: staples and brad nails. The staples that are used require a special tool and an air compressor, but the brads really don’t. Here’s a tool I carry that has come in pretty useful on a bunch of occasions.

A stapler/brad nailer is quite helpful when re-securing all the molding and trim found in many RVs. In addition, if a section of paneling comes loose, the brads can be used to secure the panel easily. The stapler side of the tool is useful around the campsite for doing things like stapling a piece of plastic over your firewood to keep it dry from the rain and so on. It can also be used with plastic sheeting or tarps in the event of an “emergency” where a leak has to be sealed or diverted.

There are a number of these tools available from your local home center, along with a variety of staples and brads to choose from, or you can find the DeWalt DWHTTR350 heavy-duty aluminum stapler/brad nailer at Amazon.

Helpful RV Gadget: Blow out plug

By Chris Dougherty
Certified RV technician

When it’s time to winterize your RV blowing out the water system can be a pain. Having a quick disconnect blow out plug like the one made by Winterize Manufacturing makes the job a lot easier. All you have to do is screw the plug into the city water inlet of your coach, set your compressor to 50 psi (a compressor with a tank is required — sorry, the little tire inflaters won’t cut it), and connect the hose directly to this plug. Then proceed to make certain everything in the RV is blown out.

The blow out plug is:
• Milled from a single solid piece of aircraft high quality aluminum – strong, durable, corrosion resistant – drinking water safe
• Quick connect compressor fitting (most common style produced allowing max air flow) will attach to any 1/4″ universal coupling.

It is available at Amazon.

Five ways to unintentionally ruin your RV

By Chris Dougherty
Former technical editor of RVtravel.com

Through the years I have seen people with RV damage that they could completely avoid simply by paying attention to their unit and taking care of it. Here are my top five ways to ruin an RV:

#5. Weight and balance. If this were about highway safety this would be #1. Many RVs are overweight on at least one wheel position, which can lead to premature axle component wear and tire failure. Tire blowouts are a leading cause of damage to RVs. Watch your weight! Stay within the parameters set by your RV manufacturer.

#4. Mice. You’d be amazed at the damage mice can do to an RV. They will chew anything to get what they want, where they want, including cabinetry, wiring, plumbing, electronics, etc. Then there’s the filth. Mice leave trails that other mice can follow … and do. Once it’s there, it’s there forever.

#3. Winterizing. It is inevitable that every year an RV shop will see at least one coach damaged in some way by insufficient winterization. Someone forgot to drain the water heater, or only allowed the system to drain without blowing it out and adding antifreeze. Toilet valves and ice makers are particularly susceptible.

#2. Cleaning. Ever hear the saying “A clean machine is a happy machine?” Your RV machine needs cleaning and attention. Soils will wear into the fabrics, paints, flooring and other surfaces. You’ve made the investment to buy a coach — protect your investment by keeping it clean.

And the #1 RV wrecker out there: Water. Leaks are the #1 cause of RV damage. Almost all RVs are made from materials that are moisture sensitive, just like your house. The only thing is, your RV needs to be lightweight to travel on the road as well as put up with a hurricane and an earthquake every time it goes down the road. Because of this, and the normal twisting and racking that goes on, seals will fail. Maintaining the seals is imperative to keeping your RV in good condition for a long time.

In addition, leaving vents open without covers causes a lot of damage, as does storing your RV for the winter in snowy regions without an RV cover. Take care of these five things, and you’ll be well on your way to keeping your RV in great shape for years to come.

#RVT740 ##RVDT1352

Help keep your RV warm or cool with vent pillow

By Bob Difley

Roof vents are a terrific feature of RVs. They allow a flow of air to circulate through the RV, light to help brighten the interior, and a vent with a cover can be left open in a storm for air flow without letting the rain in.

But roof vents also have their drawbacks. During hot and cold days and nights, without insulation they are like having a hole in the roof that lets unwanted heat and cold in when you don’t want it, or heat out when you’re trying to stay warm inside.

However, the Sunshield Vent Pillow helps to resolve some of these comfort zone dilemma.

Vent-pillowIt snaps into the vent hole on the inside (no need to remove the outside vent cover) where the side pressure keeps it in place even while traveling. The upward facing surface is covered with a reflective material to reflect the sun’s hot rays and the three inches of foam help to stop heat transfer both in and out.

Fitting all standard 14-inch roof vents, it is durable, snaps easily into place, is easy to remove, and easy to store. It will keep your RV cooler in the Summer and warmer in the Winter.

You can find the Sunshield Vent Insulator on Amazon.

##rvt741

Help avoid water heater problems with tank rinser

It’s likely that you don’t think about your water heater much. As long as it turns on and you get hot water what’s to think about.

heater-rinser-737But ignoring this simple maintenance procedure may cause you problems down the road and even possibly premature failure and replacement.

Camco’s RV Water Heater Tank Rinser helps extend the life of your water heater. The rinser lifts sediment that collects at the bottom of your hot water heater and washes it out of your water heater tank. Practice this regularly and you will lengthen your water heater’s life.

Just hook a garden hose to the rinser and insert it into the water heater drain and watch the gunk flow out. The rinser has a shut off valve to easily control the flow.

You can find the Water Heater Tank Rinser on Amazon.

Tools for RVers: Sears Craftsman Handi-Cut

By Chris Dougherty
Certified RV technician

One tool I have used frequently over the years is the Sears Handi-Cut. This unique cutter has a 3 7/8 inch blade that cuts through a variety of materials. I use it primarily for cutting through hose and PEX pipe (a form of polyethylene pipe with cross-linked bonds) when repairing RVs.

The blades are razor sharp and cut tubing pretty squarely. Additional blades store in the handle, which has a lock to keep the cutter closed when in storage in the toolbox. The Handi-Cut and replacement blades are available from Sears and Amazon.