
Dear Dave,
There was a nick in the flexible water line with white sleeve inside. We have repaired it with a connector and two clamps. No leaks. However, there is now a small amount of water visible between the inner liner and hose. Will this eventually become a problem? Do we need to replace entire water supply line? Thanks. —Ron, 2018 28 ft. Minnie Plus 5th wheel
Dear Ron,
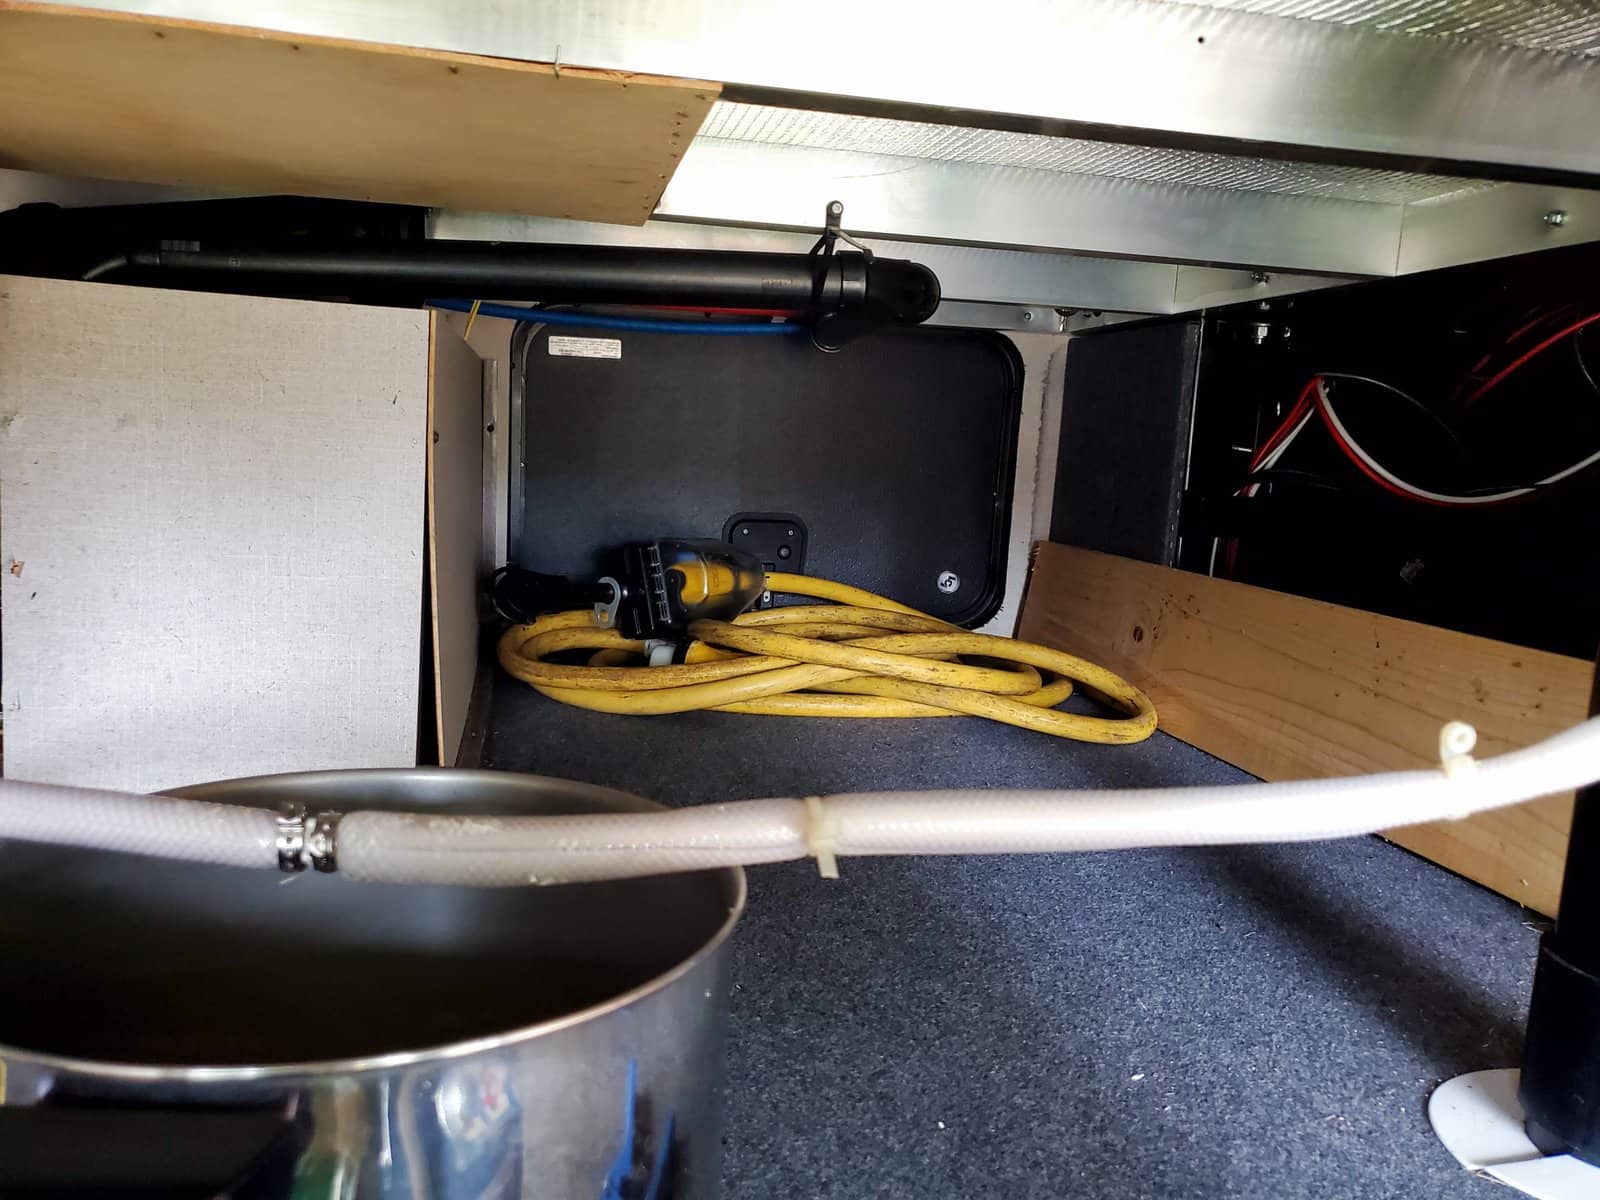
[It took a couple of back-and-forth emails to nail down what hose was having the issue and Ron finally sent this photo. Ron identified it as the supply line going to the toilet.]
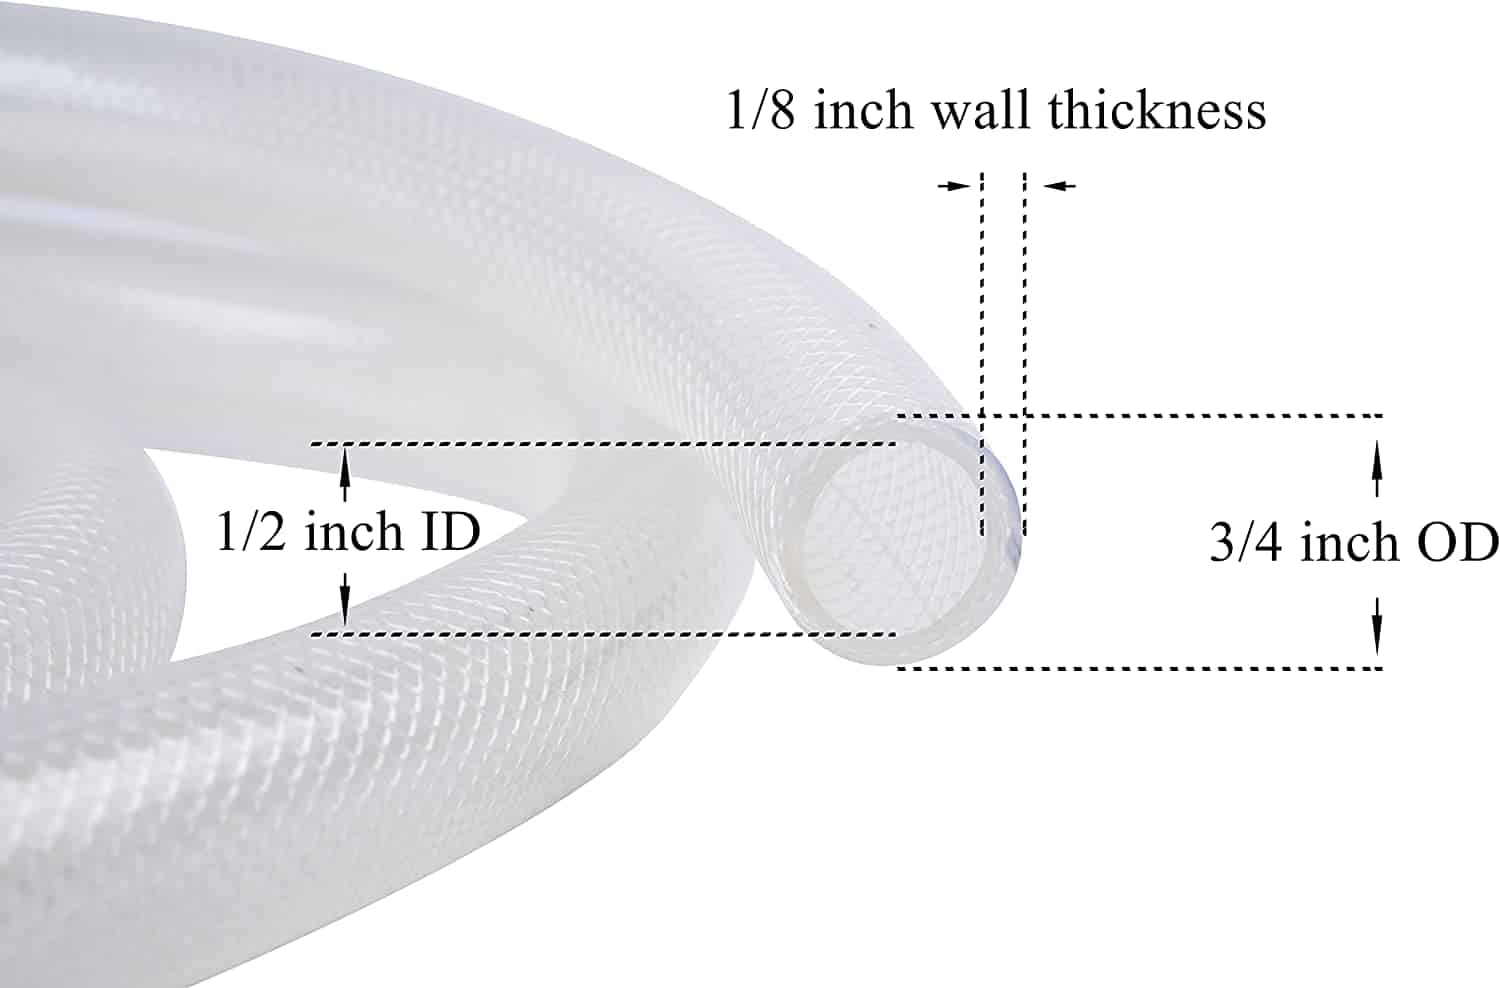
This is a ½” braided plumbing line that is pretty common in the RV industry and even some residential applications. This type of hose is sold at most home improvement stores. You can also get it at Amazon here. It is not a two-part hose; rather, it is a construction that has braiding incorporated into the material. So if there is water between what looks like an inner and outer hose, the material has separated.
If there is a separation, I would suggest replacing the entire hose, as it has created a weak point that typically will keep “creeping” and separating away from that area. Here is what the hose looks like.
Location of the water supply hose
What also concerns me is how the hose is just hanging in the compartment. Typically, RV manufacturers would use a more rigid PEX supply line going to the bathroom and then this type of more flexible hose going to the toilet valve. The ½” braided hose could not be supported well enough in this compartment and will move far too much while traveling down the road. In my opinion, that may be what caused the nick in the first place. In the photo you can see red and blue PEX lines running on the other side of the compartment.
Also, since this is a 2018, this might be a DIY project rather than original equipment. I would replace the entire line with a PEX supply line and crimp connector, which you used in the connection.
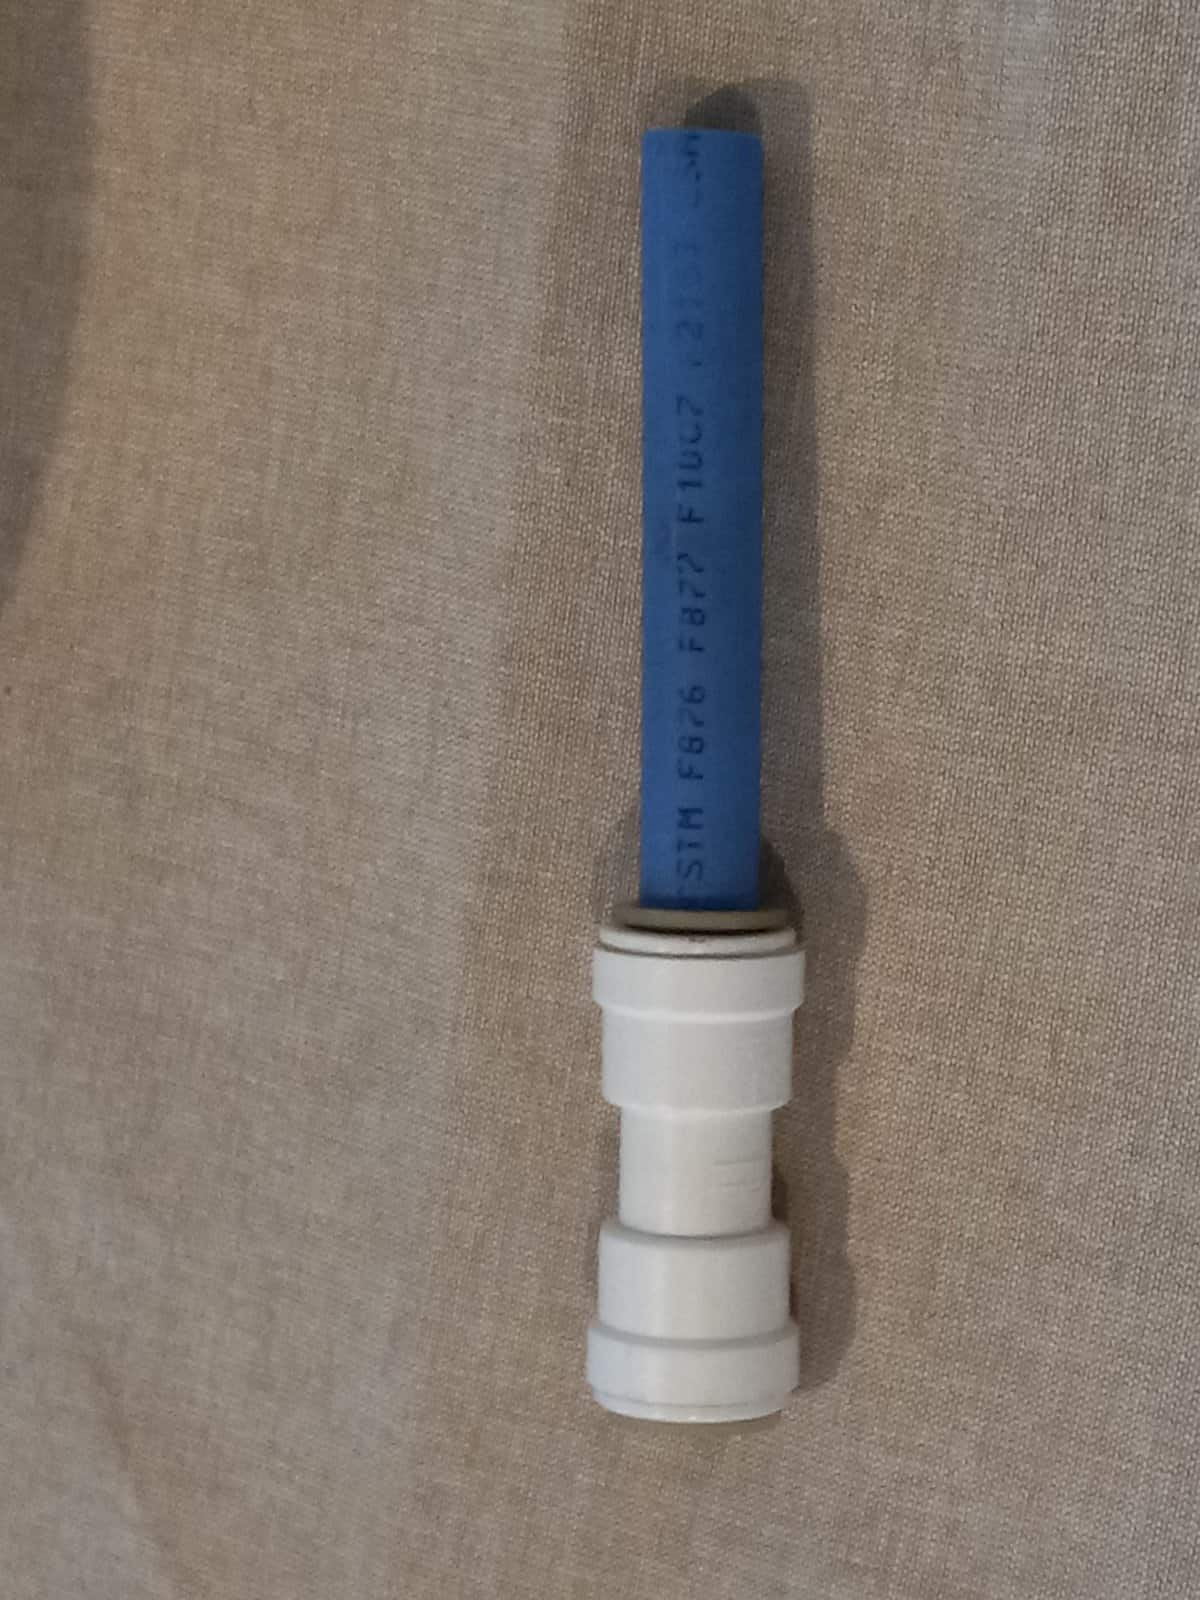
There are some handy compression fittings. However, with the bouncing you will experience going down the road and the placement of this line hanging from the top, I would use the crimp connectors since you already have the crimper. If not, you can get one at Amazon here.

You might also enjoy this from Dave
Dave Solberg is a leading expert in the RV industry and the author of the “RV Handbook.”
Read more from Dave here.
HAVE A QUESTION FOR DAVE?
We have started a new forum link for Ask Dave. Please be as brief as possible. Attach a photo or two if it might help Dave with his response. Click to visit Dave’s forum. Or send your inquiries to him using the form below.
##RVDT2014
Your diagram of the hose is confusing. 1/2 inch ID plus 1/8 inch wall thickness equals 5/8 inch, but your diagram shows 3/4 inch OD. What happened to the other 1/8 inch?
Well it does say 1/8″ wall & thats 1/8′ X 2 = 1/4′ + 1/2″ = 3/4″. May sound weird but that the way they call out any type of tubing! Do it in reverse 3/4″ O.D. & 1/2″ I. D. subtract them & get 1/4″ now divide it by 2 & get 1/8″ wall, as there is a wall on each side! Yup I’m sure someone will have a better description.
Snoopy
Exactly. There are two sides to everything.
Hi Dave. As I look at the picture you’ll see a tie wrap on the right that’s meant to be held in position as it has an eyelet for a screw. I also noticed a hole just above on a support beam & it looks like the hose was supposed to be secured there! Maybe it was never secured or Ron had taken it out so he could work on it!
Thanks
Snoopy
I have a similar PEX tool kit and it has easily paid for itself. Best thing we have done with any RV is install a shut-off for the toilet. Leaking toilet valves are in my opinion, more common than any other water problem. You can flush an RV toilet with a bucket, but it sure is a pain if you have to run outside for the water. Also, many RVs have much longer low-point drains than needed. I cut mine shorter and install ball valves. Then put insulation around the remaining pipes. That alone reduced ice blocks when nighttime temps hit freezing.