
Dear Dave,
I bought this 2017 Jayco in 2020 from a second owner, trusting him with selling an undamaged trailer. It seems either the first owner or this one did not report an issue with a tree falling upon the camper with a small limb piercing the roof liner. I inspected everything except the roof…
It was repaired/painted using an elastomeric paint. However, it apparently was a hit-and-miss job. A year-and-a-half into my ownership and after a heavy rain, I noticed some puddling of water on the floor in front of the bathroom shower plumbing access panel. I examined the plumbing and no leak was found. Much to my dismay, upon pushing up on the RV ceiling next to a speaker, water poured out!
My dilemma
Here’s my dilemma. I found the punctured area, which had grown from a small pencil-size hole to the approximate size of a 24″ circle. I immediately cleaned the area with denatured alcohol and applied a strip of Permabond tape. Living in South Carolina, I am not worried about extreme temperature fluctuations, in addition to having a cover for this RV.
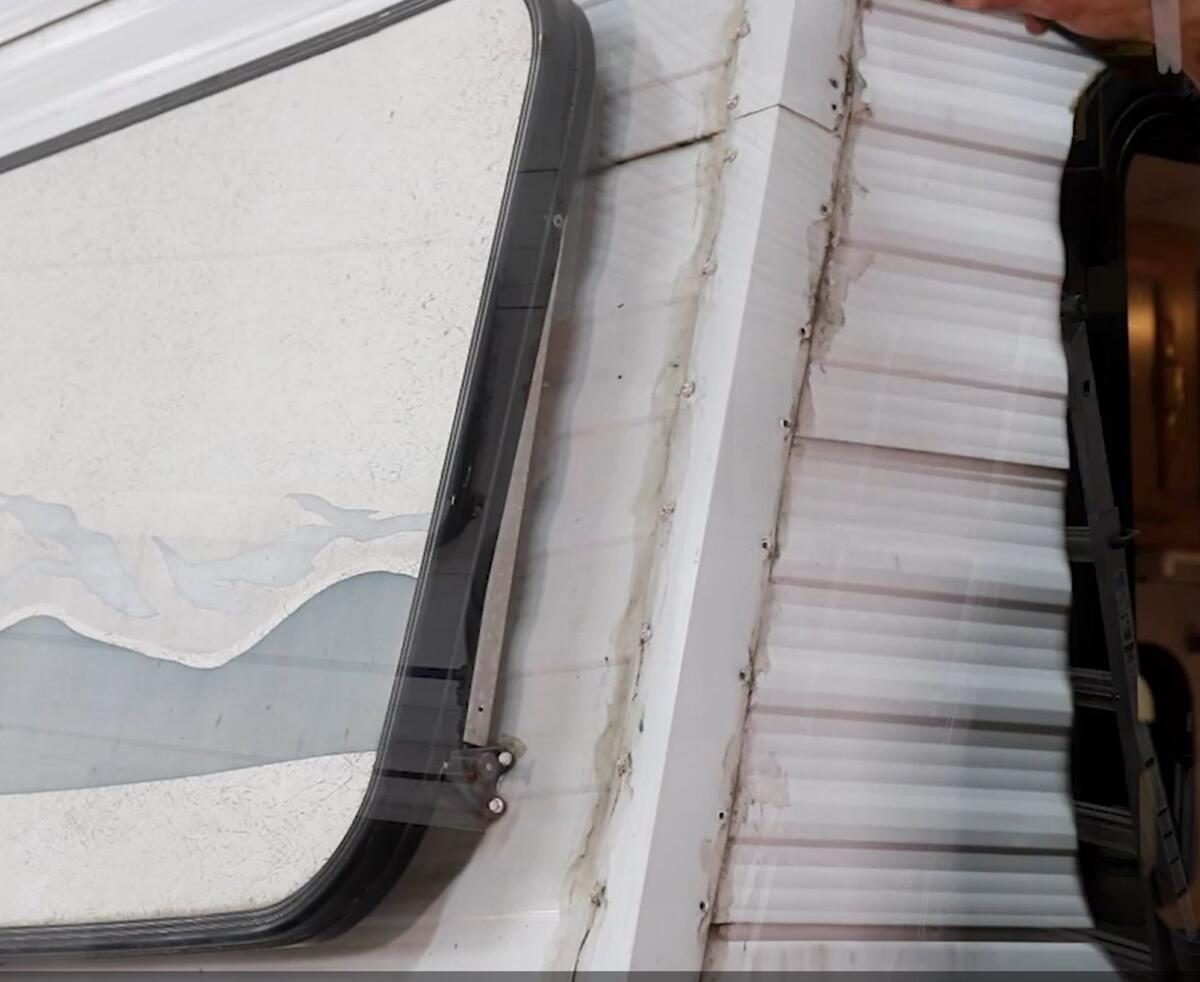
Just recently I’ve noticed a separation on the front right where the front and sides meet behind the black rubber seam. Apparently the water seeped forward, traveling down the outside of the luan paneling between the exterior aluminum and paneling, pooling under the bottom of the storage area.
I’ve received detailed drawings from Jayco regarding the framing of this unit. My question is: How difficult will replacing the outside corner wood frame be? RV dealerships want to charge as much as this one is worth for their repairs. I thank you in advance. —Phillip, 2017 Jayco 212QBW
Dear Phillip,
Unfortunately, without seeing the damage and peeling back some of the wall or flooring, it is difficult to determine the extent of repairs needed. Once you see water damage, it’s generally too late and there is much that has rotted under the floor and inside walls.
Questions for you
I have a couple of questions or, better yet, concerns. First, you stated the ceiling leak started with a pencil-size hole that grew to a 24″ circle. Was that a 24″ hole or a large area of water damage? Had you seen it initially as a pencil-size hole but didn’t address it at that time? Also, you stated you applied a strip of Permabond tape, which I am not familiar with. However, I do not know of any roof sealant tape that is 24″ wide—most are only 6″. So I am wondering how the 24″ issue was sealed. This also emphasizes the importance of inspecting the roof and seals to prevent moisture penetration and eliminating a small issue from becoming a catastrophe.
We had a similar situation at the RV Lifestyle & Repair club on a 2006 Forest River Salem that was purchased to renovate for video content. I went to the workshop for an introduction video shoot. I noticed the entire front seam had new hex screws every inch and silicone that looked like it had been applied with a scoop shovel.
This was not a factory installation and indicated what must have been a moisture leak and attempt to stop it without removing trim and getting to the real issue.
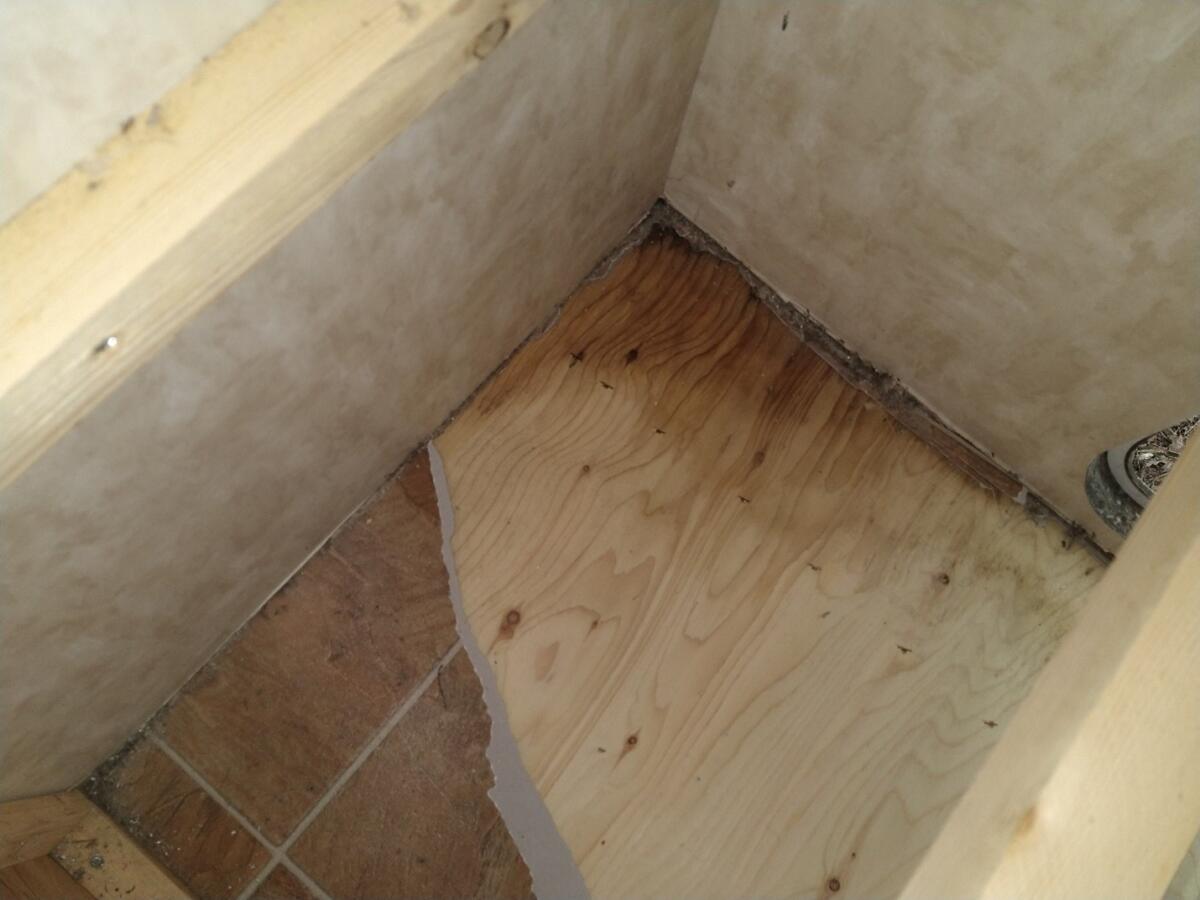
Much hidden damage
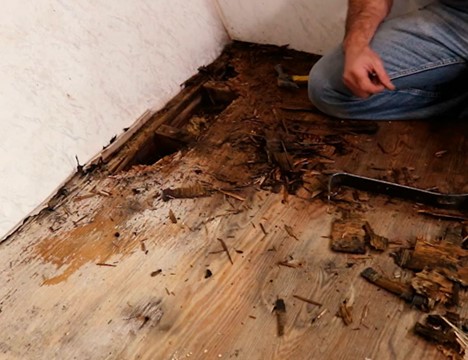
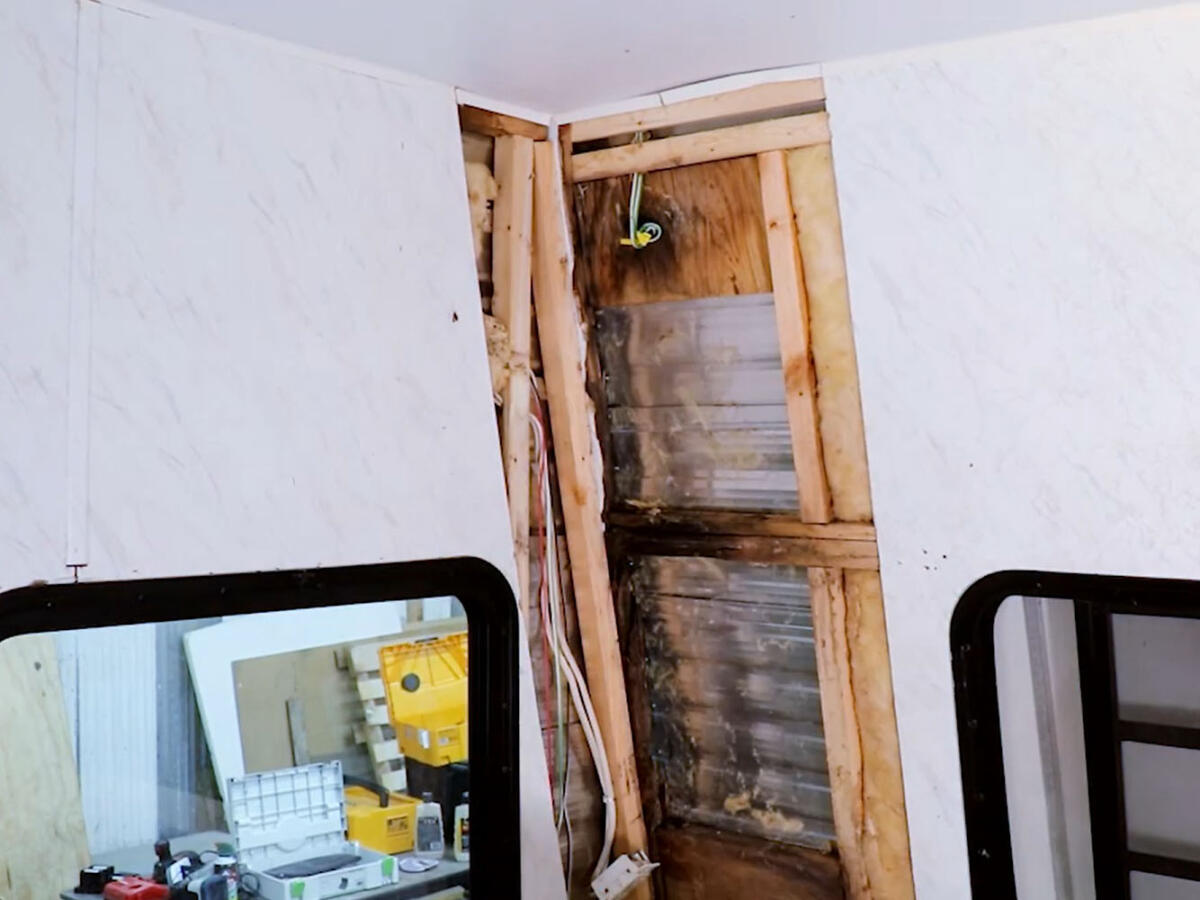
Sure enough, once we took out the interior bed frame and looked at the damage, the entire front wall, floor, and joists were rotten.
The leak started in the roof cap at the front and ran down inside the wall, as you have encountered. This meant the front wall and wooden framework needed to be replaced.
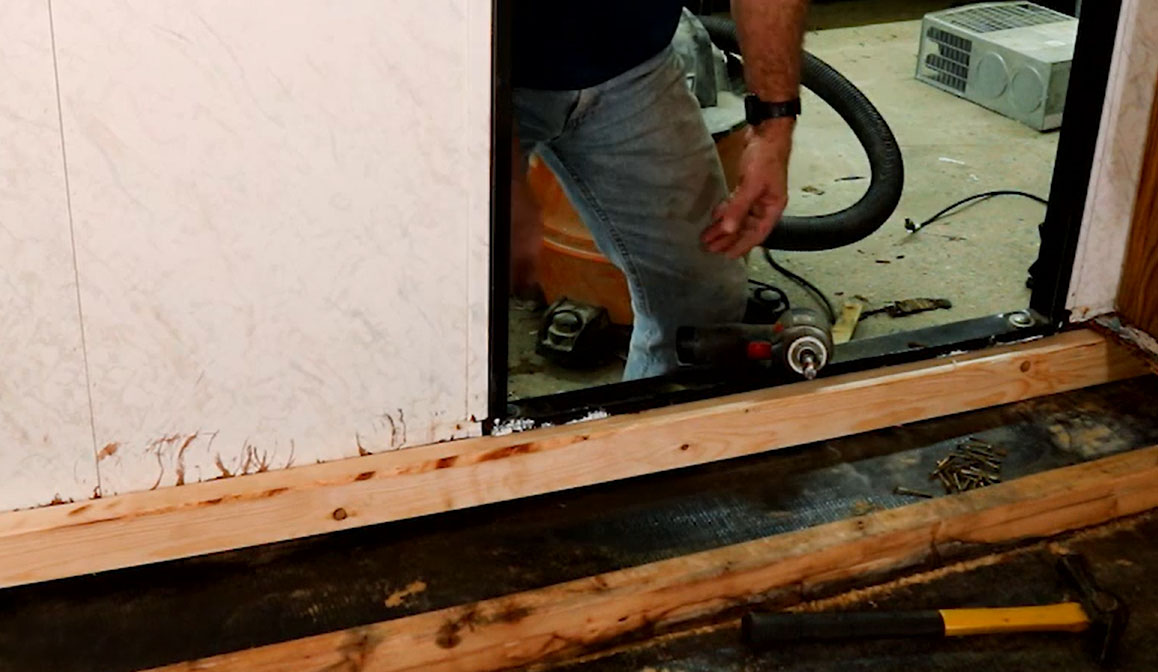
Once the floor was removed, we found the joists were rotten much farther back than determined. The entire floor needed to be rebuilt as far back as the entrance door, which included the entire front dinette and most of the kitchen.

Estimate for repair
I would guess the dealership estimated for the worst case rather than a small corner repair like this one.
This is why I always recommend getting a unit inspected by a qualified RV technician and also have the roof inspected at least every spring and fall.
A major repair would be more than 20 hours of labor at least, in my opinion, and with labor rates at $200, that puts it at $4000 without materials.
If you are handy and have some help, this could be done as a DIY project IF you have the facility, tools, and patience. Check out the video of the entire process on the RV Lifestyle & Repair site here.
You might also enjoy these posts from Dave
- Can a water leak be fixed without a whole new roof? Is it even worth fixing?
- My slide room floor is rotten from water damage. How can I fix and waterproof it?
- Should I use Flex Seal to protect 2-year-old RV’s roof?
- How to protect and maintain newly replaced RV roof. Plus, why new roof was needed
Dave Solberg is a leading expert in the RV industry and the author of the “RV Handbook.”
Read more from Dave here.
HAVE A QUESTION FOR DAVE?
Send your inquiries to him using the form below.
RVDT2640
Thank you, Dave, for the discussion of the potential extent of the area that must be repaired. Wow! This easily becomes a demoralizing task. It certainly bears out the importance of the need to hire a qualified third-party inspector if buying a used RV. It also demonstrates the importance of regularly inspecting and resealing as needed all seams. Have a great day and safe travels!