
I have over 700 articles posted here on RVtravel.com. Most of the time I do not get a follow-up on what fixed the reader’s RV issue. However, this came from Jim, one of our readers, on a follow-up repair to the plastic shower article posted previously.
Hi, Dave,
Hope the seminar tour is going well. I just wanted to thank you for articles you have posted on RV Travel for repairing plastic shower bases. I am writing with my experience repairing our shower base.
J-B Weld not commonly carried
First, the J-B Weld PlasticWeld epoxy putty is not commonly carried by the major hardware chain stores. Amazon lists it, and some ACE Hardware stores stock it. Given J-B Weld is based in Sulfur Springs, TX, and we are wintering in Johnson City, TX (5-hour drive), I would think it would have a better distribution. Still, you are correct in suggesting this product. It was one of the materials I used in our repair.

I am guessing the shower base in our 2017 Keystone Cougar 33SAB is made of ABS. The floor has always had a lot of flex. I think the plastic is starting to get a little brittle, and standing away from the drain, the base cracked at the top of the pocket for the drain.
Going through the access panel (roughly 4.5X8) with a flashlight, I could see the drain was well supported at the bottom of the trap, but the bottom of the pan was supported by 0.5”-thick Styrofoam on top of a 0.25” scrap piece of chipboard bridging between two 4” high chunks of 2X4. Either additional pillars or thicker chipboard would have avoided the problem. I was able to cut and wiggle into place near the bridge center, a 4”-high chunk of 4X4. Of course, that was closing the barn door after the horse had gone.
Used Loctite product
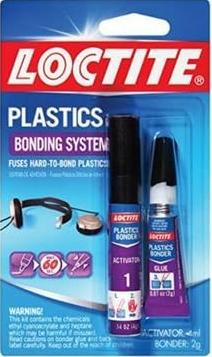
No PlasticWeld at the local hardware store, but I did find Loctite’s Plastics Bonding System. Packaging indicated the 2-part system would bond most plastics including some really hard-to-bond poly-plastics. The Loctite product did, indeed, allow me to watertight bond the shower base crack.
And while the shower base held for my wife’s shower, I wasn’t quite convinced that was enough for a permanent repair. My gut told me more reinforcement was needed. So I drove 30+ miles one-way to the nearest ACE Hardware with the PlasticWeld in stock. Last night I used just a small part of the stick to reinforce the now bonded crack. I cleaned and sanded to prep the surface. The shower base is still repaired after I showered this morning. $20, plus gas and my time for the repair. I don’t want to even guesstimate what it would cost nor how long it would take to have our mobile tech replace the shower base!
While the repair is pretty obvious, I am fairly confident it will last for many years. By the way, as we use a silicone edged, stainless steel perforated disk as a primary hair catch, it completely covers the drain and the repair.

Related:
You might also enjoy this from Dave
My RV’s shower floor has cracks. Can I repair them?
Hi Dave,
As you can see in the photo I attached, there are two cracks in the shower floor! The first one was repaired with silicone but it didn’t last long. Then we got the other crack two months ago and I’m trying to fix it. My question is, do you recommend replacing the whole shower with a home style shower instead of plastic? And how would I go about that? Thank you. Any information is greatly appreciated! —Colton, 2020 Puma Palomino 31RlQS
Dave Solberg is a leading expert in the RV industry and the author of the “RV Handbook.”
Read more from Dave here.
HAVE A QUESTION FOR DAVE?
Send your inquiries to him using the form below.
##RVDT2317
Dave, you are correct in that people do NOT follow up with their results after getting advice or suggestions as to fixing a problem. It’s the same on Facebook. Many, many folks post problems. Many, many folks post solutions but FEW report back any results. It would be helpful to all if one would report back to you or to the chat group their results either positively or negatively. This would allow us all to learn and arm us with the information we need to resolve our issue should the same or similar issue present itself. After all, isn’t that the purpose of these post? Thank you for all your advice.
The floor in our shower had some flex in it that left would have resulted in issues. There is a round access hole to the plumbing so I trimmed and placed 2 solo cups on a sheet of plastic with a small hole in the side under the supporting wood structure and filled them with expanding foam. I can still get to the waterless trap and if needed can use a hacksaw blade to remove them if necessary. A note of caution, it only takes a little shot of foam into the cups due to the foam will expand about 15-20% or maybe more depending on what kind you use. Too much may cause issues.
I like the idea. Not as strong as a chunk of wood, but obviously from your experience, strong enough.
I’m 6’7”, 240 pounds. Expanding foam is extremely strong especially when in a cylinder.
Thank you, Dave! Safe travels! 🙂
Home Depot is my source for JB Weld products.
JB Weld has a wide distribution. But Home Depot does not carry JB Weld’s putty epoxy PlasticWeld product. They carry the dual syringe plastic bonding product, but not the putty. The putty product is much stronger.
Quick note- 6 days and multiple showers since the repair and all is still well.
I had good luck JB waterweld. It will set even wet areas and cures in 1 hour. It’s off white, not terribly visible.
Great article on fixes. I learned from the experience of others and added 4×4 blocks underneath the pan to minimize flexing. No cracks after 10+ years. This isn’t the “end all” solution, but worked for us…so far.
In the Plumbing industry we use a product called “Structolite” comes in 50lb. bags. It is perlited mortar mix and a bed of this is laid down where the “acrylic”, fiberglass or plastic base of the tub or shower is being installed. Haven’t had a base crack in 40 years of using the product. Only catch is once the base is set you “must” walk away for at least 1/2 to all day for it to harden. What are the odds of the RV industry doing this. If you could gain access to the bottom of an already installed unit you could push the product under and around to support it.