Home Blog Page 2186

Want toast? Stove-top toasters save the day

0


By Greg Illes

If you camp mostly hooked-up, you probably have an electric toaster which meets your needs. But there are many camp situations where an electric toaster just isn’t a viable choice. Maybe you’re not hooked up, and perhaps it’s quiet-time and you can’t run your generator (or maybe you just don’t want to listen to it).

Personally, I love a slice of toast in the morning, but I hate starting the day listening to the rumble and roar of my generator. Inverter power is a possible option, but an electric toaster at 900W will draw 80A from an inverter — four slices of toast can use up three to four percent of battery capacity. It’s always possible to pan-fry bread, but let’s face it, that’s fried bread, not toast. Besides, it’s just another dirty pan to wash.

Enter a delightful little product, the stove-burner toaster. These inexpensive, compact little tools can cook up a slice of toast in about a minute or so, with no battery impact and only a miniscule consumption of propane. There are multi-slice models from camp-equipment vendors like Coghlan and Coleman, but the best-working unit I’ve found is the single-slice device (models available from Primus, GSI, Chinook). These take longer to make multiple slices, but the results are very controllable and uniform. Besides, who’s in a hurry when camping?

To use one of these, un-fold it and place it over a stove burner. Light the burner, and adjust the flame and toaster position to produce an even dull-red-hot heat in the lower layer of the toaster. Using tongs, place a slice of bread on top of the toaster and count to 30 (maybe more or less, depending on your stove and personal preferences). Flip the slice over, repeat, done.

The one-slice units fold up as thin as a slice of bread, and come with a tidy little storage bag to be cleanly tucked away in the tiniest of RV rigs. And, at $10-$15, they don’t dent a wallet.

Greg Illes is a retired systems engineer who loves thinking up RV upgrades and modifications. When he’s not working on his motorhome, he’s traveling in it. You can follow his blog at www.divver-city.com/blog.

Overweight RVs: An industry and consumers’ problem

By Greg Gerber
editor, RV Daily Report

There has been a lot of discussion in recent years about overweight RVs. Most of the talk centers around RVers cramming too much stuff in their units and exceeding the vehicle’s weight rating.

Groups like Escapees Club and FMCA offer the opportunity to have RVs weighed at many events, and most who do have their RVs weighed are surprised at the results.

But, overweight RVs are not entirely the consumers fault. The RV industry shares much of the blame. I recall reading a blog a year or two ago where the writer noted their motorhome was designed to carry everything but people. I can’t put my finger on the post now, but the bottom line was that after weight for fuel, LP gas and fresh water was added into the mix, the family had just 400 pounds available for clothes, dishes — and people.

A few weeks ago, I was approached by Kimberly Travaglino, who is the founder of the nearly 1,150-member Fulltime Families group. She was very concerned about her Heartland fifth wheel after learning some interesting information about the unit. The fifth wheel is officially rated to hold 18,000 pounds, according to the labels affixed to her RV. However, she has since discovered:

  • Each of her three axles are rated for just 5,200 pounds — for a total weight carrying capacity of 15,600 pounds.
  • Furthermore, the leaf springs on her toy hauler are rated to carry just 12,000 pounds.

She was rightfully concerned that even if her family was diligent to keep the weight of the entire fifth wheel to just 18,000 pounds — the maximum weight rating — her family was exerting more pressure on the axles and springs than they were designed to bear. She asked what, if anything, could be done to shore up the structure. I immediately recommended MORryde because their staff has told me in the past they were the experts in RV suspensions, and their website boasts of that claim as well:

“At MORryde, we think of your RV as a house on wheels — one that needs a solid foundation to withstand the rigors of the road. For nearly 50 years, we’ve been delivering suspensions systems that protect this foundation. Considered the expert in suspension systems, we offer a variety of solutions, for every budget.”

Which is why Kimberly and I are both surprised the company would not even offer the courtesy of a response when we both sought confirmation that MORryde had products to help people in situations like this. Assuming that this is a very common problem in the industry, I even offered to do a story in RV Daily Report and Let’s RV on how effective the products were in addressing Kimberly’s weight issue. Crickets — no response at all.

While Kimberly and I were in the process of trying to find a solution to her weight issue, the family moved their RV from Cocoa Beach back down to Delray, Fla. They made it exactly one exit down Interstate 95 when her husband, Chris, spotted white smoke billowing out of the driver’s side wheel compartment. By the time he pulled over, flames were shooting out from the rear wheels, and burning perilously close to the toy hauler’s fuel tank.

Because they had been trained by Mac the Fire Guy to have fire extinguishers at each RV exit and in the tow vehicle, Chris was able to suppress the fire with a whole can of extinguisher foam.

THE VEHICLE WAS TOWED to a service center where the Travaglinos were told the axle bearings had locked up on the driver’s side rear tire. They are left to believe that this whole situation was caused because the fifth wheel toy hauler was rated for a certain capacity — which is why they bought it — but built with components that could not bear that much weight.

Kimberly is, perhaps, one of the RV industry’s greatest cheerleaders. Besides her own organization, her Facebook group has nearly 10,000 members. She is responsible for hundreds of people buying new RVs each year, if not for full-time living, then at least so families can experience many of the things her group does on a part-time basis.

However, she is constantly listening to horror stories from RV owners about defective products they bought. The problem has increased in recent years, she told me. She has been at her current campground for only a few days, and three of her neighbors have complained about product quality.  One can point to the RV roof peeling away and exposing lumber on a two-week-old travel trailer.

“I think the recession forced several high-quality RV manufacturers with commendable reputations out of business because they couldn’t compete against companies who build and sell RVs that are, for all intent and purpose, designed to be bought and stored,” Kimberly told me.

If anyone in the industry has a solution to the problem of overrated RV weights, and what can be done to help people who bought these RVs shore up their systems, Kimberly and I would welcome more information. Perhaps an RV dealer has jerry-rigged a solution that could be shared with others?

How to “reserve” your newly occupied campsite

0


by Greg Illes

Everyone’s been there, perhaps many times. You found a good campsite, but you need to leave for a while. Whether it’s getting some groceries, going sightseeing, or just driving that annoying half-mile back to the entrance to register, you have to leave that (great or last) site vacant. Other campers are trouping by, eager for a vacant site. So how do you save “your” site?

If you only need to register, your traveling partner can stay behind. But if you’re both going out for an hour or the day, some other method is needed. Typically, a camp chair or a cooler will suffice to “mark your territory”, but these aren’t always noticed or heeded. I recall a time when we pulled into a site and got all situated, and the real occupant pointed out to us his “marker”, a camouflage jacket draped over the far picnic bench, virtually out of site of where we were. Poor technique, but we didn’t argue.

A really useful item to use for reserving your site is the collapsible traffic cone. These are sold in various auto and RV stores (and of course Amazon), for use as safety/emergency markers (a very good item to have handy in a roadside breakdown). They come in sizes from around a foot high, to more than two feet high, and they collapse into a 2-inch-thick square which packs away very nicely.

The cones are high-visibility orange, plus they have reflective bands which are easily seen at night (very useful when you arrive back at camp late and have trouble finding your own site). They also have that “mystique” of officialdom, and tend to garner a bit more notice and respect than the odd piece of camp equipment.

They have weighted bases, so they won’t blow away in a stiff breeze (unlike camp chairs). And at $10-15, if some rude traveler does make off with them, it’s not a major economic event.

Put one or two of these in the entrance to your campsite, and you will have to pick them up before you re-occupy the site. Using this technique, you’ll never leave them behind.

Greg Illes is a retired systems engineer who loves thinking up RV upgrades and modifications. When he’s not working on his motorhome, he’s traveling in it. You can follow his blog at www.divver-city.com/blog.

Improve your RV’s FM radio reception

by Russ and Tiña De Maris


In these really “high tech” days, the thought of FM radio may seem a bit “quaint.” Still, saving money is far from quaint, and those free FM radio signals are a lot cheaper to draw in than satellite radio. But one RVer recently asked us how he could add an antenna to his recently-purchased FM radio.

Many think “crank up” RV TV antennas are perfect for bringing in FM radio signals. Why so? In the “old days” of analog signals, the FM radio band rode in between TV channels 6 and 7. It’s still there, the trick is to coax the signal out of your coax — short for coaxial cable.

If your TV is hooked up to your TV antenna, then you’ll need a splitter. This little device allows you to add one more receiver to a single antenna connection. It’s best to look for a TV-FM splitter, and you’ll find one on the Internet, like this one.  You’ll also need a couple of additional pieces of coax cable with the appropriate fittings. One piece will attach to the “jack” that allows your TV to attach to the antenna, the other will go from the splitter to your FM radio. You’ll have to figure out just how long these two pieces of cable will be by looking over your own situation.

A look at the back of your FM radio will help you determine how to hook up the coax cable. For radios that allow the use of an external antenna, you’ll either see a fitting like that on the back of your television where the round coax fitting screws (or slides) on; otherwise you’ll find two small screws, side by side. If you’ve got a coax fitting, you’re set to go: simply connect up the coax fitting. If you find the “two screws” style, you’ll need one more attachment, a Radio Shack purchase.

Called a “matching transformer” this little guy acts as a go-between from your two screws to the coax cable. Screw the one end into the coax fitting; the clips slide under the screw connectors on the radio.

With your FM radio connected up to the coax, turn on your TV antenna amplifier and prepare to be wowed by more stations than you thought possible. All of them free!

A final note: Some RV TV antennas make use of an “FM trap” that is designed to block overpowering FM signals from interfering with TV reception. Look over your antenna manual to see if your antenna has a trap (some that have traps have an option to turn them off or on). Lost your manual? Give the splitter a try (just keep your receipt to take it back if you find your antenna has a trap).

Help your RV refrigerator operate more efficiently

0

By Rene Agredano

If you’ve watched food become prematurely moldy or endure freezer burn inside your RV refrigerator, the problem could be resolved as easily as storing less food and adjusting the refrigerator temperature based on the current outside temperature — in other words, turn it up or down depending if it’s hot or cold outside.

RV refrigerators operate most efficiently when cold air is allowed to freely circulate inside the unit. Food that is packed too tightly will prevent circulation and quickly spoil. To prevent this expensive problem always keep your food purchases to a minimum when taking your RV out on the road. Buy your items at least one day before departing and store them in your home refrigerator until leaving. Placing cold food items inside a cold RV refrigerator puts less demand on the unit.

Plug in your refrigerator to get cold air flowing at least a day prior to your departure. Once your refrigerator has cooled to an optimum temperature of about 34 degrees, pack it with the heaviest and tallest items on bottom. Place flat items such as egg cartons on the top shelf so air can freely flow out of the cooling fins. Sensitive produce such as lettuce and berries can be wrapped with paper towels and placed in the vegetable bin to prevent premature spoilage. Finally, the bottom left corner of your freezer is the coldest place in the unit for easily spoiled items such as ice cream and meats.

Pay attention to the weather once you arrive at your destination. Your refrigerator has to work extra hard when the outside temperature rises so remember to cool down the unit during hot weather and increase the temperature during cold weather.

A small battery-powered interior fan can also help cold air circulate more efficiently. If you’re still experiencing food spoilage it’s time to take your RV refrigerator into the shop for annual maintenance.

Read more from Rene at Live.Work.Dream.

A Benchmark Atlas may change your view of the road

0


by Greg Illes

The Benchmark series of atlases have long been favorites with wanderers, and with good reason. Covering the 11 western states, these tabloid-sized books are a wealth of information and far richer than the typical road atlas. Each one covers one state, and the information is generally provided as two sets of maps: recreation view and landscape.

The recreation maps are large-scale, grand-view depictions of terrain and land-use, with major highways and arterial roads; Landscape maps are topo-style, smaller-scale, with secondary roads, campgrounds, contour lines for elevation, and so forth — exactly the kind of detail needed for serious exploration (or just for finding that great out-of-the-way campground).

The recreational maps are especially useful for locating public lands. They cover, in excellent detail and accuracy, parks, monuments, BLM lands, national forests, and state lands. Easily find roadways, dirt roads, and even trails. The road markings are remarkably clear, and it’s easy to tell the difference between a motorhome-capable dirt road and a rough 4WD track. Of course, local conditions and weather can change these things, but the maps are still a great place to start.

In addition to the pure cartographic information, the atlases also provide a fair-sized listing of points-of-interest such as campgrounds, historical places, parks, museums and such. On several occasions, I’ve found a great place that I didn’t know I was going to — until I read about it in the Atlas.

THE BIG PAGES AND CLEAR DETAIL of these giant books (11″ x 16″) make for easy orientation — the “big picture.” Despite being dedicated electronic aficionados, we find ourselves making extensive use of the atlases over our iPad and Droid maps. In fact, our several-year-old atlas copies are well-worn and dog-eared. Atlases list for $23-$25 on the Benchmark website, but they are routinely discounted at retailers; Amazon pricing runs about $16 to $21.

If you still prefer a more digital orientation, Benchmark is beginning to offer the atlases as downloads electronic devices. Check out your favorite app store for more information.

Greg Illes is a retired systems engineer who loves thinking up RV upgrades and modifications. When he’s not working on his motorhome, he’s traveling in it. You can follow his blog at www.divver-city.com/blog.

Are propane tank “trade ins” worth it?

0

By Russ and Tiña De Maris


You see them nearly everywhere: Propane cylinder trade-in kiosks. Bring in your empty and trade it in for a refreshed, full one. Often with 24-hour service it may be tempting to trade-in rather than fill up. But are they really a bargain?

On a visit to a Flying J truck stop we found bulk propane for $2.75 per pumped gallon. The same truck stop offered Amerigas exchange cylinders for $21.99. A quick nod at your calculator says you’re paying $1.64 more per gallon for the exchange, but you’re getting a “fresh tank.” Not exactly!

Reading the fine print on the exchange offer shows that the Amerigas offer is “Net Weight 15 pounds.” Propane weighs 4.23 pounds per gallon, which means you’re not anywhere close to a full five gallons, and in fact, you’re paying the equivalent of $6.20 a gallon — $3.45 more per gallon than having your own cylinder refilled.

And those “spare” cylinders they tout? Buy a spare for $54.99, filled up with a little more than three and a half gallons of fuel (which you could pay $9.75 for in bulk), and you’d still have $45 left over to buy a brand new (not refurbished) cylinder. At the time of the price check, Camping World would sell you a new cylinder for $35 which would be good for 12 years before it needed to be recertified. Those “refurbs” from Amerigas? Unless you look closely at the cylinder, you’d never know how soon you’d have to have the container recertified.

Which does bring up a point: If your existing cylinder is getting near its time for a re-cert, it might be advantageous to trade it in on a refurb. It is definitely more convenient than calling around propane service yards finding out who’ll recertify your old cylinder, lugging it out, and waiting around for the job to be done. On the other hand, if you have the time and the re-cert price is right, lug it on in.

You pay the money, you make the choice.

Meals almost fix themselves using tin foil on the barbee

0

By Russ and Tiña De Maris


While traveling does bring out quite an appetite, once you land in camp at the end of the day, who wants to fiddle around with a lot of meal prep hoopala? It’s so much easier to cruise into a McDoogies, but the nutrition is so questionable. Go some place with better nutrient values and less fat, you’re apt to spend a bundle. What to do? Pull out the barbee, the tinfoil and let the meal almost fix itself.

A couple of our favorite foil-wraps can be prep-worked before pulling out, then on arrival fire the grill and toss a packet on. Go about the rest of your set-up business and in a short time the appetizing aromas will signal the meal is ready. Best of all, cleanup is easy!

Foil Wrapped Burger Bundles: Toss a burger patty in the middle of a square of aluminum foil. Top it with slices of onion, potato, carrots and chunks of celery. Dab on a small pat of margarine, season with a pinch of garlic powder, and (if you have it) a few drops of “liquid smoke.” Fold up the aluminum “bundle” to seal in the food good and tight. Poke the pack once with a fork and toss on the grill over medium heat. Cooking time will vary with the size and thickness of the hamburger patty: check it out at about 20 minutes but it may take longer. When the spuds can be poked easily, it’s chow time. Alternatives? Ground turkey is a hit.

Painless Foiled Fish: This is one of our favorites when traveling through native fishery areas when fresh salmon is sold by the roadside. Starting with a good sized chunk of foil, lay the fish on the foil, skin side down. Butter the fish as you would a piece of toast and dash on lemon juice. Salt and pepper to taste. Wrap up the tin foil and fold over tight. Poke once with a fork and toss on the grill, medium fire. Thickness of the fish determines cook time: 10 minutes per inch at the thickest point is a good starting point.

Alternatives? Forget the butter! Layer on mayonnaise instead. Wow!

Clean Up: Toss the “pan” in the trash!

RV roof coating adds extra protection

0

Courtesy Dicor Products

Protecting your RV roof with a coating specially designed for the type of roof material you have is one of the best investments you can make in extending and refreshing the look of your RV roof. Your RV roof is exposed to many elements, including sun, rain, hail, snow and wind-blown debris, along with atmospheric conditions that can range from freezing to dry desert heat to humid swamplands.

Whatever conditions your roof is exposed to, the right coating system will help give your roof a brighter, cleaner look over a longer period of time and enhance the value of your RV investment.

For EPDM roofs, a roof coating can help make it easier to maintain a great looking roof. It does this by adding another critical layer of protection, while reinforcing seals against leaks and making it harder for discoloring dirt and mold to stick around.

For fiberglass roofs, a proper coating provides another barrier to the sun and weather, elements that can over time produce discoloring and spider cracks (or crazing). Dicor Product’s coating also produces a brilliant white finish that aids in reflecting sunlight to reduce heat absorption.

For metal roofs, products like Dicor Products’ Elastomeric Metal RV Roof Coating also provide a brilliant white finish to aid heat reflection, while reducing environmental and weathering effects on the finish. Used in conjunction with Dicor’s Rust Inhibitive Primer, the potential for corrosion is also reduced.

The bottom line: if you want to restore your roof to make it look like new again, or if you simply want to maintain and extend your roof’s good looks and investment value well into the future, you should look into a roof coating system designed for your particular kind of roof.

[Editor’s note: This information is provided by roof membrane manufacturer Dicor. While there’s plenty of “promotion” for their product included, some of the information and principles may be of assistance to our readers.]

Tricks for camping in National Parks without a reservation

0

By Bob Difley


When campground usage is up, reservations become harder to nail down. It’s a real problem for those who procrastinate, make last-minute travel decisions, or find themselves wherever their RV leads — most of the time without campground reservations. But don’t let that discourage you from visiting the national parks. You just need to practice some tricks and tips for increasing your odds of securing a campsite.

Many national parks are often by national forests or Bureau of Land Management (BLM) lands. These are great alternative camping options. Use their campgrounds for first night camping with the goal of securing a national park campsite the next day.

It’s nearly impossible to get a campsite in a National Park by arriving in mid-afternoon or later, since most parks fill well before noon, even on weekdays. A primitive campsite or boondocking on public lands will probably be your best bet, since most private campgrounds are generally on private land far away from national parks and also often fully reserved with few, if any, last minute sites.

These tips can up your chances of getting a campsite.

  • Research close-by public lands for campgrounds and dispersed camping areas — easy if there’s a Motor Vehicle Use Map (MVUM) available for download. Find which national park campgrounds have sites large enough for your rig and confirm that some of them are held for first-come-first-serve campers.
  • Plan to arrive on a weekday instead of a weekend and visita Forest Service or BLM office on your way in to see which campgrounds have available sites.
  • No sites available? Ask about boondocking outside of an organized campground (dispersed camping areas). Ask for a MVUM (for now only available in NF) that will map those areas. If there is no MVUM you can camp anywhere that you can get off the road providing you are not within a mile of an organized campground and where not otherwise prohibited.
  • When you have your site, figure out if it will work for a few days, is in easy reach of the National Park, and whether spending time to secure a national park campsite is worth the time and effort. If not — stay where you are.
  • If you want a site in the park, rise with the birds the next morning and plan to arrive in the campground very early — before 10 a.m. if possible — and get on the list for a campsite.
  • No sign up list? Roam around the campground looking for signs that someone is leaving, then hang out until they do and leave something in the campsite — a camp chair or “Taken” sign — to reserve it until you retrieve your rig.

Each park has its own policy on campers without reservations. Get what information you can from its web page or phone the visitor center so you are prepared. That should increase your odds of finding a campsite.

You can find Bob Difley’s RVing e-books on Amazon Kindle.

Ripped off by shady RV dealers — What can be done?

Dear RV Shrink:
rvshrinkWe were trapped at an RV dealership in New Mexico for two weeks because it was a cold winter and our heater would not stay running. The mechanic pulled it out once and said it worked fine after bench testing it. He then sold us a new propane regulator and filled our coach tank with a drying agent to the tune of three hundred dollars. The heater would still not light, and we were then told we had electrical problems in our converter and the furnace was not getting enough juice.

After two more dealers, and two more bills, we found out it was the main board. After this was replaced everything started working fine.I feel abused by incompetent and shady RV dealers who took advantage of our lack of mechanical skills. Knowing that the furnace could not have functioned on the first bench test we paid for, I feel we should get a refund for at least that service. My husband does not agree. He doesn’t like to rock the boat. He will usually do the right thing after he has tried everything else. This issue is causing tension between us. Should I just drop it or do you suggest I keep harping until he calls them? Ripped Off Road Warrior

Dear Ripped:
I don’t think your husband should call any of the dealers. He doesn’t seem to have the stomach for conflict and debate. I think you should call them. You sound like you understand the problem, have ample facts to prove your point and the passion for debate it often takes to wear down a business that has made mistakes honestly or otherwise.

I would give the dealer the benefit of the doubt. Don’t come out swinging no matter how upset you are. The secret of success is sincerity. Once you can fake that, you’ve got it made. If you cannot come to some agreement after the first attempt, it is simply a matter of persistence and volume control.

I ran into a mechanic once who told me it took him 15 years to discover he had no talent for fixing RVs, but he couldn’t give it up because by that time he had a constant stream of people clamoring for his expertise. In the future, make sure you do not send your husband in to do the negotiating. He is too easily bamboozled. Leave him in the parking lot and handle it yourself. Get an understanding of results expected before service fees, and never, I mean never, let them see you sweat. —Keep Smilin’, RV Shrink

The RV Shrink is not really a psychologist (or professional RV technician). But he does know a lot.

#rvs737

Shovel your way out of trouble

0


By Greg Illes

Sure, the best way to get unstuck: “Don’t get stuck in the first place.” Ah, but despite the most honorable of intentions, sometimes that dang gas pedal just won’t make us go forward any more. We’re stuck.

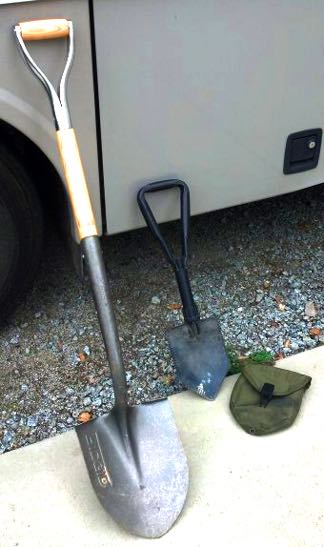
It’s almost always a case of having traveled into soft terrain. Mud, loose dirt, or sand have swallowed up the tires — more throttle just means more stuck. Tow trucks are hideously expensive and many of them won’t venture onto dirt roads anyway. The seemingly desperate situation doesn’t have to be so. A simple shovel can usually extract your rig from its predicament.

If you don’t yet carry a shovel, by all means head to your local hardware store. A full-size, short-handled, round-point shovel is the overall best tool and it stores much more easily than the long-handled version. For a smaller rig, even a folding shovel (from camping or surplus shops) will still do the job.

Inspect how you got stuck and what the shortest path is to freedom. Often, the best option is likely to be backing up the way you came. Don’t automatically think that you have to keep going forward. Every time that I have driven my 15,000-pound class-A into harm’s way, it was always best to back up out of trouble.

Dig a trench behind each dug-in tire. The idea is to get the mud, sand or dirt out of the way of the tire so it can roll easily. You must do this for every tire, down to tread level. This might mean digging six trenches nearly a foot deep and it can take a while (but not as long as waiting for a tow truck). Dig those trenches back at least six to eight feet.

Be sure your front tires are straight and aligned with their trenches — otherwise they’ll just act as anchors. Start the engine, shift to reverse, RELEASE the parking brake (!), and gently apply some throttle. Do not allow the tires to spin.

Your rig will begin to move along the trenches. As it begins to move, you can give it a little more throttle, and the momentum will take you back to good earth. If it starts to get stuck again at the end of the trench, don’t panic and slam the gas. Just get out and extend the trenches some more.

When you are free again, clean off that shovel and stow it away for your next “adventure.”

Greg Illes is a retired systems engineer who loves thinking up RV upgrades and modifications. When he’s not working on his motorhome, he’s traveling in it. You can follow his blog at www.divver-city.com/blog.