
Join me “In The RV Shop” as I explain how to apply Geocel RV sealant to the RV exterior body, along with the materials and tools needed for the job.
Ensuring your RV is properly sealed is crucial for maintaining its structural integrity and preventing water damage. My shop uses a lot of Geocel RV sealants during our body reseal service for sealing joints, seams, molding, windows and other penetrations on RVs.
In this guide, I’ll walk you through the steps to apply Geocel RV Sealant to your RV exterior body, helping you protect your investment from the elements.


Materials and tools needed:
- Geocel RV Sealant (Available colors: White, Clear, Almond)
- Drip-free caulking gun
- Body solvent cleaner
- Painter’s tape, Scotch brand
- Plastic caulk remover tool
Step 1: Surface preparation
Before applying Geocel RV Sealant, it’s essential to ensure that the surfaces are clean and free of dust, dirt, and old sealant. Use a cleaning low-grade body solvent cleaner or, depending on the state, a degreaser that is appropriate for the surface material and a clean cloth or rag to wipe away any debris or old sealant residue.
Step 2: Masking
For a clean and precise application, use painter’s tape to mask off the areas surrounding the joints or seams you’ll be sealing. This helps in achieving a neat finish and makes cleanup easier.
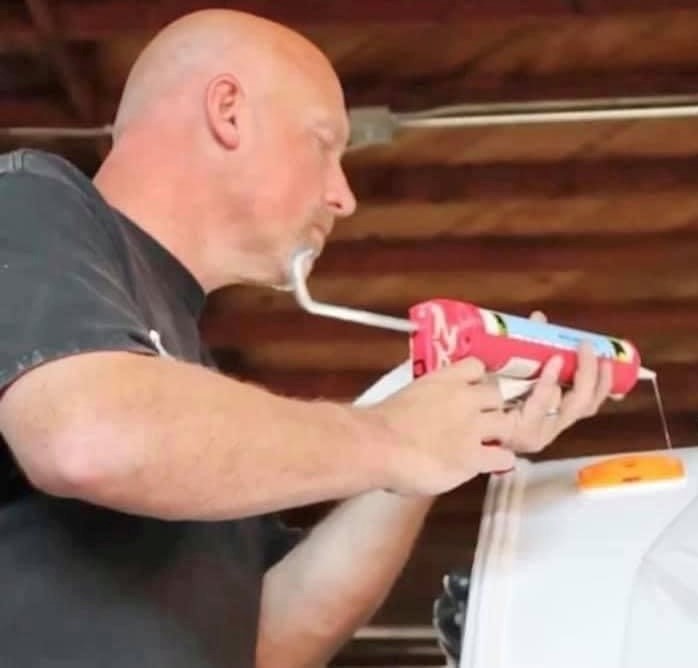
Step 3: Load the caulk gun
Insert the Geocel RV Sealant cartridge into the caulking gun. Cut the tip of the cartridge at a 45-degree angle, ensuring the opening matches the size of the joint or seam you’ll be sealing. Use a utility knife or caulk remover tool for this purpose.
Step 4: Apply Geocel RV Sealant
Squeeze the trigger of the caulking gun, applying a consistent bead of Geocel RV Sealant along the joint or seam. Move the gun at a steady pace, and try to avoid stopping and starting to maintain a smooth application.
Step 5: Tooling
After applying the sealant, use a caulk smoothing tool or your finger (wearing disposable gloves) to smooth and shape the sealant. This not only enhances the aesthetics but also ensures a proper seal by filling any gaps or voids.
Step 6: Remove painter’s tape
While the sealant is still fresh, carefully remove the painter’s tape. This helps achieve clean edges and prevents the sealant from adhering to the tape.
Step 7: Cure time
Allow the Geocel RV Sealant to cure according to the manufacturer’s instructions. Typically, it takes 24 hours for the sealant to fully cure. During this time, avoid exposing the sealant to water or extreme temperatures. For additional information on a product please see manufacturer website for details.
Properly applying Geocel RV Sealant to your RV body is an essential step in maintaining its longevity and preventing water damage. Following these steps will help you achieve a professional-looking seal and ensure the protection of your RV against the elements. Regularly inspect and reapply sealant as needed to keep your RV in top condition for many adventures to come.
Join me in the informative video below for additional secrets of RV body reseal. Find out why it’s important to seal every nook and cranny of your coach to protect it from water damage.
More from Dustin
Make sure you check out my website, California RV Specialists, and our YouTube channel for more helpful information, and see our published articles on RVtravel.com and other social media pages.
##RVT1160
Very informative as usual. Thanks Dustin
The masking tape hint is one thing most people don’t consider. No matter how careful you are, there is always the “oops” factor. It also helps give you a place to catch the drip after you lift the caulking gun.
I also use a caulk smoothing tool dipped in a slight soapy water solution. Same thing when using your finger.
Thank you, Dustin! 🙂 I enjoyed the sealant tutorial; thanks. I don’t know if the painter’s tape or the disposable gloves is the better pro tip, but both are news to me. Thanks again and safe travels! 😉