

By Cheri Sicard
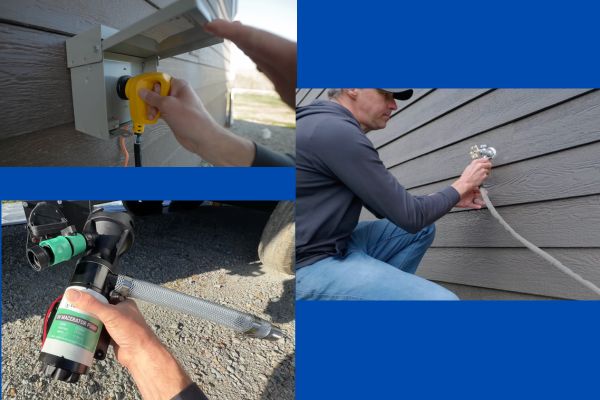
An RV gets a lot more useful when it has full hookups at home. In the video at the end of this post, Jared Gillis from All About RVs shows how power, sewer, and water can turn a parked rig into a guest space, a trip-prep station, or an easy place for extra living or office space. Jared’s at-home RV setup looks a lot like a small RV site, but he also points out lower-cost options that still cover the basics.
Full hookups start with the right power setup
At-home RV hookup usually comes down to three parts: power, sewer, and water. Power often matters most because it keeps the RV usable day to day. Jared’s pedestal-style setup includes 50-amp, 30-amp, and 20-amp service with breakers in one spot, much like a campground pedestal. That makes plugging in and shutting breakers off a lot easier. His panel is similar to this RV pedestal panel with 50-, 30-, and 20-amp service.
For 50-amp service, the outlet uses two hot wires, black and red, plus a white neutral and green or bare ground. In the panel, those hot wires land on a two-pole breaker. A 30-amp outlet is simpler, with one hot, one neutral, and one ground on a single breaker. He also likes this deeper 50-amp RV box because the lid can still close with a cord or surge protector plugged in.
A lot of owners still choose 30-amp, even with a 50-amp RV, because wire cost climbs fast on long runs. His shorter run used 6-gauge wire, while his longer pedestal run used 4-gauge to help avoid voltage drop. That low voltage can damage RV equipment, which is the same issue many campers worry about in bad parks. For reference, he linked 50-amp 6/3 wire, 30-amp 10/2 wire, a 30-amp panel, and a small 30-amp panel with breaker.
Sewer hookups can be simple or park-style
Jared’s home sewer hookup ties into a septic or sewer line with a 3-inch pipe, though he said he would switch to a 4-inch pipe if doing it again. That matches what most RV parks use and works better with common threaded adapters.
The more common budget option is using a home cleanout. That can work well, but only after checking the plumbing layout. Some cleanouts include backflow preventers, so the dump point needs to be verified first. He also notes that a macerator pump can help when the dump spot is uphill or farther away than a normal hose run can handle.
Water is the easy part, if year-round use matters
For water, Jared installed a frost-free hydrant with the shutoff below ground. That keeps water available year-round and feels much more like a campground setup.
His one layout change would be moving the hydrant behind the electric pedestal so the area feels less crowded near the RV door.
The main takeaway from all of this is simple: A home RV hookup does not have to be fancy to be useful. When power is sized right, sewer is verified, and water is easy to reach, the RV becomes a lot easier to use between trips.
RELATED
- Know your plugs: 50A vs. 30A RV hookups—When 50-30 doesn’t equal 20!
- How to prepare land for full RV hook-ups
RVDT2878
The house is a corner lot and parking on the street (during the non-snow season) is allowed. 25′ wire & hoses do the trick. The TT is 30A, but 20A (with a true 20A cord) is allowed. I can run anything, but not everything in the TT. I also installed an additional water spigot near the 20A power. The house (built in 1906) has an auxiliary sewer vent just outside the foundation, near the 20A & water. I built a 1″ PVC ‘L’ to drop into the vent and use a dedicated 3/4 contractor hose and macerator pump for waste.
This allows me to do pre & post trip prep/cleanup and most maintenance right at the curb. Incredibly handy.