
By Russ and Tiña De Maris
Hate to let you in on a little secret, but the older we get, the harder it is to use the toilet. We’ll spare you the medical perspective of bodily functions, but just getting up and down from the toilet can be—well, a pain in the—er—neck. And legs. And back. And don’t forget the knees. Adjusting the height of your RV throne can make a world of difference. An RV toilet riser may be just what you need.
An RV toilet riser for your own “Game of Thrones”
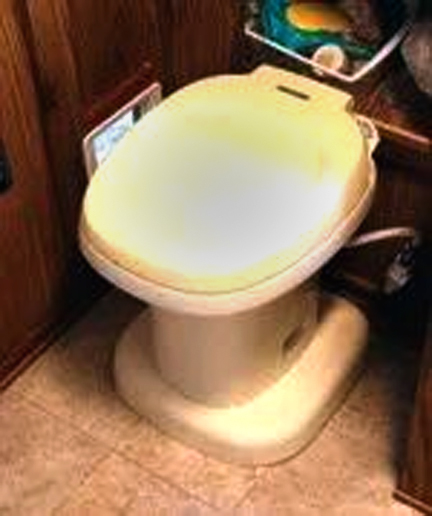
Too often, RV toilets are on the short side, but we found a relatively inexpensive upgrade that really helps. Install a riser to give yourself a bit of a lift. We’ll walk you through your own “Game of Thrones.”

Thetford, maker of many RV toilets, also produces an RV toilet riser. The device gives RV toilets a lift of two-and-a-half inches. Happily, it works not only on Thetford models, but also on toilets produced by other manufacturers, including SeaLand (Dometic). The riser installs on the bathroom floor where your current toilet sits, and the toilet is then mounted atop the riser.
As we’ve changed RVs, we’ve had occasion to install these risers. It’s a fairly easy job, albeit a bit smelly for a few minutes. We’ll walk you through the process and talk about a couple of alternatives.
Before you get started
Prep work is straightforward. Aside from having the riser kit and appropriate tools (coming up), dumping your black water tank is a good idea. The less “junk in the trunk,” the less smell you’ll have to endure.
Tools? You’ll want to eyeball your existing toilet installation. You may be able to remove the bolts that hold your toilet to the floor with just an end wrench. Others may need a ratchet and socket, and maybe an extension bar. Some RV engineers must be fans of Cirque du Soleil—you could need a universal joint for your socket setup.
Got a SeaLand toilet? Consider buying just one new “closet seal” (the gasket that normally goes between the toilet and the floor), as your seal is a bit larger than those used on Thetford toilets. The Thetford kit includes two seals, and one of them will be fine for the floor-to-riser junction, but the riser-to-toilet connection could stand to have the bigger seal.
In all cases, check out the existing fresh water supply line. You’ll be putting the toilet up another 2½ inches. If your existing supply line won’t have enough “give” to make the added distance, you’ll need a longer replacement. You may bless yourself if you also add a shut-off valve to the setup. That way, if your toilet starts leaking on the fresh water side, you can shut it down without killing off the water supply to the rest of your rig.
Finally, before you yank the toilet loose from the floor, have rags and some household cleaner on hand. The things you see under your toilet can be creepy, and “clean up on Aisle 9” may be your first order of business.
Here’s the step-by-step process—Taking it apart
Shut off the water supply to the toilet and drain the toilet bowl. Since you’ll need to turn the toilet upside down for the installation, getting the water out is a must. Disconnect the toilet from the existing flange bolts that hold it to the floor.

Likely, the old toilet flange seal will be hanging onto the toilet for dear life. Too bad! Pull and toss away the old seal and clean up the bottom of the toilet. Remove the old toilet hold-down bolts; they are useless for the new installation. Install the new flange seal.
Depending on where your water supply line comes in, you may need to modify the toilet riser. If the supply line comes up through the floor, the new riser may cover it. In that case, you’ll need to drill a hole in the riser to accommodate the plumbing line. Thetford’s instructions will provide you with possible locations for the hole.
In our installs, the water line came from the wall immediately behind the toilet. It was also in an area impacted by the riser. Rather than trying to cut a hole through the side of the riser, we relocated the line. In one case, the water line was in a “dead space” in a cabinet behind the toilet. This added a considerable amount of time to the installation, but we were happy with the results.
And putting it together
Since the new riser sits on the floor, you’ll find new flange bolts that pass completely through the riser, then into the toilet. Instructions in the kit advise which of the two sets of bolts you’ll use. You’ll also find two flange seals. Again, if you’re installing a SeaLand toilet, you’ll use your own new SeaLand seal. Otherwise, put one of the new flange seals from the kit on the bottom of your toilet flange. This gasket forms a new seal between the base of the toilet and the top of the riser. You’ll also install a new seal gasket over the flange on the bottom of the riser. Here you’ll use one of the seals from the riser kit.
Pick the right flange bolts and position them in the floor flange. Next, line up the riser so the word “front” will be where the front of the toilet will be located. Now simply lower the riser down over the bolts. This is where it gets tricky. Those hold-down bolts probably won’t stand real still, and you’ll be basically threading the bolts through little holes in the riser. Since most RV bathrooms are pretty tiny, you won’t likely have room for a helper to assist you in the alignment process. For some, liberal applications of the appropriate refreshing beverage may be called for.
Soda straw hack
There’s a trick you can apply, aside from that beverage. Go out to the car and open the glove box. Pull out one of those drinking straws you got at the fast-food joint but didn’t use. Cut off a chunk of the straw, and force the open end of it down onto the flange bolt. The extra length above the bolt can then be fed through the riser, and then through the toilet. It keeps the bolts from slipping and sliding, and helps tone down the language of frustration.
Once you’ve got the riser settled down on the floor flange, line up the toilet and drop it down over the hold-down bolts. This is a bit easier since the bolts will be less inclined to wobble, now that they’ve been “collared” by the riser—and by the drinking straw.
You might need a “throne sitter” before you’re even done
But you’ll be fighting against the collective efforts of two springy rubber flange seals. Here’s where a helper may be needed. Have the helper sit on the toilet so his or her weight will compress the flange seals enough to get the bolts to come into reach. Quickly get hold-down nuts tied onto the threads and start running the nuts home. With your helper off the pot, tighten the nuts until all rocking motion is taken out of the installation. If your bathroom floor is carpeted, it may take considerable doing.
Here’s our own “Flintstone and Rubble” experience with one install. We struggled to get the toilet pushed down far enough to get the flange bolts through the toilet base. We thought we needed the longer bolts, so we yanked the riser back up, and put on the longer bolts. Wrong, Fred and Barney! After we put the longer bolts in and got it all lined up, we started threading the nuts on. Woops! Now the bolts were too long! We couldn’t thread the nuts down far enough! Off comes the toilet and the riser, and in go the shorter bolts. That old “put somebody on the throne” to moosh the toilet down was the needed trick. When Thetford tells you which of the bolts you need, believe it!
With the toilet firmly moored, reattach the water supply line, turn on the water, and check for leaks.
Shop around for a new riser
If you want to proceed with this as a project, be sure to shop around. Prices for Thetford risers vary widely. On the internet, you’ll find prices (including shipping) range anywhere from a low of $35 to the mid-$50 range. We phoned two local suppliers and found one retailer, renowned for its low prices, asking $35, while another sold us a new riser for $27.
While this riser will fit all Thetford toilets, and most SeaLand models, it will NOT work with SeaLand’s 511 and 911 models, nor will it function if your SeaLand uses a SeaLand “universal mounting unit.”
Alternatives to a “whole-toilet” riser
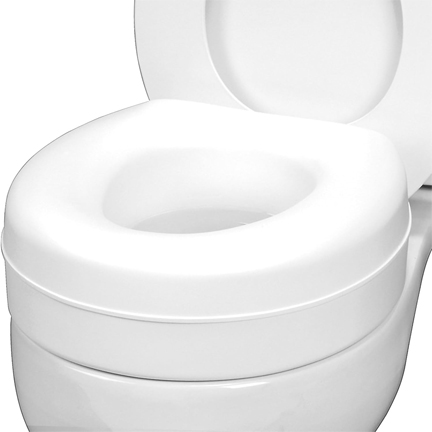
We mentioned alternatives. Some RVers don’t want the hassle of doing this kind of install. One reader says they wanted to have something they could take with them if and when they switched RVs. One reader suggested a toilet seat add-on riser. Instead of lifting the entire toilet up, this riser sits atop the existing toilet seat. [Here are more toilet seat risers for seniors, including those with handles.]
If you want to consider this option, be sure to measure your existing RV toilet seat. Compare it to the information provided by the riser manufacturer to make sure the riser is compatible with your toilet seat. And one thing we saw was this—instead of adding just 2½ inches like the Thetford whole-toilet riser does, this one jacks your throne up five inches. For some, that could be a problem. We have visions of how to install a small trampoline in your RV bathroom to get access to the really tall throne.
And if your partner’s height is too different from yours
What about cases of toilet users who vary significantly in height? While adding a couple of inches of height might be just fine for a taller person, if your significant other is shorter, a riser might not work. Still, there might be a case of health creating issues with getting off and on the seat. What to do?
Here’s how one RVTravel.com reader fixed the problem: “I added a vertical handle in the corner [of the bathroom] where the two walls meet in front of us in the right corner. There are studs there that provide a secure anchor for the handle. I used a 12″ long, 3″ wide piece of corner molding to which I mounted an 11″ white plastic grip handle. We can grasp that as we rise off the toilet and it makes the effort much easier.”
Is an RV toilet riser worth the effort? For us, absolutely! Easing down to sit is much easier, and when it’s time for “liftoff,” getting a 2-inch jump on gravity can make a huge difference on those knees and other recalcitrant body parts.
Again, here’s a link to the Thetford toilet riser we used.
YOU MIGHT ALSO LIKE:
- Easy leaking toilet fix: Replace the ‘ball seal’ on your RV’s toilet
- Ask Dave: Where can I find the part to fix my toilet? I’ve looked everywhere
- An easy, quick way to fill your RV’s toilet bowl
- Letter to the Editor: Anyone else flush their toilet like this?
- Best toilet brush for RV bathroom
RVDT2876
Good article! I asked this very question of Dave not long ago. At 6’4″, I find RV toilets to be child-height.
Thanks for this article!
I installed the Thetford riser and found the new height much better.