

By Cheri Sicard
RV wheel bearings don’t ask for much, but they do need fresh grease. On a fifth wheel or travel trailer, repacking bearings about once a year helps prevent heat, failed seals, and brake problems.
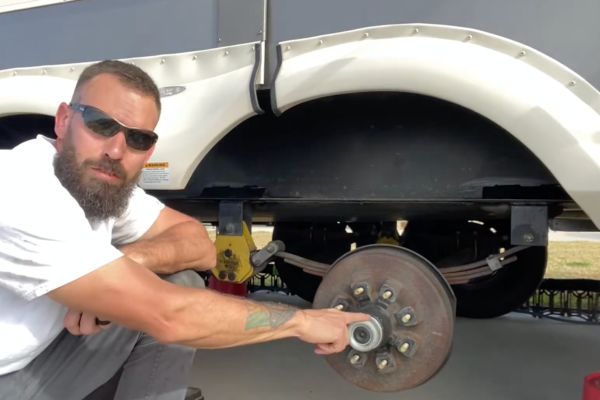
In the video at the end of this post, the Why Wait crew knocks out bearing service and a quick brake check before a long spring and summer trip out West, starting from Texas.
Why repacking wheel bearings matters for RV safety
Old grease breaks down over time. If a rear grease seal fails, grease can end up inside the brake drum and soak the brake shoes. When that happens, stopping power drops fast, which is the last thing anyone wants on a mountain grade.
The other risk is heat. Bearings that run low on grease can overheat, and that heat can lead to failures and even blowouts. Since the wheel is already off for this job, it’s also a good time to inspect the brakes and test the emergency breakaway system before hitting the road.
Jacking the camper up without making it complicated
Every RV is different, so the setup matters. On this camper, the job starts by loosening lug nuts while the tire is still on the ground. Then the camper is raised just enough for the tire to come about a half-inch off the ground.
This setup uses a hydraulic auto-leveling system. The other tire on that side stays on as a backup, so if a jack ever failed, it would only drop a short distance. Bottle jacks can also work, but the main point is to lift it as safely as possible for that rig and campsite.
Tools and supplies that make the job easier
Having everything laid out first keeps the mess and the missing parts to a minimum.
- Brake cleaner like CRC Brake Parts Cleaner
- High-temp grease like Lucas Red “N” Tacky Grease
- Gloves like mechanic disposable powder-free gloves, and lots of shop towels
- Brake sizing tool, like a Westward brake resetting gauge
- Seal puller like a grease seal puller tool
- Rubber mallet, flat screwdriver, pliers
- Breaker bar like a 1/2-inch drive breaker bar and a torque wrench like a 1/2-inch drive torque wrench
- New grease seals (ordering an extra seal helps), plus cotter pins
A bearing packer is optional, for example, a deluxe steel bearing packer.
One wheel at a time: removal, inspection, and cleaning
Parts should stay together per wheel. Bearings, washers, and hardware aren’t meant to get mixed across hubs, so tackling one corner at a time keeps things straight.
After the wheel comes off, the dust cap gets tapped off gently. Some hubs have grease inside the cap because of a zerk fitting, especially if someone pumped grease into the hub. Next comes either a cotter pin or a retention clip, then the castle nut. As the hub slides off, the outer bearing and washer can fall, so a hand stays ready to catch them.
With the hub off, the rear grease seal gets pulled and the inner bearing comes out. Bearings and races get inspected for pitting or discoloration. Old grease gets scooped out, then the spindle, hub, and bearings get cleaned with brake cleaner. An air gun doesn’t get used here, because brake dust is harmful to breathe.
Brake test, bearing packing, and reassembly
A quick brake test happens by pulling the emergency breakaway cable and spinning the jacked-up tire. It should stop right away if the system works. Brake shoe clearance can also be checked with a brake gauge and adjusted using the star wheel through the access slot, if needed.
Hand-packing bearings takes time, but it’s straightforward. Grease goes into the palm and gets worked into the bearing until old grease pushes out all the way around. The cone shape matters; the small end faces into the hub.
The inner bearing goes in first, then a new seal gets tapped in flush using a clean piece of wood (or a driver tool). The spindle gets coated with grease, the hub slides on, and the outer bearing, washer, and castle nut go on next. The nut gets snugged, then backed off about a quarter turn so the hub spins freely. Finally, the cotter pin goes back in, the dust cap taps on, and the wheel goes back on with lug nuts torqued to spec.
Repacking RV wheel bearings is messy, but it’s not hard. Done one wheel at a time, it’s a solid weekend task that also forces a close look at brakes, seals, and wiring.
Chris estimates about an hour to an hour-and-a-half per wheel once the setup is handled. Before the next long trip, that kind of routine maintenance buys a whole lot of peace of mind.
Watch the video below to see these steps in action.
RELATED
- Danger: Over-greasing your wheel bearings can cause serious safety hazards
- The truth about RV wheel bearings, plus maintenance tips
- Ask Dave: What grease to use to repack wheel bearings? Your opinion on Nev-R-Lube?
- Ask Dave: If wheel bearings are sealed, why do they need to be repacked every year?
RVDT2867
This article was about 5th Wheelers and TT.
How about RV Class C, what do you recommend?
Follow the maintenance recommendations from the manufacturer of the cab and chassis your class C was built on.