

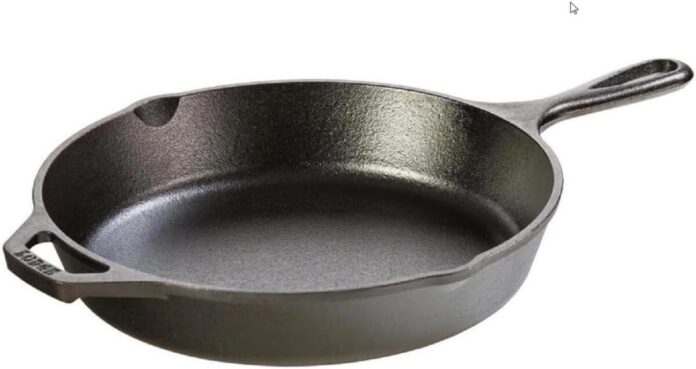
If you RV, you probably already love gear that’s rugged, multipurpose, and low fuss. That’s exactly why cast iron is a favorite in RV kitchens. It sears like a dream, works on a campfire or propane range, and with a little care lasts for decades.
Manufacturers and test kitchens praise cast iron for its heat retention, durability, and ability to build a natural nonstick surface through seasoning.
Great for RV life
Cast iron tolerates rough handling, works on open flame, induction (if flat-bottomed), and stovetop-to-oven recipes, so you don’t need a lot of specialty pans. That’s a space saver in your rig!
Cast iron is fantastic for high-heat jobs like searing steaks, frying bacon, making cast-iron skillet cornbread or biscuits. It’s also great for roasting vegetables and even baking a simple loaf of skillet bread or skillet pizza when space is tight. It’s also a safer nonstick alternative to PTFE-coated pans for folks avoiding chemical nonstick coatings.
The right way
A good seasoning (the polymerized oil layer on the metal) is what gives cast iron its nonstick properties and protects the metal from rust. If you strip or neglect that layer or allow the pan to sit wet, you’ll get sticky food, metallic flavors with acidic dishes, or rust.
Because RVers often have limited water and storage, humidity can be higher. Following efficient cleaning and drying routines prevents problems before they start.
Cleaning
While old lore said “Never use soap,” modern experts and manufacturers say a little mild dish soap is fine now and then.
What really matters is rinsing, drying, and re-oiling the surface so the seasoning is preserved. After cooking, while the pan is still warm, wipe or rinse out loose bits with a little hot water and a non-scratch brush or pad.
For stuck-on food, pour a handful of coarse kosher salt into the warm pan and scrub with a paper towel or cloth (salt scours without aggressive soaps). If a stubborn spot remains, a quick scrub with a firm scrubber and a splash of water will work.
Rinse and then dry thoroughly. Use a towel first, then heat on the stove for a minute to evaporate any lingering moisture. Finish by rubbing a thin layer of oil over the cooking surface.
These steps minimize water use and keep seasoning healthy, which is perfect for small RV sinks and limited fresh water.
If your pan is super gummed up, a short soak (a few minutes) in hot water is acceptable. Just avoid long overnight soaks as that invites rust.
If the seasoning is badly damaged or the pan has rust, you can use mild dish soap and a firm scrub to strip the skillet to bare metal and then re-season.
For serious rust, soaking in a 1:1 solution of distilled white vinegar and water can loosen corrosion. Be sure to check often (every 15–30 minutes) and stop once the rust flakes away. Then wash, dry, and re-season. After any heavy washing that removes seasoning, rebuild the seasoning by applying a thin film of oil and heating (stove or oven) to polymerize it.
Season your cast iron
Seasoning is simply polymerized oil that forms a hard, slick layer. To season, wipe the pan clean and dry. Then, rub every surface with a thin layer of a neutral oil (vegetable, canola, or a cooking oil recommended by the pan maker. Follow with heating the pan in the oven or on the stovetop until the oil smokes a bit and bonds to the metal.
Repeat the seasoning process once or twice for a new or freshly stripped pan. Frequent cooking with fats also continuously improves seasoning, so daily use on the road will help.
Tips for using cast iron
- Preheat the pan before adding food. Cast iron takes a little longer to heat, but it keeps heat very well, giving better browning and searing.
- Avoid sudden extreme temperature shocks (like running cold water over a red-hot pan) to prevent warping or cracking.
- If you plan to cook long-simmering acidic dishes (tomato-heavy sauces, long-simmering vinegar-based reductions), consider using enameled cast iron or stainless steel. Or keep the acidic stage short. Well-seasoned pans tolerate short acidic contact, but prolonged simmering can change flavor and wear the seasoning.
- For campfire cooking, keep the pan clean of soot on the outside and re-season more often if flame cooking strips the surface.
Storing cast iron
Store pans dry and with airflow. Nesting is fine. Place paper towels, thin towels, or cork trivets between pans to protect the seasoning and absorb moisture.
If you use lids, prop them slightly (a folded paper towel works) so air can circulate.
In damp climates or if you’re storing your cast iron for a while, rub a thin coat of oil on the surface before putting it away. This can help block moisture.
For small galley setups, a pegboard, hanging rack, or a single open shelf keeps pans accessible and lets them air out between uses.
RV-specific do’s and don’ts
- Do heat and dry the pan after washing to avoid rust.
- Do use salt scrubs and stiff brushes to save water.
- Do keep a tiny bottle of neutral oil handy for quick post-wash seasoning.
- Don’t soak overnight or leave pans wet in storage.
- Don’t panic if you find rust — it’s fixable.
- Don’t assume all acidic dishes are off limits. Short cook times and well-seasoned pans are forgiving. But if you’re making a long-cooking tomato stew in a small pot, enameled or stainless steel may be the better choice.
Do you use cast iron when RVing? Tell us about your favorite cast iron recipe using the comments below.
RELATED
- Lodge cast iron scrapers: Small gadget, big results
- Buying cast iron: What to look for in a cast iron skillet
- How to make the best steak ever in a cast iron skillet
- How to cook a perfect fried egg in a cast iron skillet
- Cast Iron Care: How to clean and season cast iron
RVT1231

I love the cast iron for some dishes at home; however, tend to leave them at home in favor of lighter weight, non-stick, cookware in the RV. I do not cook over an open fire, my knees cant take the up and down.
My knees aren’t the greatest either, which is why I cook using a tripod with a cast iron grate over the campfire. This raises my cooking to a comfortable level. When allowed, all of our meals are cooked in cast iron over a fire.
The same principles apply to the currently popular propane heated cast iron topped griddles.
I don’t use cast iron in my home or RV. It’s way too much bother and weight.
The part of cast iron pans and dutch ovens. I am a 1800s reenactments and use a lot of cast iron with very little water. After cooking wipe scrape with a spatula and wipe out as much stuck on as you can. Put in a little water and heat to boiling take off heat and use a cast iron pot scrubber and then a little water to rinse. Put back on heat to dry. While pan is still warm use 100 percent bees wax instead of oil. Take a paper towel and wipe bees wax around the pan and let cool. Cooking oil gets sticky and can turn rancid after long period of time but bees wax will not. You can get bees wax at most Amish and Mennonite Stores. Thanks and Happy cooking
I have lots of cast iron and really like it. But lately I have switched to lighter weight for camping. I have a carbon steel 10 inch skillet which can be seasoned or not, it has a lid and bag to store it in; a hard anodized aluminum stovetop dutch oven (it won’t poison me) and a small Stanley pot for heating water, etc. I do like stuff that cools off quicker than cast iron, so i can be off walking the dog or on the road. I have another ball burnished aluminum thing that I cook lots of stuff in.