


Dear Dave,
I have read several horror stories about water damage from roof leaks. I’m interested in a 2016 Thor motorhome and would like to know what to look for. —Terry, 2016 Thor Challenger 37KT
Dear Terry,
If you are looking at purchasing a used unit, it is important to have the entire unit inspected by a trained RV technician, as what looks good outside could be an expensive repair inside.
Due to exposure to the elements, temperature changes, and road vibration, sealants can fail to keep moisture from penetrating into the roof and sidewall and causing damage. The various materials used on the roof and front caps expand and contract with temperature changes, and the sealant can be pulled apart and even crack when it gets brittle.
It is recommended to visually inspect all the seams and sealants not only of the roof to sidewall and caps, but also any cutout such as vents and skylights. Once a moisture leak is detected inside the rig, it is typically an expensive repair. You have no guarantee the previous owner took the steps to maintain it properly.
Exterior inspection
Visually inspect the sealant on the roof for gaps or separation and any soft spots on the roof itself. Any cuts, tears, or holes in roof material could be an issue now or later on. Typically, self-leveling lap sealant is used on the horizontal seams such as the roof to front cap around vents.
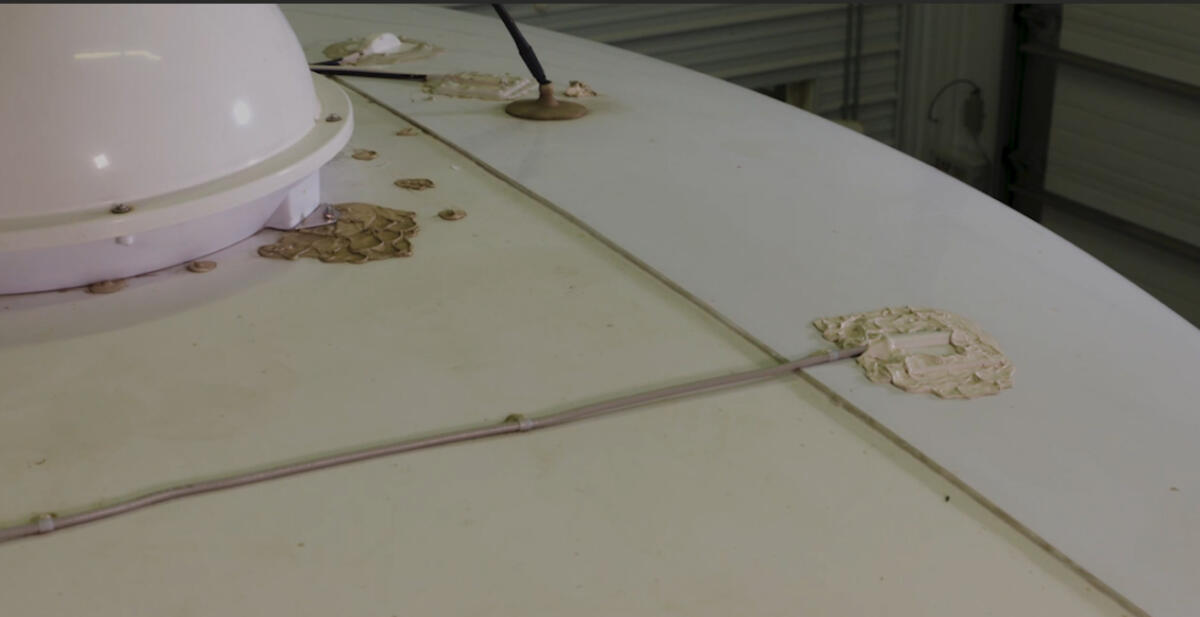
You may need to clean the roof first to get rid of any lingering mold, mildew, or dirt that might hide cracks or pinholes.
A soft spot would most likely indicate moisture has penetrated and soaked into the wood substructure, making it weak.
Take caution when walking on a roof as some do not have the structure to support the weight. You will need to use side scaffolding or use a long 2″x6” to span across an area. Stay clear of cut out areas such as vents and skylights.
Visually inspect the sidewall for blistering or delamination around windows, slide room cutouts, and at the floor level.
Interior inspection
Inside, open overhead compartments and look for stains in the headliner material or wrinkles in wall coverings. Mold and mildew could be signs of a moisture leak. However, it could also be due to condensation.
Extend all slide rooms and look for moisture leaks around the opening or a soft floor at the corners. This could be a very expensive repair!
You can also use a moisture meter to identify wet material inside the sidewall or roof material. It will send an electrical pulse and measure moisture. You can find one on Amazon here.

How to physically check for leaks
The best method to check for water leaks is to use a device called Sealtech, which draws in air from a roof vent and pressurizes the rig from the inside. Then douse the outside of the rig with soapy water and look for bubbles, just like finding a nail in a tire. Unfortunately, this device costs several thousand dollars and is not a DIY-type of procedure. It would be best to take it to a service center that has this, or hire an RV inspector.
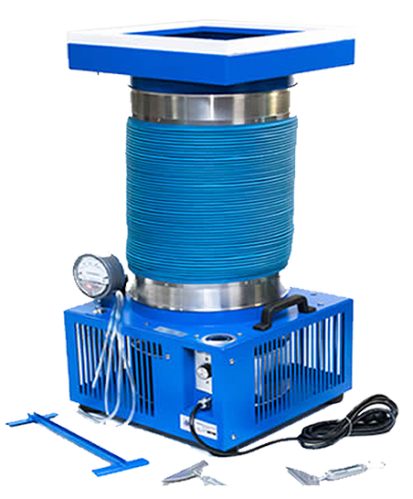
You can do it the old-fashioned way and soak the roof and sidewalls with a garden hose and go inside and visually inspect the inside with a flashlight looking for moisture. Keep in mind, water will travel through hollow tubes in framework, so the entry point might not be the same as the visual inside point.
You might also enjoy these posts from Dave
- Can a water leak be fixed without a whole new roof? Is it even worth fixing?
- RV roof leak damage estimated at more than rig is worth. How hard is it to repair?
- What advice would you give to someone buying a used RV?
- My slide room floor is rotten from water damage. How can I fix and waterproof it?
- There’s a water leak in my bedroom slide. The seals look good, so now what?
- Should I use a pressurized leak finder to find leak in RV’s sealed underbelly?
DAVE HAS ANSWERED MORE THAN 1,000 readers’ maintenance and repair questions. Read a directory here. There is so much to learn!
Dave Solberg is a leading expert in the RV industry and the author of the “RV Handbook.”
RVDT2746
