Courtesy Dicor Products
Protecting your RV roof with a coating specially designed for the type of roof material you have is one of the best investments you can make in extending and refreshing the look of your RV roof. Your RV roof is exposed to many elements, including sun, rain, hail, snow and wind-blown debris, along with atmospheric conditions that can range from freezing to dry desert heat to humid swamplands.
 Whatever conditions your roof is exposed to, the right coating system will help give your roof a brighter, cleaner look over a longer period of time and enhance the value of your RV investment.
For EPDM roofs, a roof coating can help make it easier to maintain a great looking roof. It does this by adding another critical layer of protection, while reinforcing seals against leaks and making it harder for discoloring dirt and mold to stick around.
For fiberglass roofs, a proper coating provides another barrier to the sun and weather, elements that can over time produce discoloring and spider cracks (or crazing). Dicor Product’s coating also produces a brilliant white finish that aids in reflecting sunlight to reduce heat absorption.
For metal roofs, products like Dicor Products’ Elastomeric Metal RV Roof Coating also provide a brilliant white finish to aid heat reflection, while reducing environmental and weathering effects on the finish. Used in conjunction with Dicor’s Rust Inhibitive Primer, the potential for corrosion is also reduced.
The bottom line: if you want to restore your roof to make it look like new again, or if you simply want to maintain and extend your roof’s good looks and investment value well into the future, you should look into a roof coating system designed for your particular kind of roof.
[Editor’s note: This information is provided by roof membrane manufacturer Dicor. While there’s plenty of “promotion” for their product included, some of the information and principles may be of assistance to our readers.]

 Many national parks are often by national forests or Bureau of Land Management (BLM) lands. These are great alternative camping options. Use their campgrounds for first night camping with the goal of securing a national park campsite the next day.
 We were trapped at an RV dealership in New Mexico for two weeks because it was a cold winter and our heater would not stay running. The mechanic pulled it out once and said it worked fine after bench testing it. He then sold us a new propane regulator and filled our coach tank with a drying agent to the tune of three hundred dollars. The heater would still not light, and we were then told we had electrical problems in our converter and the furnace was not getting enough juice.

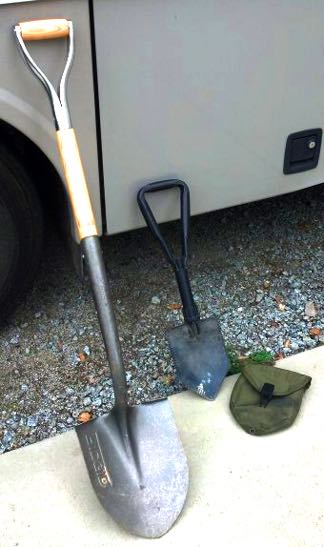 It’s almost always a case of having traveled into soft terrain. Mud, loose dirt, or sand have swallowed up the tires — more throttle just means more stuck. Tow trucks are hideously expensive and many of them won’t venture onto dirt roads anyway. The seemingly desperate situation doesn’t have to be so. A simple shovel can usually extract your rig from its predicament.
 But first things first. Camping at Wal-Mart is not “camping.” It’s not about pulling out the BBQ or even extending the slideouts. And it shouldn’t be about using automatic levelers, which can damage the surface of the parking lot. What it IS ABOUT is pulling into a quiet area of a Wal-Mart parking lot, turning off your engine and blending into the environment. Keep lawn chairs inside and don’t extend an awning. The idea is to sleep the night and then move on. Wal-Mart is not a campground. It’s a retail store that happens to be okay with RVers staying in its parking lots. It says so on its corporate website.
 As much as you think you can perform certain functions as fast now as you ever could, it’s just not true. One area that it doesn’t pay to take chances or cling to old beliefs is our ability regarding safety.

.jpg) Start with a coated wire rack that is the width of the bottom of the sink you’ll be using. You can buy a new rack, but we used one we found for 39 cents at a thrift store. If the rack is too long to fit the sink, use a wire cutter to trim one end to the length you need.
Start with a coated wire rack that is the width of the bottom of the sink you’ll be using. You can buy a new rack, but we used one we found for 39 cents at a thrift store. If the rack is too long to fit the sink, use a wire cutter to trim one end to the length you need.