

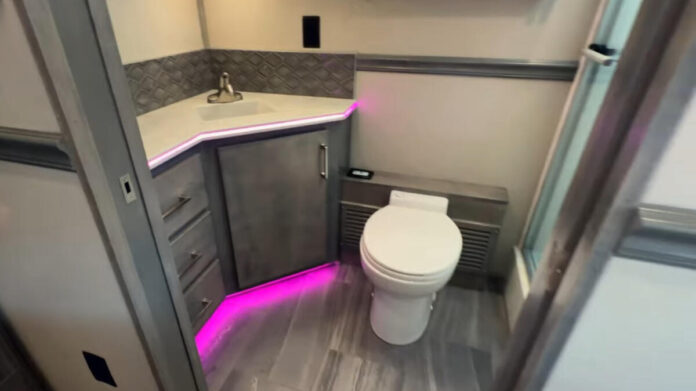
“It’s a cave,” an RV friend complained. “Once the bathroom door is shut, the gloom descends.” This RVer needs some tips to brighten up the RV bathroom.
Upgrade lighting
Whether you’re a weekend warrior or a full-time nomad, switching to LED lighting can make a world of difference. LED bulbs provide a much higher light output, enhancing visibility and brightening the area. With significantly lower heat emission, LEDs help prevent issues like discoloration of light covers and reduce the risk of overheating.
When it comes to transforming your RV’s lighting, you have two basic options:
Bulb replacement
For many RVers, the simplest solution is to replace the old incandescent bulbs with LED alternatives. Most RV light fixtures are designed for one of two types of bulbs:
- Push-in bulbs: These bulbs have a wedge-shaped base that fits snugly into the fixture.
- Twist-and-lock bulbs: These bulbs twist into place, ensuring a secure connection.
LED versions of these bulbs are widely available. When swapping them out, it’s important to handle the LED bulbs carefully. Always grip them by the main body rather than the lighted parts to avoid damage. And while LEDs typically last a long time, it never hurts to have a few spares on hand.
Fixture replacement
If your RV’s existing bathroom fixtures look dated or have suffered from discoloration over the years, you might consider upgrading the entire fixture.
New fixtures not only incorporate the efficiency of LED technology but also add a modern aesthetic to the bath’s interior. With a variety of styles available, you can choose fixtures that perfectly match your RV’s décor and enhance its overall feel.
Paint
If your RV bathroom walls or sink cabinet is a dark color, consider repainting. Remember that white isn’t the only go-to color. Any light, pastel tone will brighten and lighten the space.
Reflections
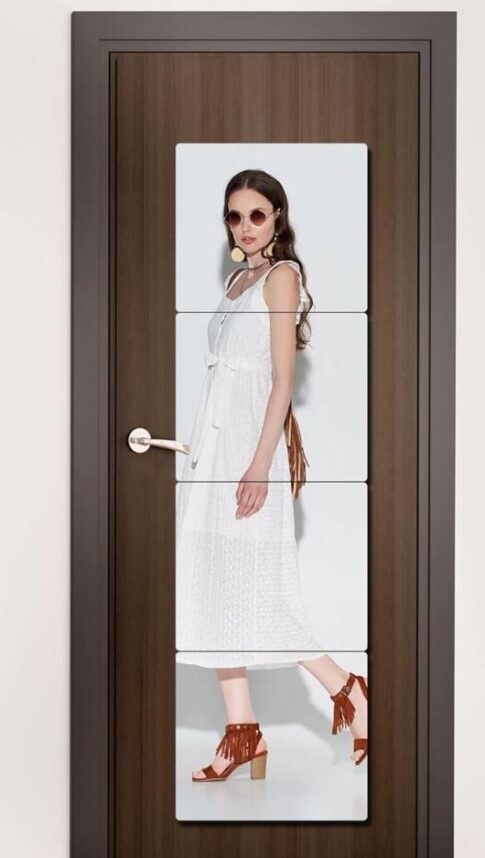
As most decorators will tell you, a mirror added to any space will reflect light and help the area appear larger. I was a bit skeptical about adding a mirror to our RV bathroom—too afraid of breakage!
Then I discovered this unbreakable mirror on Amazon. Actually, it’s four separate mirrored sections, so you can use however many fit into your small space.
If your RV bathroom lacks wall space, place the mirror on the inside of your RV bathroom door. The mirror panels are lightweight and easy to install using the two-sided stickers that are included.
Add color without paint
Another tip to brighten up the RV bathroom is to add some color. Here are two quick and easy ways to accomplish this.
Linens
 Look for brightly colored towels. Consider yellow or light pastels. If you prefer a more subtle pattern, check out any of these towels on Amazon.
If you’re unable to find what you like, consider looking for beach towels, which usually feature bright, bold patterns and colors.
Shower tip
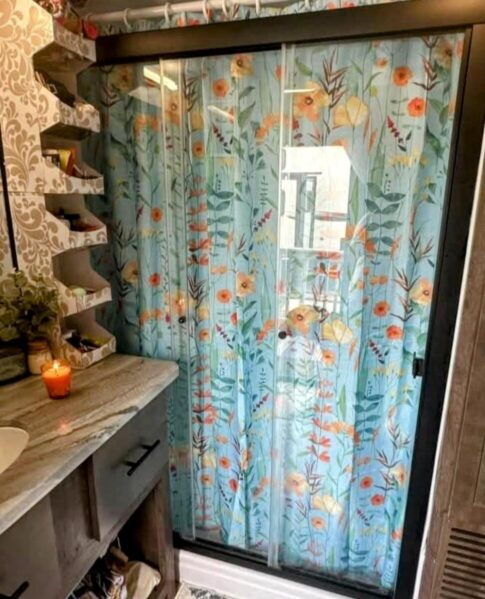
I found this idea on Facebook. It was posted by Dahaf Dahaf a few days ago, along with the photo. This clever RVer used an expandable shower curtain rod to mount the semi sheer shower curtain inside the shower enclosure.
The shower curtain helps to keep the shower glass clean and adds a pop of bright color to the space as well!
How about you?
Can you share your own tips about ways to brighten up the RV bathroom? Please use the comments to do just that!
RELATED
- Easy ways to declutter your RV bathroom
- Best toilet brush for RV bathroom
- Boondocking RV bathroom tips: Stay another day (or week) off-grid
##RVDT2609

Gail, what paint do you recommend for RV walls, especially the bathroom?
A good quality latex paint worked well for me. I used Sherwin Williams after a base primer coat.
Thank you!
While the wood is dark, the walls in our two TTs are a light shade. There is lots of light from the overhead lights. We have the opposite problem, too much sunlight via the skylight. Hot sunlight. We took the advice found here on RV Travel to add a window cling film to the interior side of the skylight. The two toughest parts of the project: getting the liner off the cling material and accommodating the curved skylight panel. You have to overcut the cling and carefully trim with a very sharp razor blade.
Rv bath is located between the kitchen & bedroom off an angled hallway. It is relatively large compared to most I’ve seen. I put a string of blue lite LED’s between the skylite panels with a switch. Great nite lite. Also, amber LED’s above the shower/tub door rail on a separate switch. Changed incan. bulb in ceiling lite with LED – however it is too bright for me – so it too is on a separate switch! I hid the wires to the switches in wire mold. Mounted the switches, on the bedroom side, above the sliding bedroom door. Full lite selection for your mood or needs. Also new sink and 310 toilet assy’s and faucets as well. A full length wall mirror to the wall too! Class A. 34′ Winnie Vectra.
Wow! Great upgrades! And quite a lot of work. Thanks for sharing your good ideas!
I cut white fiberglass reinforced panels (FRP) to fit the four walls of our wet bath. Really brightened and dresses up the space.
Thank you for the tips, Gail! We do have a full-length mirror attached to the back of our bathroom door. DW added a piece of art (some animal) to a little-used part of the bathroom vanity, which is attractive and held in place by “earthquake putty,” or something else. It holds things in place during travel! Have a great week and safe travels!