
By Dave Solberg
Hello Dave,
Love your RV help! I hear so much about inspecting your RV’s sealants. Even though ours is under a roof most of the year, I have already had to reseal some of the seams on the roof with self-leveling sealant. I also see some of the caulking down the slideout seals looks like it needs to be redone.
Big question: What sealants do you recommend for each area of the RV? And what are the specific areas to look at? Also, along the edge of the roof, should the trim pieces be removed and resealed?
We are pretty handy and don’t mind going on the roof, but we don’t want to do anything that’s unnecessary.
Thanks so much in advance. —Pam, 2019 Flagstaff 832IKBS
Hi Pam,
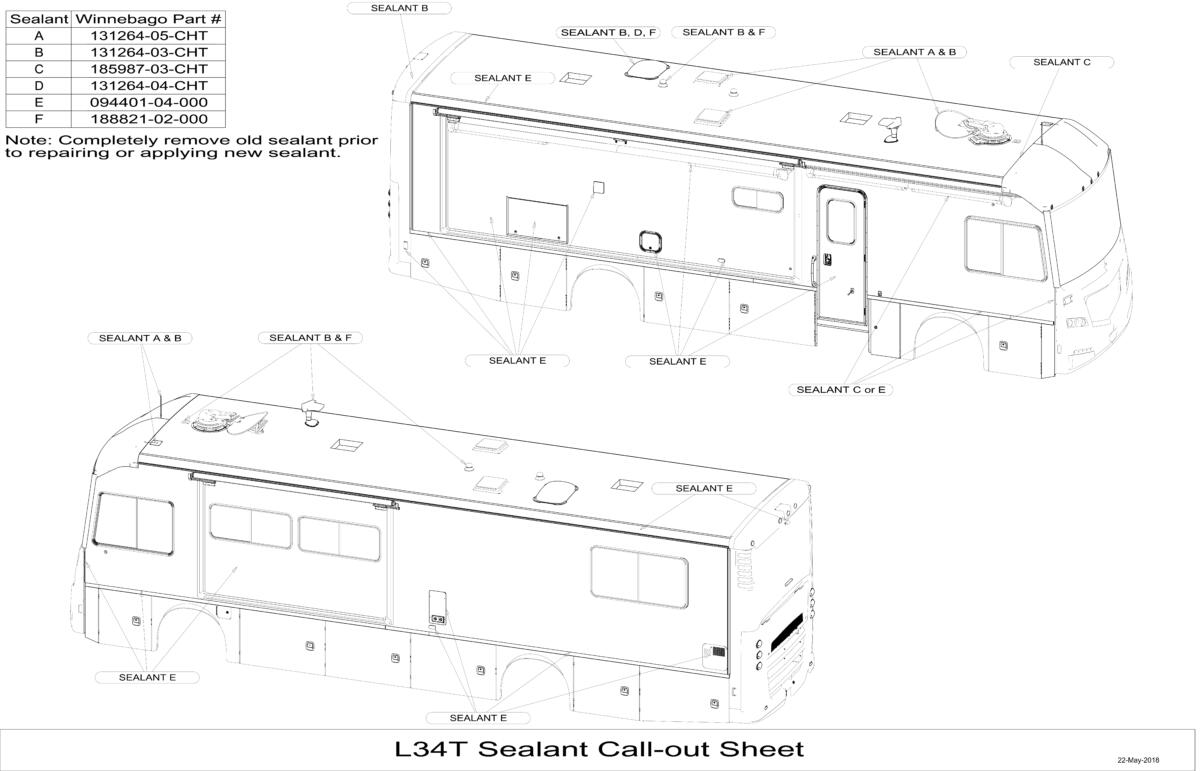
I get this question all of the time, especially during my seminars at RV Shows. What would really make it simple is if every RV manufacturer provided a sealant chart like Winnebago Industries does. You can go to it and find the make, model, and year of your RV and download a recommended sealant chart complete with part numbers!
Unfortunately, nobody has the diagrams like Winnebago, such as 3D parts, wiring, plumbing, and sealants. However, your 2019 Flagstaff is a traditional travel trailer with a one-piece fiberglass sidewall skin, hard-molded fiberglass front cap, and a rubber roof membrane.
I cannot find the type of roof material; however, it would most likely be either EPDM or TPO. You can tell by removing an interior roof vent shroud and look at the extra material folded into the opening. If the underside is black, it is EPDM; if it is the same color as the top, it is TPO.


Different types of sealants
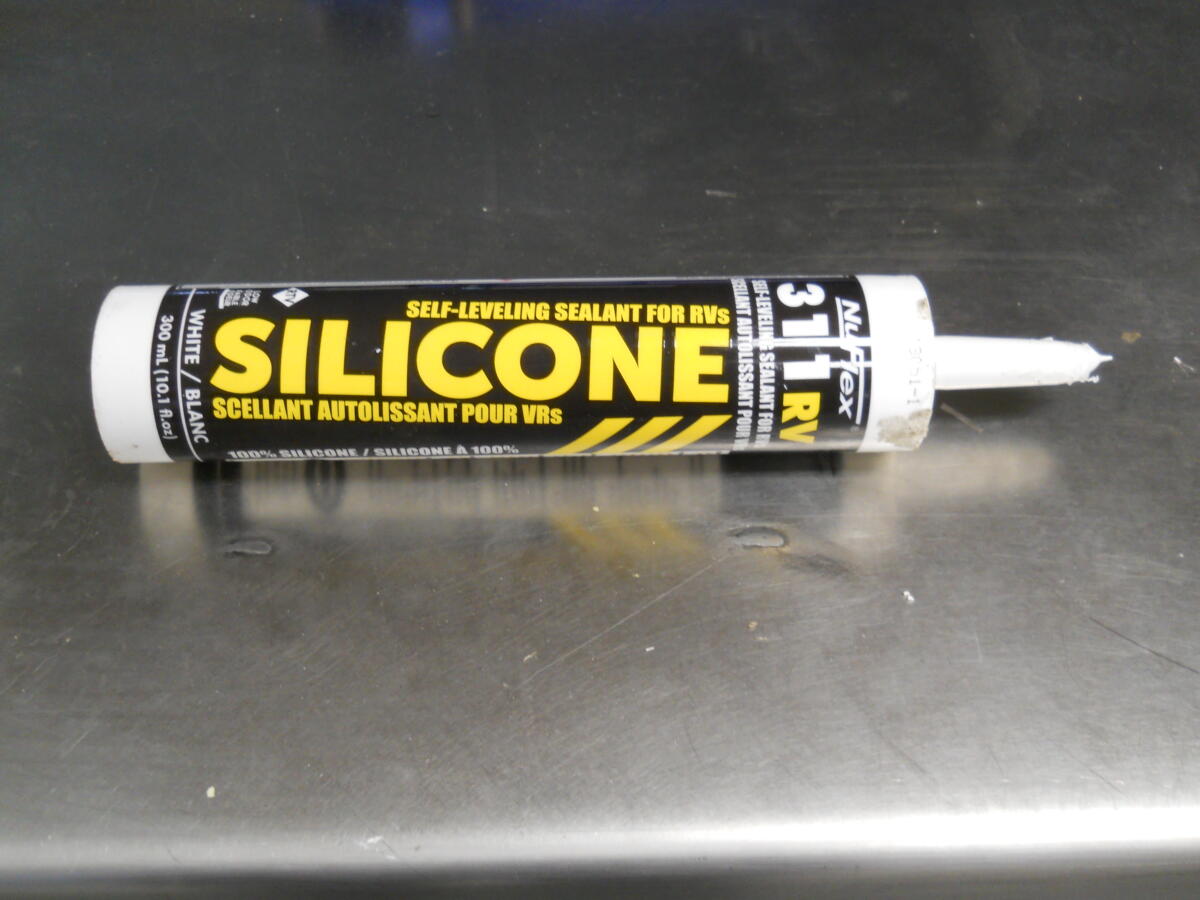
There are different types of sealants used, the first being a self-leveling lap sealant. This is used on the roof on areas you want the sealant to flatten out or become level, such as around roof vents, the hard front cap to rubber membrane seam, and others. It is important to get a sealant that is compatible with your rubber membrane, as not all silicones will stick to every surface. Winnebago used NuFlex 311 for the fiberglass roof for years. It bonds to fiberglass and the PVC plastic of the roof vent edge.
“J” channel joint
On the roof of your rig, you will want to inspect the front cap to roof material joint as the hard fiberglass front cap can literally move with road travel and temperature changes. Most manufacturers use a “J” channel that allows the two materials to overlap and expand and contract without creating too much of a gap. The sealant moves with them to protect the seam from moisture penetration.
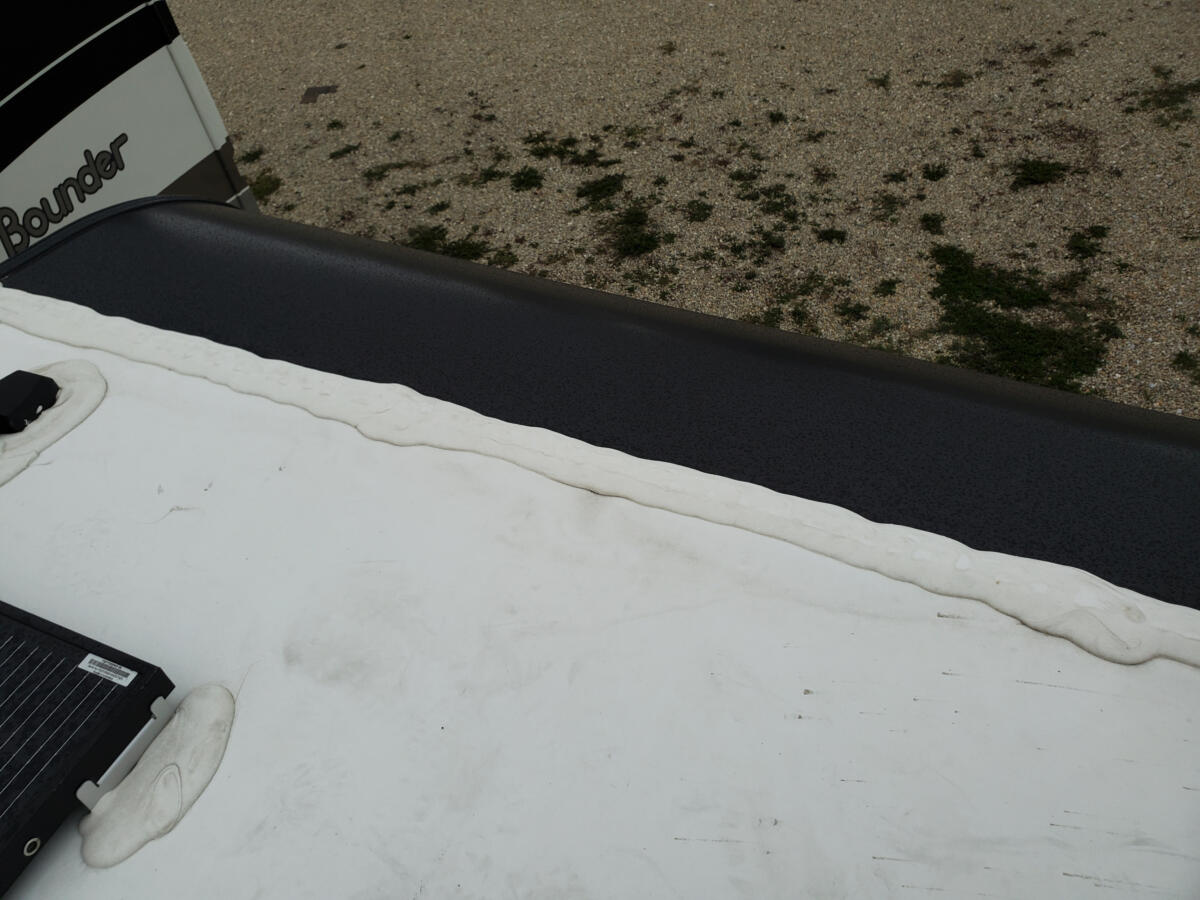
This is a photo of a typical seam with the “J” channel underneath and a good bead of the self-leveling lap sealant. Inspect it at least twice a year. If you see any cracks or separation, it is a good idea to use a heat gun on low and a plastic putty knife to clean off any bad sealant.
Do not get the gun too close as you will burn the material. I have tried a hair dryer, but it does not get hot enough to soften the sealant, and overheats quickly when used over a few minutes. You don’t have to get it completely clean, just fairly level and the bad stuff off. Also, check the edges to make sure it is still sticking to the surface.
You will notice this same sealant used on anything coming up through the roof such as sewage and other vents, and anything mounted to the roof such as solar panels and antennas. These should all be checked, as well.
Roof-to-sidewall joint
The roof to sidewall joint looks to be a traditional sharp-edge travel trailer design. It has the rubber membrane coming to the edge and an aluminum trim piece joint from the roof to sidewall. Some manufacturers wrap the rubber membrane over the edge with a curved design, and the awning rail secures it to the sidewall. This seam also needs to be inspected and have the same procedure as the front cap.
Typically, RV manufacturers use a putty-like tape called butyl tape under the trim and then cover it with self-leveling lap sealant. You will see a little of the butyl tape ooze out somewhat. This is typical and can just be trimmed off and apply a small amount of self-leveling sealant. I would not remove the trim unless you see large gaps between the trim and roof material.
The roof air conditioner has a foam gasket between the base of the air conditioner and the roof which is compressed to create the seal. No additional sealant should be used as the front drip pan has holes for the condensation to run out. Adding any sealant to this would create a block or dam and force the water into the roof. It is recommended that you check the four interior bolts holding the roof air conditioner once a year to ensure they are tight and the foam gasket is compressed.
Seals on the side of the RV
On the side of the unit you will have a seal at the four corners with the front having the hard cap at the top. It typically has butyl tape underneath and a very light bead of a non-leveling sealant. It has the consistency of toothpaste, as you want it to stay and not sag down the side. This is not applied as thick as it will sag initially when applied. But, more importantly, it will attract dirt and grime and the larger application will look horrible in no time.
It looks like your rig has the hard cover on the entire front rather than just a top cap, so I doubt there are any trim pieces between the cap and sidewall. Just inspect the seam similar to the roof-to-sidewall joint and use the non-sag sealant.
I am not sure what “slideout seals” you are referring to that have caulking. The seals I am familiar with are rubber bulb-type seals. They are either applied to the sidewall and roof flange with adhesive backing or “pinched” to the slideroom opening frame.
If it is the metal trim around the opening of the sidewall, then it would most likely be the butyl tape underneath and the non-sag sealant. These vertical seams can be cleaned with the same heat-gun method described earlier. I would recommend conditioning the rubber seals around the slide room with 303 Protectant or ProtectAll.
Window seals
The windows will have butyl tape between the window frame and the sidewall, and some use a silicone over the top called a “cap seal.” This is not needed if the window is installed properly and the frame is tight. The cap seal just collects dust and dirt and looks bad, in my opinion.
Check the underbelly
I would also recommend checking the underbelly of the unit, especially inside the wheel wells. Any separation of the sidewall to floor or a rip in the underbelly fabric can be a major repair when driving in rain and the wheels throw water.
One last area to visually inspect are the clearance lights, especially on the front cap. If the lens is cracked or the base is not sealed, a driving rain will force water into the front cap of your rig. This can be sealed with a common silicone designed for outside use such as windows and doors.
RELATED
- What is the scheduled maintenance for RV roof sealant? How hard is it to replace?
- Should I put a coating on the roof of my brand-new 5th wheel?
- RV’s corner trim is separating. What adhesive should I use to fasten it?
- Can I use silicone to seal the gap under my Class A windshield?
- Should I use Flex Seal to protect 2-year-old RV’s roof?
- Can I use something besides butyl tape for sealing an RV window?
Dave Solberg is a leading expert in the RV industry and the author of the “RV Handbook.”
Read more from Dave here.
HAVE A QUESTION FOR DAVE?
Send your inquiries to him using the form below.
RVDT2689
Dicor on EPDM is very labor intensive. In the Southwest, I had to renew it about every 6 months. It develops tiny cracks that pull water in through capillary action. It also has unhealthy solvents.
I’ve mostly switched over to Eternabond tape. I have Eternabond along a roof edge that is 11 years old and still in good condition.
Around the vents, four strips stopped the leaks every 6 months.
When it eventually wears out, I will simply remove it with a heat gun and replace it with more.
The labor savings, avoiding chemical exposure, and elimination of leaks every few months has been great.
Don’t void your warranty, for what it’s worth, but consider trying some Eternabond. It has been a game changer for me.
Totally agree with you. I’ve been using Eternabond tape on all my rv’s since the nineties. I’ve never had a leak anywhere that I have used Eternabond. It has certainly stopped a few leaks that I had prior to using the tape. I’ve had several motorhomes over the years and the first thing I do is tape the front and rear caps at the roof seams and vents.
“It is recommended that you check the four interior bolts holding the roof air conditioner once a year to ensure they are tight and the foam gasket is compressed.”
I don’t know that one wants to crank the AC bolts “tight” or fully compress the foam. Newmar recommends 50-60 INCH pounds of torque. That’s not a lot! Enough to compress the foam gasket (which is a dense foam, if it is quality material) but not squash it flat.
I guess, as always, get the specs from your manufacturer and follow them.
I am always concerned about using any sealant that mentions silicone because of all the warnings cautioning against using silicone on an RV because “nothing will stick to cured silicone, not even more silicone.” To make it more confusing many RV websites and writings use the word ‘silicone’ instead of the more generic term ‘sealant.’ Can NuFlex 311 be applied over old NuFlex 311 without having to remove all of the old?
Thank you for so carefully discussing the different areas and associated type of sealant, Dave! Have a great day and safe travels!