If you find yourself wondering, “How do I clean and prep the RV roof sealants and surface before resealing with Alpha or Dicor self-leveling sealants?” then join me as I give you a quick rundown on how to prep and clean the roof before sealing it with RV roofing tools and products that I use at my repair shop.
Getting your RV roof ready to be resealed
First, start by sweeping or blowing off anything loose on the roof surface.
Once the surface is clean from debris, you can wipe down the area with an Acrysol body degreaser. Acrysol helps remove any of the old dirt and oils from the roof and sealant surface. This will not leave a film or residue on the surface, allowing the new sealant to bond to the surface of the roof and the old sealant. I like to use terry cloth towels or paper towels when cleaning the sealant surface, which helps to remove dirt and oils.
If everything is secured properly and you are ready to begin the resealing process, do not forget to double all the moldings. This is your time to add additional screws or trifold rivets.
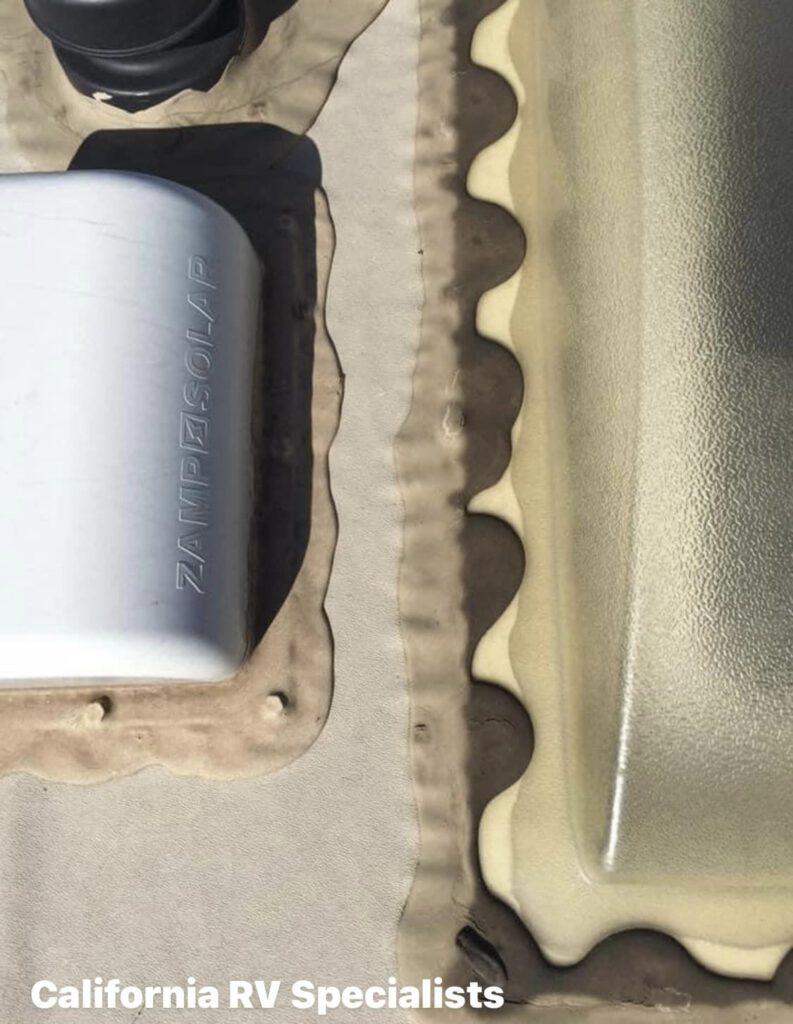
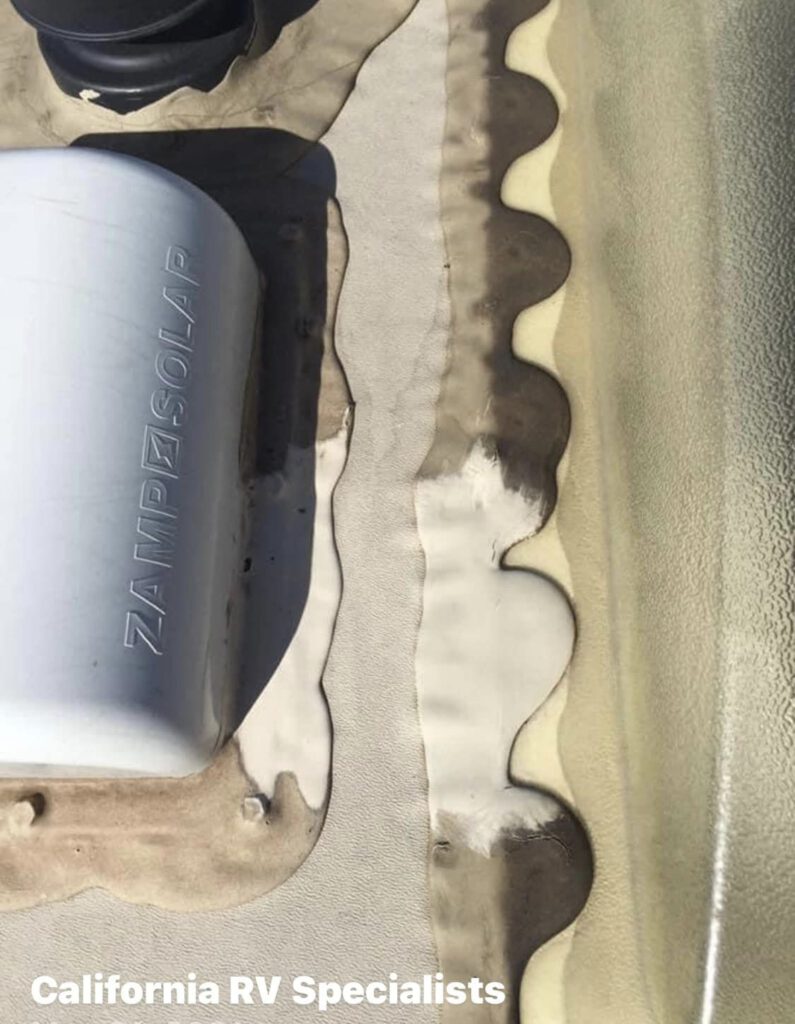
You will notice in the pictures below that the dirty roof sealants are now white again. Once you have the roof and sealant surface clean as you can get it, you can then start the sealing process with the lap seal or non-sag sealants.
Examples pictures: Notice how dirty the sealant was versus the white clean area of the sealant?

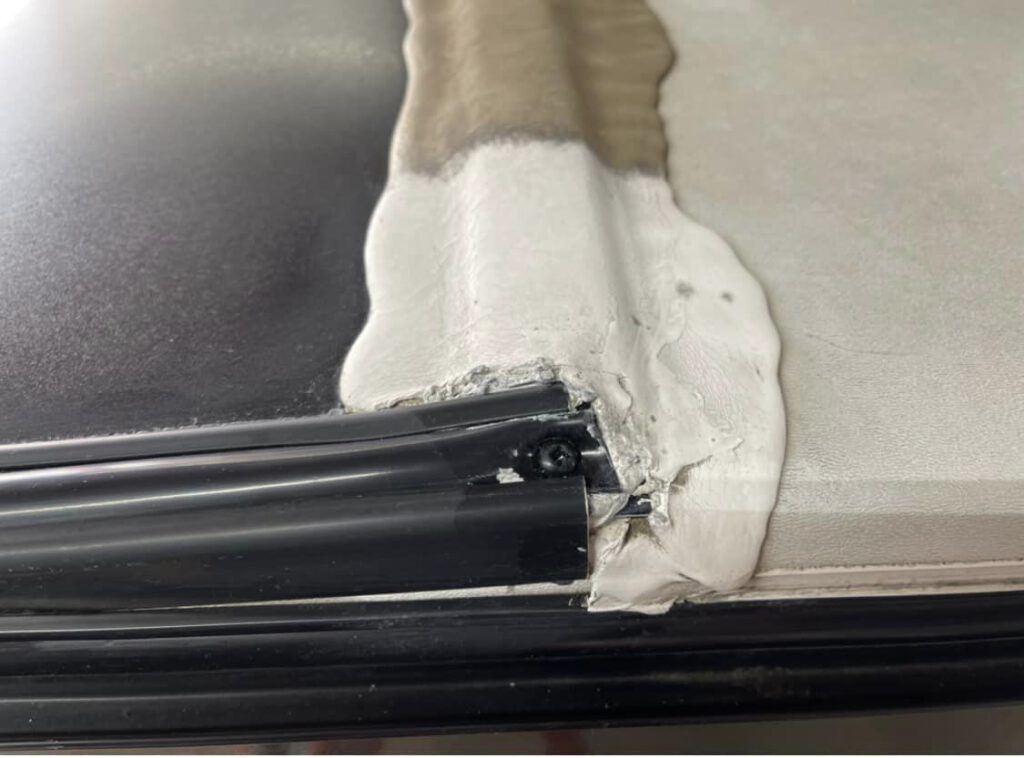
In the shop, fixing loose molding
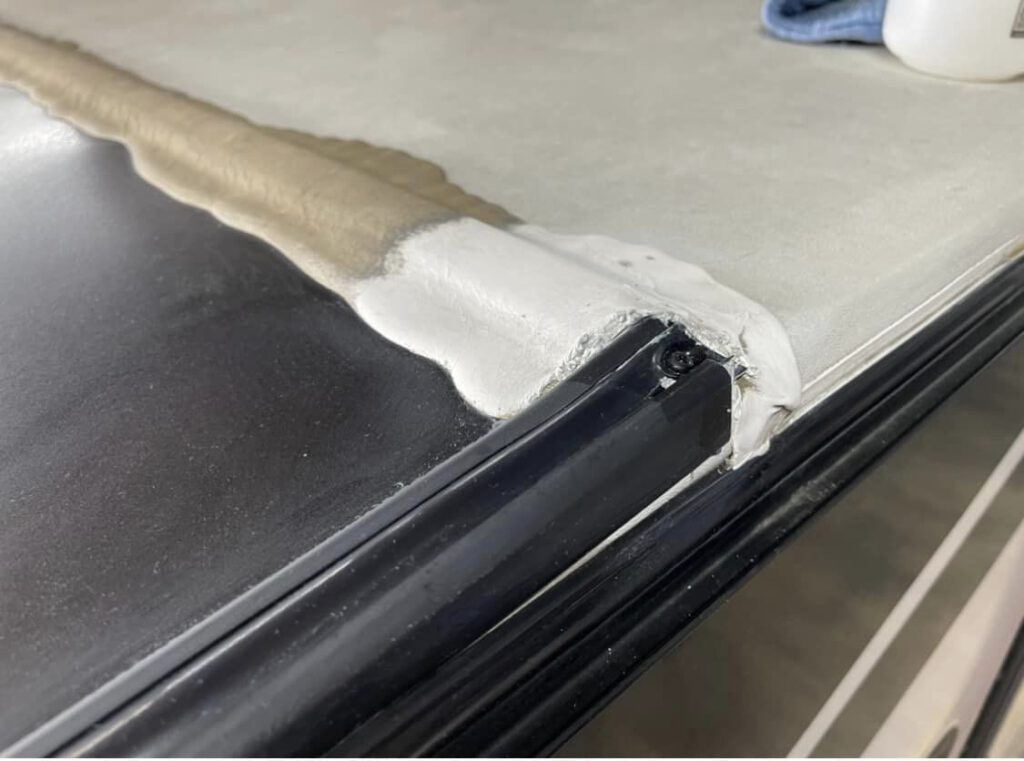
The molding was coming loose on both sides, which caused the side sealant to separate on side seams, around the gutter and at the roof line edge. You can see the gap difference from the moldings from the first picture to the left to right as the last picture reflects how much it tightened back down in place.
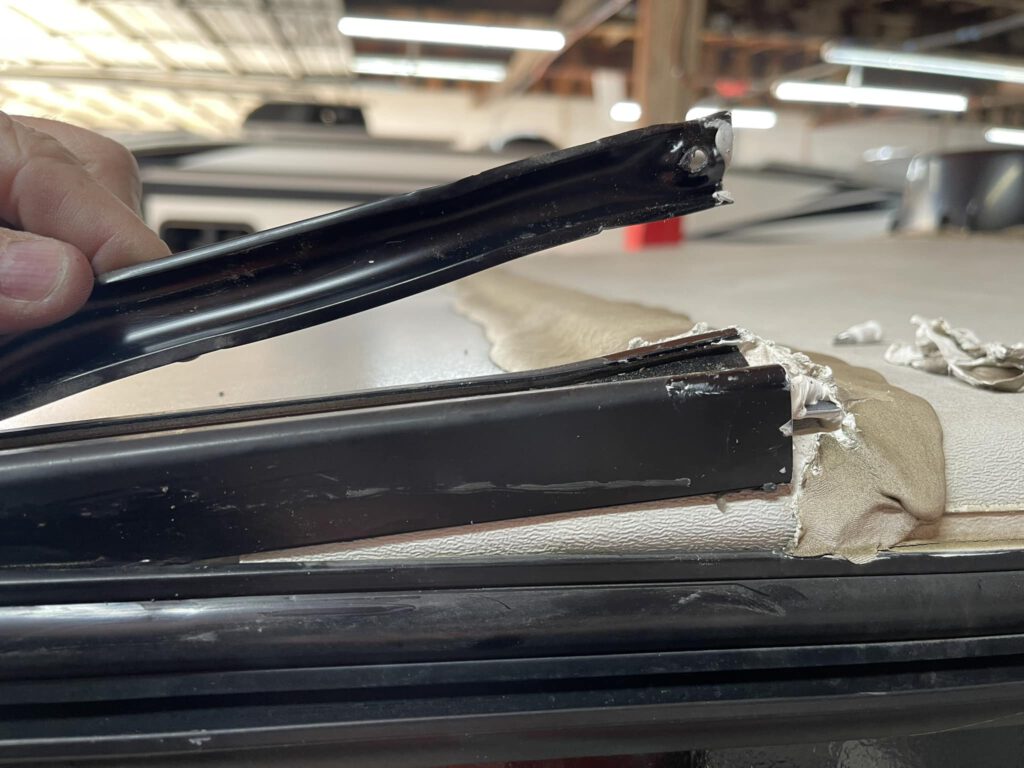
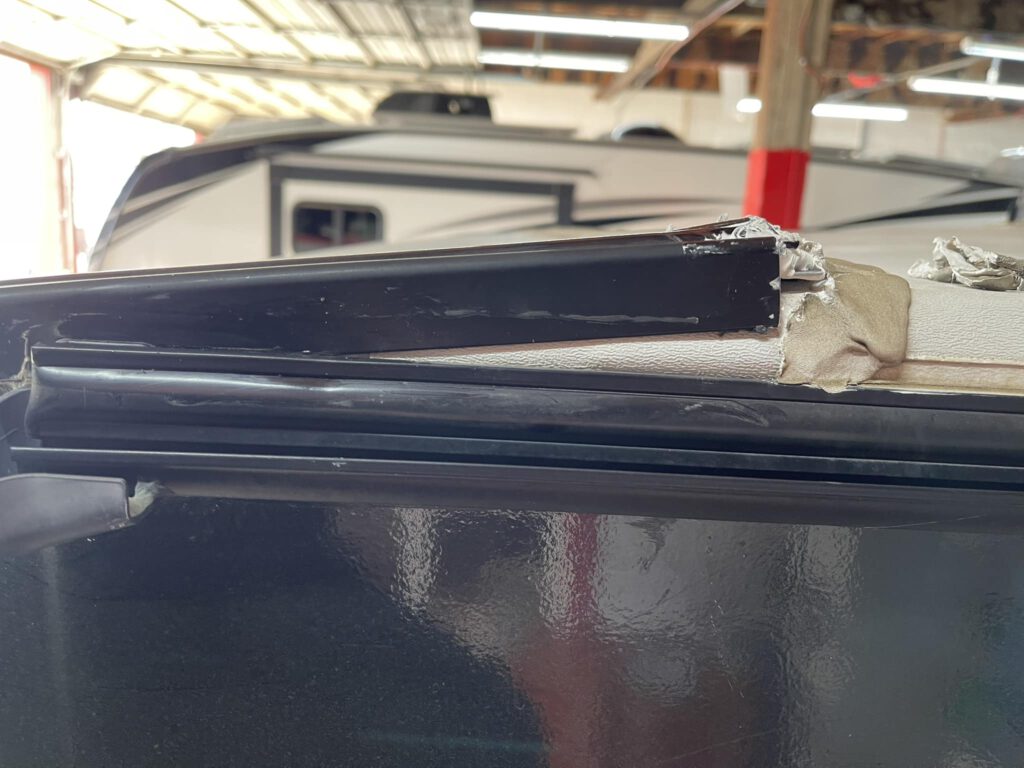

Additional screws were installed to help secure the molding in place. Note that the moldings are pre-drilled every 6 inches. In a lot of cases, the moldings are cut short and no screw is installed at the end. This happens all the time during production. That’s one of the biggest issues when units come in for leaks—we find the molding has lifted or broken free.
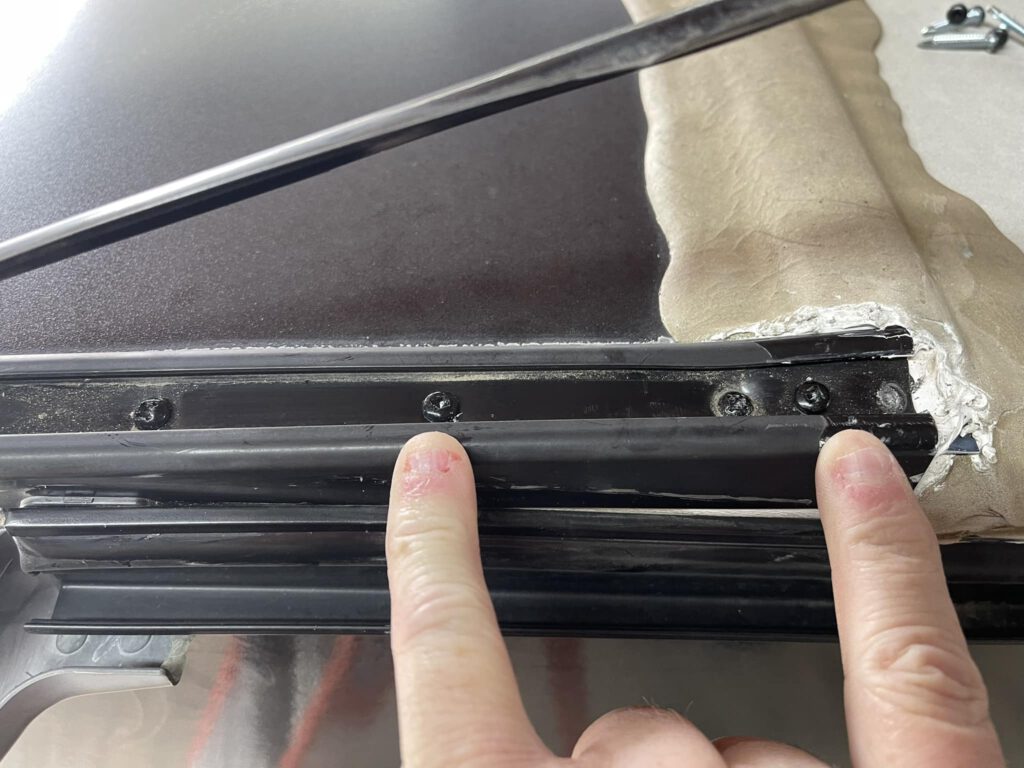
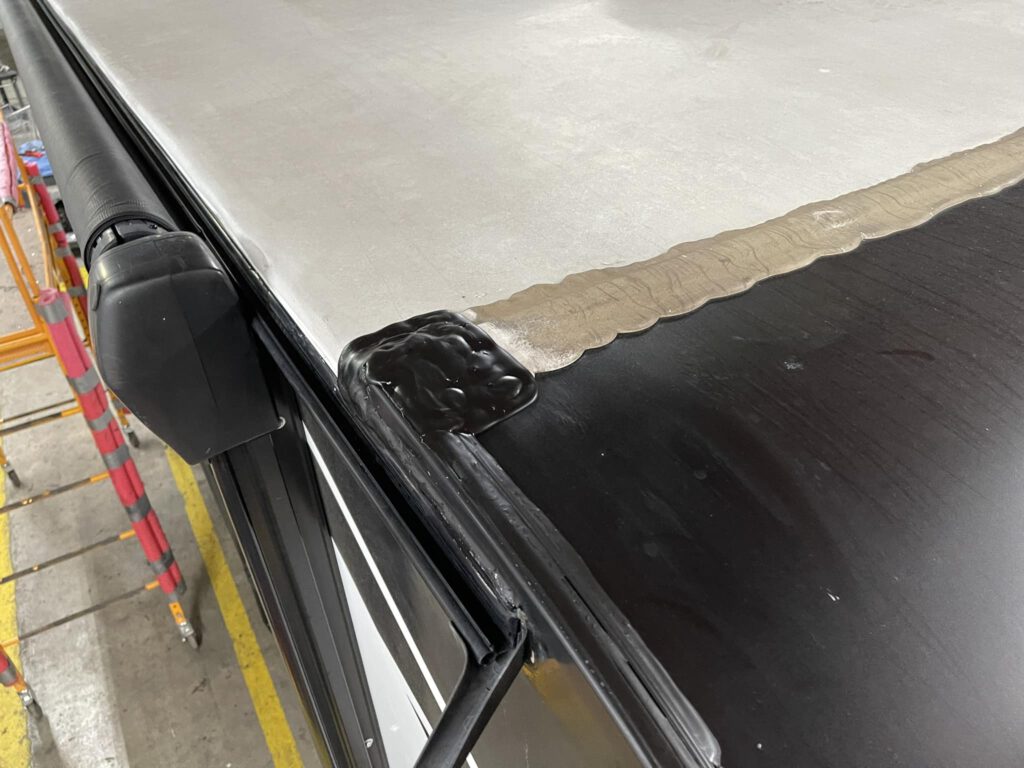
The pictures below are of the opposite side. The same procedure was done on both sides. The sealants have not cured all the way and are still self-leveling. I applied black sealant to match the cap and side of the roof edges. Also, I applied sealant in the insert molding edges on both sides about a foot down to help shield the water from getting past them on the roof surface.

I hope you enjoy these reminders and tips. Don’t forget to keep up on your maintenance!
Below is a list of the products we used during the repairs.
- Acrysol cleaner
- Scraper tool CRL blue stick
- Tapered tip stick and handle
- The Best Caulking Gun
- Dicor Lap Sealants Self-Leveling black
- Dicor Lap Sealants Self Leveling white
More from Dustin
Dustin owns and operates California RV Specialists, an independent RV repair shop located in Lodi, CA. He thrives on sharing his knowledge and enthusiasm of RV repair and maintenance with his team, customers, and virtual friends.
Be sure to check out his YouTube channel where he shares what’s going on in the shop and the product offerings in the store. Dustin is also very active on Facebook. Join his group, RV Repairs and Tips – What’s in the shop
Dustin proudly operates the business alongside his wife, Ashley; but the true pair that run the show are their Boston Terriers, Arvie and Hitch.
##RVDT2091

I’ve patched roof sealant cracks & holes, or top coated stretches of roof sealant several times over the past 5 years as part of an annual maintenance routine. To this point, nobody can see this unless they are on the roof. Everything remains water-tight.
My question is, at what point do you stop patching and start the much bigger job of replacing sealant?