


With winter here, hopefully everyone in the cold weather region has already winterized their rig—either using RV antifreeze, or blowing out the plumbing system. In either case, it is best to drain the water heater and use the bypass valve so you don’t need to waste 6 gallons of RV antifreeze or more to protect it.
Typically, the water heater is drained by removing the drain plug located at the bottom of the tank.
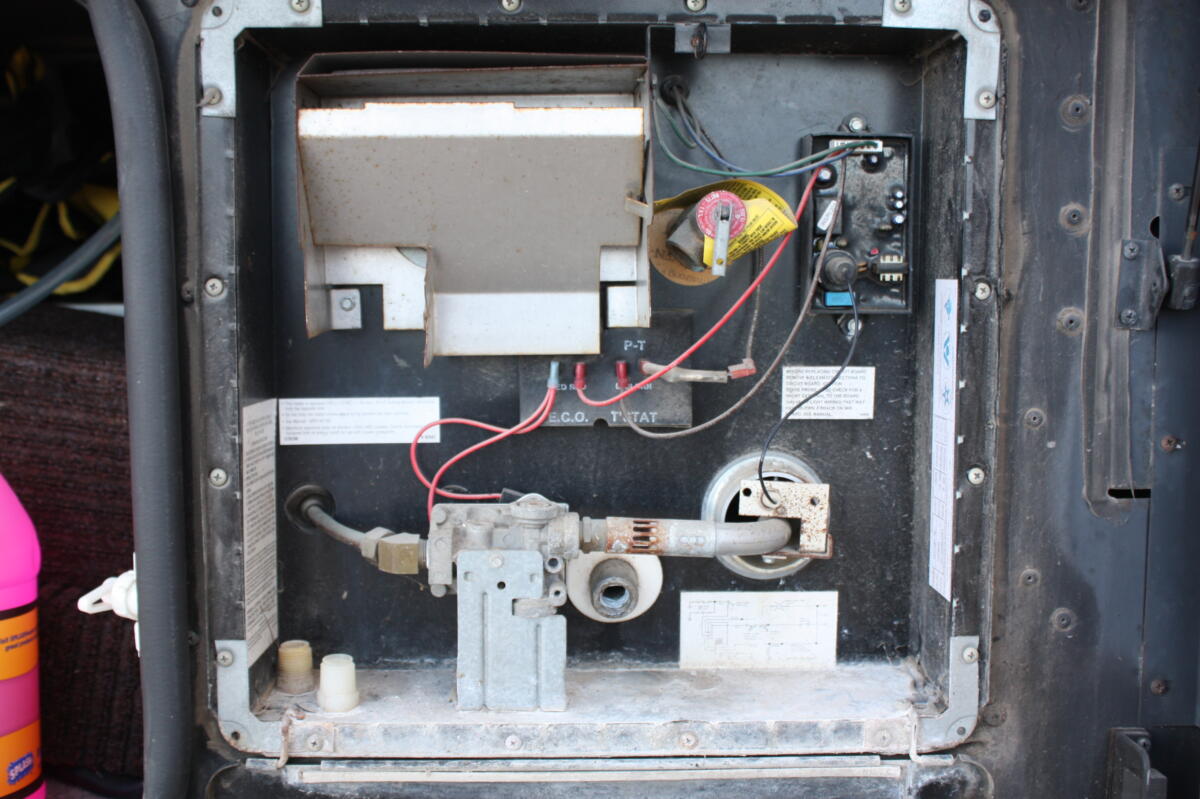
If you have a Suburban water heater, it will have a metal drain plug with an anode rode designed to attract minerals in the hard water to protect the tank. Atwood has a plastic drain plug and no anode rod, as the metal in the tank is used.
Both tanks have the drain hole located in a similar location, which you can see in the photo above. This drain hole is not located at the very bottom of the tank, but rather is an inch or more above. That means you never completely drain the tank.
There is no issue with this water freezing and bursting the tank as there is plenty of room for the frozen water to expand. However, leaving this hard water sitting in the tank year after year will allow it to go bad, or “skunky”, which can create a horrible smell and taste.
How to rinse out the water heater tank
To rinse out the sludge, calcium, and even bacteria that can grow in the bottom of the tank, I like to use a water heater flush wand available on Amazon here.
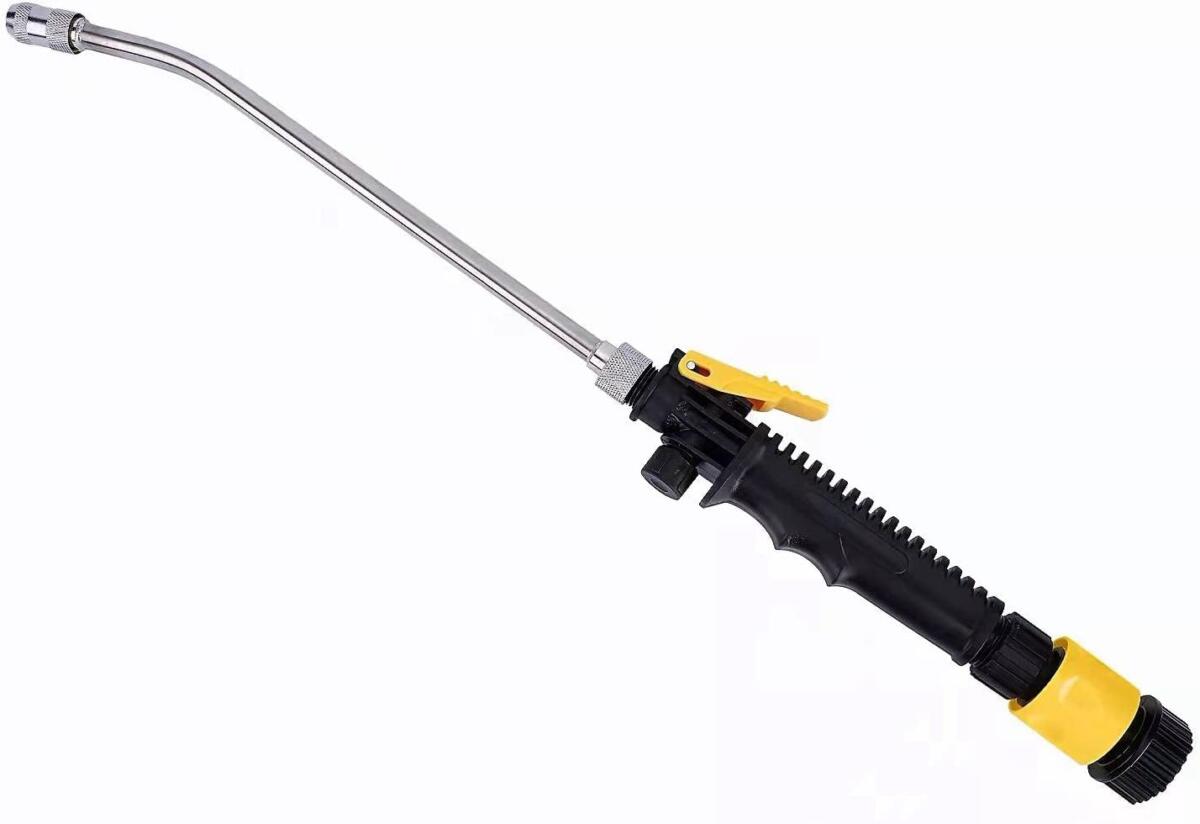
I like this model as it has a heavy duty handle, easy press on/off switch, and a metal bar that is securely attached with a threaded connection. Cheaper models have a plastic wand that slides on the handle. Several RVtravel.com readers have had the wand fly off inside the water tank. It is almost impossible to retrieve.
Simply connect the wand to a garden hose and stick the end inside the drain plug with the tip facing down. Let it run for at least one minute and flush all the old water out.
You will still have water in the bottom of the tank; however, it will be clean. You can add a cup of bleach or vinegar with a funnel or pour it into the hose and then connect the flush wand. I typically do this in the fall when winterizing so it sits with fresh water during the storage period.
*****
Twelve Days of Christmas RV Tools
• First day: anemometer
• Second day: infrared temperature sensor
You might also enjoy these posts from Dave
- Bad well water caused algae growth in RV water heater. Can’t get rid of it
- Will I ruin my water heater by running it with no water?
- Best way to clean and sanitize RV fresh water tank
- Your RV’s fresh water system: What you should know
- Where is RV fresh water tank’s low-point drain? I can’t find it
- How to get excessive mold out of RV’s fresh water tank
- How long can fresh water be stored in the RV’s tank?
DAVE HAS ANSWERED MORE THAN 1,000 readers’ maintenance and repair questions. Read a directory here. There is so much to learn!
Dave Solberg is a leading expert in the RV industry and the author of the “RV Handbook.”
RVDT2792

Gotta wonder if there is a sensible reason for the drains to not be located at the lowest point in the tank.
The shape and placement of the tank limits where the drain is located. There is a fitting welded into the tank as low as it can be.
Not much different than the fresh water tank outlet on the side of the tank near the bottom.
Plus, tanks like the Suburban have an anode rod that needs to be in ‘free’ water to work.
The water heater flush wands are great, when they work. I have never had one last more than two seasons. One wand did not finish the first season
My one complaint about the metal wand is the tip doesn’t create as much pressure as does the notorious plastic version. The higher tip pressure flushes out more crud. Although, indeed those plastic wands don’t last long.
I also use an inexpensive transfer pump to get more of the water out of the tank before long-term storage.
Or a wet/dry vac with a 1/2 inch piece of flexible tubing. It also helps suck out some of the crud.
Great idea, Dave, just does not apply to our RV. Have a great day, safe travels, and a grand 2026!