Do you have a question regarding RV waste management? Email it to Doug at doug (at) drainmaster.com or call him at 877-787-8833.
* * *
Dear Doug,
We see a lot of people dumping their holding tanks at RV parks and it seems there are a number of ways to do it. We all seem to know we dump the Black first and the Gray second. My question is: What is the proper procedure for connecting and disconnecting the hose? —Mel S.
Dear Mel,
Interestingly, this procedure is done a number of ways — some not so sanitary or environmentally friendly, as may have been evident when arriving at a new RV site. Lots of people dump their tanks then disconnect the hose from their RV and the sewer inlet and wash out the hose before storing it. The result is ground contamination around the sewer, electric and fresh water pedestal!
The proper way to connect your sewer hose is to first purchase a system that has protective caps on each end to ensure water left in the hose will be contained for storage. (The campground owner will thank you for being so considerate.)
First, remove your hose assembly and walk it to the ground sewer inlet. Remove the cap and insert the fitting, making sure it is secure and will not fall out. Then take the coach connection end to the RV, remove the sewer hose cap and place the opening under the cap on the RV sewer connection. Slowly remove the RV connection cap while holding the hose fitting under the outlet, which ensures any residual liquid in the piping will be captured by the hose and not drip on the ground. Connect the fitting and make sure it is tight and secure.
When you have checked to make sure the connections are sound and the hose is secure on the ground or in its support system, I recommend you open the gray valve for about 25 seconds, then close it! This is a safety precaution to make sure if you have a leak of any kind it will only be gray water that escapes. All is well. Now open the black valve and let the contents drain into the sewer. When empty, close the black valve and open the Gray valve until the contents are completely drained.
I will not go into the tank flushing process at this time.
Now it’s time to remove the hose waste transfer system. First, remove the hose connection from the RV, replace the cap hose then the cap on the RV. Retract the hose as you walk it back to the sewer inlet. This will drain the residual water, or most of it, from the inside of the hose. Lift the fitting from the sewer inlet and replace the cap. Return the sewer inlet cap, return and store your hose in the RV in an enclosed box or designated storage area.
By using this “first in, last out” method of attaching and detaching your transfer system, you will enjoy a more sanitary process of dumping as well as being environmentally friendly.
If you are looking for a system that eliminates a lot of the steps above, send us an email or call us for more information — We can make dumping holding tanks as simple as putting gas in your rig or car. You can also ask Chuck Woodbury, as he has our system on his coach.
Doug Swarts is the owner of Drain Master of Hollister, California, which specializes in RV, marine and industrial waste management. He is the co-inventor of the Waste Master hose and the inventor of the Drain Master electric valve dumping system. He can be reached at doug (at) drainmaster.com or at 877-787-8833.
Dear Gary,
Unfortunately, my husband did not properly winterize our Southwind. When we fill the fresh water tank we have no problems, but when the pump goes on the leaks start. When we roll under the RV the leaks are not around any plumbing pipes. There are leaks by the storage bins and around some electrical wires. There are no leaks under the kitchen sink and no leaks under the shower or toilet or bathroom sinks. How do we fix the leaks if we can’t find where they are? Where should we look for leaks and how do we get there? —Jacque
Dear Jacque, If the fresh water system was not drained completely or properly, the water heater could have ruptured or, at the very least, a fitting could have been damaged. Check for water around the water heater tank first; be sure to feel around it as much as possible because the tank is surrounded by a foam shell. If the tank is damaged, the water may be somewhat contained by the foam. At the rear of the water heater, from inside the coach, check the outlet fitting at the top and the cold water inlet at the bottom. If you have a water heater bypass valve kit installed, check those valves for dripping also; likewise, for any water filter or purifier in the system.
It is also possible that the pump itself has ruptured; inspect the pump head for leaks. Water will always seek its own level and flow down but it won’t necessarily be in the most direct way, so the areas where the water is dripping from the coach may not be where it’s actually leaking. Check all lines and fittings in accessible areas. Don’t forget external areas like the outside showerhead, if so equipped. Trace the plumbing as far as you can from the sinks, toilet, pump, and hot water tank. If you cannot locate a leak in the areas mentioned, then it could be that the leak is under the floor or behind a wall. In this case you should probably seek professional help.
Access for plumbing repairs is normally accomplished by coming up through the bottom whenever possible rather than down through the floor. Another option is to fully drain the water system and use pressurized air (50 – 60 PSI) instead of water pump pressure. A fitting called a blowout plug can be attached to the city water inlet and compressed air injected. This will eliminate the water mess as you search for each leak. A soapy solution can be applied to fittings just like leak testing an LP system. Bubbles will form at the leak.
Freeze-damaged tubing will be quite evident. You’ll see bulged portions with a slit running in the same direction as the tubing. The good news is ruptured tubing can be easily cut out and replaced using new fittings. The bad news is that there may be several ruptures. You’ll have to run a pressure test (air or water) after each repair is completed until the system will hold pressure for about ten minutes.
Wish I had better news for you, but the remedy is easy once you locate each leak in the system.
Dear RV Shrink:
My wife thinks I should be an exterminator. We have a fifth-wheel and she is always hearing noises. She says she hears mice scurrying around, gnawing and thumping, and our cat is always on point. I never hear anything. Then she started seeing other people in the campground putting lights under and around their rigs at night. The guy next door puts the hood up on his pickup every night with a light in the engine compartment. I think he is just proud of his truck, but my wife said he does it to keep pack rats out. Do I have to light up the world every night to keep vermin from moving in with us? If rodents are so fearful of lights why would they want to come in anyway? —Mickey Mouse ideas in Mesa
Dear Mickey:
Some say that the rat light idea is all based on urban legend. From personal experience I can say I did have a pack rat nest in my motorhome engine compartment before lights and, so far, none after. Like you, I noticed the lights around rigs in Lost Dutchman State Park in Arizona and thought it might be people wanting to show off their vehicles at night.
You don’t have to go overboard and light up the whole campground. I just put a short string of LED lights under my engine and wired them to my battery with a switch. Many people use rope lights and just lay them on the ground. I park my toad facing the front of the motorhome to share the illumination and hope for the best.
If your wife thinks she hears evidence of a silent invasion you would be wise to start a trapline and see if you snag anything. Better safe than sorry.
Those little furballs can do a lot of damage in a short span of time. Stay on top of it. —Keep Smilin’, Richard Mallery a.k.a. Dr. R.V. Shrink
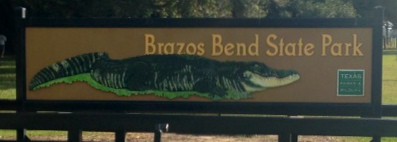
Two alligators bask on small island in Elm Lake at Brazos Bend Texas State Park (Julianne G. Crane)
Brazos Bend State Park is less than an hour from downtown Houston and is one of America’s top state parks, according to National Geographic Traveler magazine. There is plenty to do in this 5,000-acre park, so, if you aren’t traveling by RV, be sure to pack a picnic. (No food service at the park.)
Explore on foot, bike, or horseback. There are more than 35 miles of multi-use trails, some of which are wheelchair-friendly. Take a virtual tour on the park’s Interactive Trails Map.
Hike and bike trails: We bicycled many of the trails that circled six small lakes,
connecting with each other and heading into the hardwood forest. Along the way we encountered lots of wildlife, including many American alligators.(Read about alligator safety.)
Nature Center: Stop by to learn more about the park and its residents (more than 300 species of birds). See exhibits on the three ecosystems in the park–wetlands, prairie and woodlands. Hear about the 21 reptiles and amphibians, that live here. The center and gift shop are open weekdays 11 a.m. to 3 p.m. and weekends 9 a.m. to 5 p.m.
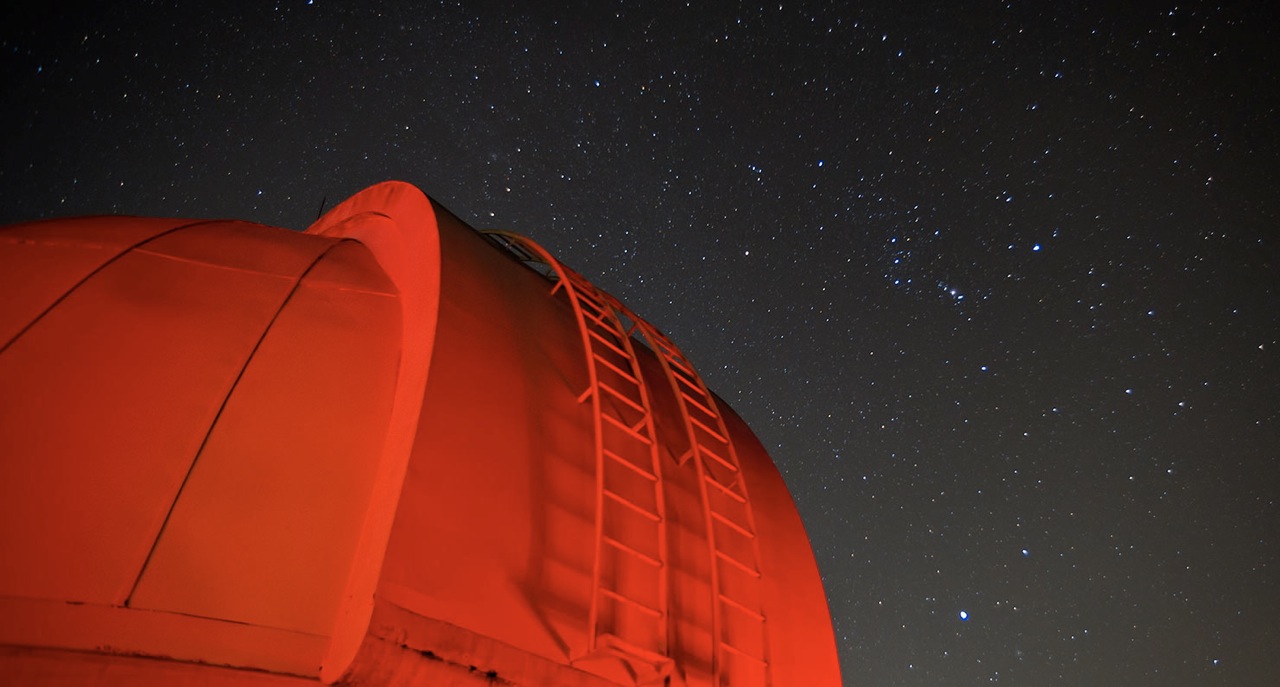
George Observatory is open on Saturdays from 3 to 10 p.m. The observatory is part of the Houston Museum of Natural Science. Visit the observatory website or call (979) 553-3400.
Adults: $7. Children, Military, Teachers, or Seniors: $6. All pricing excludes the Brazos Bend State Park Entrance Fee of $7 day/adult.
If you go:
Brazos Bend State Park,
21901 FM 762
Needville, TX 77461
(979) 553-5101
Latitude: 29.371000 Longitude: -95.631921
No more stumbling around your darkened RV headed to the bathroom in the dead of night. The SnapPower Guidelight is a plug-and-play replacement for standard plug-in night lights and hardwired lights.
It installs within seconds and requires only a screwdriver to take off and replace the cover plate — no wires or batteries.
SnapPower is designed to look like a standard outlet cover plate (faceplate) by day with beautiful LEDs that provide ambient lighting at night. These guide lights are not compatible with GFCI outlets that have the test and reset buttons on the face of the plate, nor will it replace a standard cover plate with a switch.
I keep getting mail from the Neptune Society. That’s the company that will cremate you after you die (but not before, of course) for a modest fee compared to burying you in the ground in an expensive coffin.
Recently, my junk mail from the company has offered, right on the front of the envelope, this message: “Free Pre-Paid Cremation.” To which I say, “huh?” Free but pre-paid? Does that make sense to you? Watch the video and I’ll tell you more.
If you’ve been to RV rallies or group campouts, you know how much RVers like flying flags, especially boondockers at Quartzsite that are scattered across the desert and use the flags to find their vehicle amid this sprawling RV parking lot. And they add color and pizazz to your campsite as well.
Now the ability to fly flags has gotten even easier, FlagPole Buddy of San Diego announces with their release of a new Under Tire Mount (UTM) for flag poles. The patent pending UTM is the only sturdy, under tire mount that can be placed and removed under the tire, without moving the vehicle, a release from the company stated.
Slide the UTM under any tire or all four tires at any time. Remove by pulling on the built-in grab handle, which allows it to be removed without disturbing your vehicle. The “V” fork design works with cars, SUVs, trucks, RVs, etc. The UTM comes in two models: Single Pole & Triple Pole. The Triple Pole has the potential to fly 24 flags off of one vehicle. The UTM comes standard in “Screaming Yellow” and accommodates either aluminum or fiberglass poles.
It’s made in America of hi-grade, 1/8-inch gauge steel, with a durable powder coat finish. It’s strong enough for the largest truck to drive over it without damage, the release stated. The pole tube unscrews from the base for easy storage.
Doug Swarts (Drainmaster.com) and Chuck Woodbury of RVtravel.com discuss how a simple, inexpensive device can save the day (as well as a lot of money on a major repair) when cleaning out an RV’s black (sewer) tank. A variety of the devices mentioned in the video are available for around $10 to $20 on Amazon.
RVtravel.com editor Chuck Woodbury has a short message for the readers of RVtravel.com. He spoke a little about why he wrote about traveling to Mars in his essay this week. Please leave a message below if you are so inclined.
Learn about RV camping, RV travel, RV news and much more. This newsletter, now in its 16th year of continuous publication, is funded primarily through advertising and voluntary subscription contributions from our readers. Thank you!
Issue 776 • Week of Jan. 14–20, 2017
Editor’s corner With Chuck Woodbury Chuck (at) RVtravel.com
Mars One’s idea of a human settlement.
I’ve read four books about Mars in the last few weeks. If I were half my age, I would have applied to be on the first mission. I loved the book The Martian and thenthe Martian movie starring Matt Damon. Both fueled my wanderlust — the same wanderlust that’s kept me on the road in an RV for much of three decades.
I subscribe to an email newsletter called Mars Daily, which keeps me updated on the latest news about the Red Planet and planned manned missions. It drives me crazy that I will never get to go. No, actually, it makes me mad! I want to go!
If I would have lived during the early 1800s, and were aware of Lewis and Clark’s expeditions to the Pacific Coast, I would have begged to come along. I am so envious of the guys who went to the Moon. Oh, what I would give to go there, too (or maybe I already did?). I’d settle for a trip to an asteroid.
If you missed the National Geographic Channel’s six-part series about the first settlers of Mars, try to see it. It’s fascinating. You may be able to stream episodes on the Nat Geo website. With a Prime membership, watch it on Amazon Video.
In Death Valley, Calif., you can easily imagine being on Mars.
THE REASON I BRING THIS UP is that sometimes, mostly in the evening when the weather keeps Gail and me inside our motorhome, I find myself daydreaming that we are in a spaceship headed to Mars. Please don’t laugh too hard at this silly-sounding thought. . .
I already have a space helmet.
The space we occupy in our 32-foot motorhome is about what the first voyagers will have on their seven-month journey to the Red Planet. Gail and I have everything we need in our little Earthbound spaceship, but what if we could never step outdoors, even open a window for fresh air, and the view from our window was the same day after day? That, I think, would be hard!
IN ALL THE BOOKS I’VE READ about a Mars journey, the biggest challenge according to most mission planners is how well the crew will get along. What if one member doesn’t get along with others or goes crazy? That happened once on the International Space Station and two astronauts had to be isolated in different areas until they could return to Earth.
Inside Russia’s Mars500 “space” vehicle
Living with someone full-time in our RV is in many ways similar to what those early spacemen and women will experience. They will face far more challenges, of course, than those of us in RVs on Earth. Still, many of the challenges of living with another person (or a few other people) in close proximity are the same in a spaceship or an RV.
The fact is, people living in small spaces can often get on each other’s nerves (maybe you have experienced that!). With our RVs, if we’re a little steamed we can take a walk to cool off, or even split up for awhile if things get bad. In a spaceship and later in very tight living quarters on a vast, inhospitable planet, such escape would not be possible. Those early Mars settlers will likely never return to Earth, or if they do, after many years. That will be a big challenge to their psyches all by itself.
Gail and I are lucky because we get along so well even in our small living quarters. But I have been in situations where my travel partner and I were not so compatible and under a lot of stress. That situation would be awful aboard a tiny spacecraft where no escape were possible.
MY VIDEO FOR THIS ISSUE I recorded a personal video for subscribers only. I talk a little bit about why I picked the topic of Mars for my essay. It’s six minutes long. Watch it here.
Thanks to those of you who helped spread the word about this newsletter last week. We picked up about 600 new subscribers. And a special “thank you” to those of you who pledged voluntary subscriptions, which are essential to us these days to continue publishing (and get better).
Many of you commented last week with horror stories about problems with your new RVs or service after the sale. I will keep working to do what I can to help these people and others from ending up in RV horror situations. It will be a battle. As is, RV makers can turn out crap and there is often little a buyer can do to get things right. I urge you to download and read my friend Greg Gerber’s series “The RV industry death spiral.” It’s free.
Is reading this newsletter worth 10 cents to you? Our staff works hard to bring you a valuable newsletter every Saturday. Readers help make it possible with their voluntary subscriptions. Even a pledge of $5 a year is appreciated — that’s less than 10 cents an issue! Many readers pledge more — $10 a year is less than 20 cents an issue! Your contributions make it possible for us to write about important matters, not just fluff to make advertisers and RV industry big shots happy. Enter a voluntary subscription.Use a credit card, PayPal or mail a check.
Winter Differently in Yuma, AZ! With 7 resorts to choose from, book your stay in one of the sunniest places on earth, Yuma, Arizona! Whether you are looking to book an RV site or relax in one of our beautiful rentals, we have something for everyone. Stay a week, a month, all season or all year long! Click here to reserve your Yuma site today!
Reader RVs
What RV do you drive or tow? Send us a photo of your RV (and tow vehicle) with a 150-200 word description of where and how often you travel with it, and what you like or don’t like about it. Include your name(s) and hometown. We’ll post them to RVtravel.com. Send to assistant editor Diane McGovern at Diane(at)RVtravel.com .
CLICK HERE to see last week’s RV Travel Reader RVs.
America’s Largest RV Consignment Dealer Buy or sell your used motorhome, diesel pusher, fifth wheel or travel trailer hassle free at PPL Motor Homes. And check our huge selection of parts! PPL is the largest RV consignment dealer in the USA, selling more than 24,000 consigned RVs since 1972. Visit the PPL website.
We have a winner. Please hold your entries until next time. The correct answer is “A” — It was used to to create ruffles or flutters in dress sleeves and skirts.
Click photo to see it larger and for multiple choice answers, and to enter.
THIS WEEK’S CONTEST! Win this very cool apron! You’ll be the hit of the RV park potluck when you show up in this!THE QUESTION: In the photo to the right, what was the machine from the late 1800s used for? The 21st person to answer correctly wins the prize. CLICK HERE TO ANSWER (multiple choice).We can only ship prizes to addresses with a U.S. Zip Code. Only one entry per household. All entries must include your mailing address and telephone number or your entry will be disqualified.Contest ends Sunday at noon (Pacific). If we do not have a winner by then, we’ll save the prize for another time.
Not surprisingly, Monday, January 16, admission isfree to the Martin Luther King, Jr. National Historic Site (Atlanta, Ga.), in honor of King’s birthday commemoration. But all national park sites across the nation will also throw open the doors and gates for free admission that day, the first of 10 free admission days in 2017.
After several months of high used-RV auction prices, more “normal” prices have returned. Industry watcher, Black Book, reports December prices of motorhomes were down more than 8 percent to an average of $35,015. Similarly, towable unit prices dropped a huge 15 percent to come in at $11,181 – all percentages in comparison to November 2016 sales. Black Book officials suggest the drop in prices is related to the relatively poor condition of the rigs, attributing it to dealers shucking non-moving units at year-end.
Californians praying for drought relief are getting what they asked for, but with some added side-effects. In one case, Pismo Beach State Park campgrounds are flooded and shut down, and won’t reopen this month. Refunds will be issued.
Looking to book a Yosemite National Park (Calif.) campsite? Reservations for May 15 through June 14 will open at 7:00 a.m. (Pacific time) on January 15 – and you can be sure that by 7:15 or earlier, all available sites will be booked. So what can you do to increase your chances of getting a reservation? One thing – know in advance where you want to camp and know for certain the campground is reservable. Long before the reservation window opens, create an account at recreation.gov. Then, start clicking to “book a site” a couple of minutes before 7:00 rolls around – and keep clicking. For more tips, visit The Union Democrat.
Reading between the lines of statements made by the new chairman of the RV Dealers Association (RVDA), Darrel Friesen, one thing that could make the RV industry more responsive to customer needs isn’t a tide of noisy complaints – instead it’s (surprise!) money. Friesen writes in “RV Executive Today” that the new big RV customer base, Millennials, just don’t have the patience of older folks. Older RV owners will put up with long waits for repair parts, perhaps even doing some fixes themselves. But Millennials? They “expect replacement parts to be available almost overnight, and they don’t care about why we can’t fulfill their expectations. ‘The car industry does it, so why can’t you?’ they often say to us. They’re used to instant gratification.” Without being responsive to such a driving force, Friesen says the RV industry could become like so many business Dodo birds, ones with names like Block Buster, Circuit City and Borders Books. Guess some of us are just too patient.
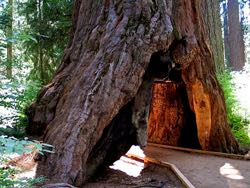
For decades people have traveled to California’s Calaveras Big Trees State Park to see – and walk through – the giant sequoia named Pioneer Cabin. Alas, the giant rainstorms took down the giant tree on January 8. Also known as the Tunnel Tree, it was hollowed out sometime in the 1880s and was 33 feet in diameter when it fell. It was about 2,000 years old.
Connecticut’s state parks are facing some tough times ahead, says Governor Dannel Malloy. He warned that with the potential state budget deficit of $1.4 billion “some compromises” will have to be made, although he said the state won’t “lose the crown jewels,” as he describes the parklands. But park managers have already turned off future reservations for many popular campgrounds, concerned they won’t have the staff to handle crowds.
Fees at a number of Washington, D.C., area national parks have shot up. Entrance fees at Washington Park, Md., have jumped by $5 to $10 per carload; camping fees at Maryland’s Greenbelt Park have gone up $4 per night to $20. And picnic fees at other parks in the D.C. area have also risen. The Service says the rate jumps were put in place after consultation with the public.
How can you end the “military” RV shower?
You know the routine, constantly turning off the shower to conserve hot water. That’s because most RVs have tank heaters with limited hot water. You never have to run out of hot water with a hybrid instant hot water heater. Find out how the Truma AquaGo® gives you a real shower in your RV. Learn more here.
More News
Camping in Saskatchewan provincial parks will cost more this year. Overnight camping fees will jump anywhere from $2 to $4, while gate costs will jump between $2 and $10. Reservation fees will also jump, up $3 to $5. Still, officials tout the “value-added” services that come with your fees – free firewood and hot showers.
Spearfish Falls. Photo: State of South Dakota
Some private campground owners aren’t happy with the proposal to create a new state park in South Dakota. The proposal from the governor, backed by a state Senate bill, would make Spearfish Canyon into a state park. At a recent public forum in Rapid City, private park owners came forward suggesting use of tax dollars to create a new park would be competing against private campgrounds.
If you’re old enough to remember what a Dodgem car is, listen up. Pennsylvania’s Conneaut Lake Park – home of the classic Blue Streak roller coaster — was in need of funds to expand its RV park. A little short on cash, they did what any wise family would do – dig around in the “attic” and see what could be sold to make up the difference. Park officials dredged out the storage facility and held an auction – with hot interest in some vintage Dodgem cars. For you too young to recall them, think of bumper cars. No word on what the winning bidders paid.
Some Necedah, Wisc., RV owners are getting the blame for a revision of a local ordinance on RV parking in the town. Under the pretext of promoting “public safety and welfare, including the prevention of vandalism and property offenses and the promotion of healthful and sanitary recreational opportunities,” the revision will knuckle down on how and how many RVs can be parked on private property. Some locals suggest that RVers brought the ordinance on themselves, with one saying, “We’re seeing more trash strewn across the roads, illegal dumping, problems with sewers … it has to stop now.”
Photo: vagawi on flickr.com
A number of snowbirds in Yuma, Ariz., got a cold awakening recently when a major propane service company refused to pump LP. Propane provider AmeriGas bought out Cactus Propane, and the new company found that more than 80 percent of the 2,000 existing Cactus Propane customers had gas safety violations. AmeriGas won’t pump LP for those not meeting safety codes, leaving a lot of unhappy Winter Yumans in the middle of a cold snap.
It’s taken six years to do it, but the Brookings, Ore., city council has finally moved ahead with plans to have campground hosts at Azalea Park. First, local ordinances ruled out the use of RVs as a “permanent residence.” Then there were concerns that a host might be considered an employee – leaving the city open to other expenses. But “security” concerns trumped – homeless people sleeping in the bushes and loiterers in the park after hours, for example. But the worst offenses? Kidnapping! Three times crooks made off with the park’s Nativity scene baby doll, the last time, returning the divine child painted up to be anatomically correct. Whoever gets the new $6,500 paved volunteer pad has a tough job ahead.
A Janesville, Wisc., RV salesman, up on charges of defrauding nearly 40 customers involved in RV consignment sales, apparently won’t be going to court. As of the last report issued near the end of December, Troy Tofte, formerly associated with Janesville RV Center, was accused of selling RVs for others, then pocketing the proceeds, but is now ready to enter a plea agreement to avoid trial. Tofte’s total restitution could reach $400,000.
We’ve heard of campgrounds shut down due to invasive bears, but invasive ants? New Zealand’s Rarawa Beach campground in the Far North closed the gates after Argentine ants moved in. The only ant species known for cooperating colonies, they build “super colonies,” which wipe out native ant species and give a nasty bite to humans. To help sniff out the problem, the world’s only Argentine-ant-sniffing dog, Rhys Jones, a Welsh springer spaniel, made an appearance to see how far the ants had spread. No word on how Rhys’ nose is protected, but it’s so sensitive that he can tell the difference between Argentine ants and native ants!
Keep up with RV Industry news throughout the week at RVbusiness.com.
We are THE RV Insurance Experts! Explorer RV offers more than just standard RV insurance. As an independent insurance agent, we provide access to a wide range of RV coverages from leading insurance companies. Many aren’t available through typical agencies — such as total loss replacement, purchase price guarantee, personal effects, awning replacement, towing and more. Learn more or get a free quote.
RV Quick Tips
Handy hint for using a gas oven
If your oven at home is electric, adjusting to a gas stove in the RV can be a trick. Gas ovens usually don’t heat as evenly and may have hot spots. Turn your items several times when baking to even out the cooking.
Get all your wheels aligned
Got strange tire wear issues? When was the last time you had your RV wheels aligned? Motorhomes are obvious candidates, but even towable RV wheels can need alignment. Not every corner tire shop can do it, so be prepared to make a few phone calls to find a shop that can.
Scraping bottom when exiting a parking lot?
If your RV bumper scrapes when entering or exiting a parking lot or other driveway, try taking the exit with your rig at an angle rather than straight on. Still no help? You may want to add skid wheels to the back of your trailer. Two types: bolt on and weld on. The former sometimes tear off, so the added hassle of finding a welding shop may be worth the trouble.
Do you have a Quick Tip? Send it to Diane (at) RVtravel.com and you just might see it here!
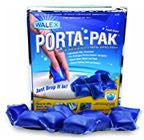
Avoid nasty odors from your RV toilet
Porta-Pak is currently used every year in millions of commercial applications. No other product available offers the combination of deodorizing performance in an easy to use drop-in packet — making it a snap to use without worry of spills. Comes in pack of 10. Formaldehyde free (RV septic systems like that!). Learn more or order.
Want better quality tires on your RV?
Many people complain around campfires or on RV forums about the poor quality of various components on their RV. Roger Marble, RV tire expert, is highly qualified to comment on the quality of RV tires. With an industry that focuses on quantity and low cost, is it any wonder that tire performance isn’t as good as we would like? Roger feels this topic continues to be important, especially given recent posts on RVTravel.com and rvdailyreport.com regarding the low quality of RV components. Learn more.
Okay to overnight in an RV at a truck stop?
Many RVers routinely stay overnight in truck stops. Some do it only as a last resort when an RV park is not nearby. Is staying in these places okay? Jim O’Briant of OvernightRVparking.com says that yes, it is okay to stay at some truck stops, but there are ways to do it and ways not to do it. Watch the video.
Airport “insecurity” underscores joy of RVing instead
If you need another reason to enjoy traveling by RV, here’s a real-life adventure that underscores the point. An RVer, who asked to remain unnamed, recently got news that she was a first-time great-grandmother. To see the new “grand,” she’d have to travel from Arizona to Washington state, and the weather seemed to suggest flying would be a better choice. So she packed her bags and headed to the airport. Read what she had to endure from TSA — terrible!
Full-time RVing: Sell the house to hit the road?
One of the critical issues for those considering the full-time RV lifestyle is whether or not to sell the “landlocked” home. It’s not only a financial and physical question, it also touches deeply on the heart. In this article, Russ and Tiña De Maris weigh in on different considerations.
Volunteer: Save on campground fees, do good, have fun
Camp hosting is not the only form of volunteer position open to RVers. RVers who bring their houses with them are top-tier candidates for volunteer positions where local housing may not be available and where there is room to park RVs for the volunteers. These locations include parks or other entities such as a wildlife refuges, national forests or wilderness areas. Learn more.
Bring Grizzly Bears back to Cascade Range?
The National Park Service (NPS) and U.S. Fish and Wildlife Service (FWS) are inviting the public to participate in a series of informational open houses regarding the proposed alternatives for the restoration of grizzly bears to the North Cascades ecosystem. The alternatives are described in the draft Grizzly Bear Restoration Plan/Environmental Impact Statement (draft EIS), released by the two agencies. The purpose of the EIS is to determine what actions, if any, should be taken to restore the grizzly bear to the North Cascades Ecosystem. Learn more and weigh in on this.
The readers write — Hammer-toss at poor-quality RVs
In a hilarious and sad-but-true fashion, a YouTube feature we highlighted showed just how bad things can be for folks buying new RVs. What a nerve that struck with our readers. Here’s just a small sample of the many responses that came rushing in
A very cool, easy way to cook eggs quickly
Ever since the powers that be have changed their minds about the healthfulness of fresh eggs, Rich “The Wanderman” has been enjoying at least one for breakfast most days. He makes them lots of different ways and he now has another way that he’s excited about — using the microwave oven and with minimal cleanup. This gadget cooks 1-4 eggs at a time, either scrambled, poached or “mcmuffin” style, and takes 3.5 minutes or less. Read more.
Cheap device prevents accidental RV sewer overflow Doug Swarts (Drainmaster.com) and Chuck Woodbury of RVtravel.com discuss how a simple, inexpensive device can save the day (as well as a lot of money on a major repair) when cleaning out an RV’s black water (sewer) tank. Watch the video.
Different model year on chassis versus motorhome
“Help! Our 2014 Axis motorhome is built on a 2013 chassis. We had both titles and the VIN number was the same for the coach as the chassis. No matter how much we explained to our local DMV office that there was no such thing as a 2013 Axis, they still issued the title to a 2013 Axis. We’re still trying to get this squared away. Does anyone have any suggestions? Is this normal?” Find out here.
Off, off, dratted sealant!
Chris Dougherty, certified RV technician, received a question about RV caulking from a reader while he was serving as RVtravel.com’s technical editor. The reader had inadvertently applied white caulking on the exterior of her beige fiberglass-clad trailer, assuming it would dry clear. Oops! Chris tells her how to fix it.
Stay warm with this 12-volt Warming Blanket! Here’s a way to keep warm in your RV without wasting propane to run your heater. Just snuggle up with a warming blanket! This one has an 8-foot cord and operates on 12-volt, perfect for RV use. Stitched from 100 percent polyester fleece, the blanket is comfortable, functional, safe and gentle on your RV’s battery. Put it on your bed before turning in to warm your sheets! Learn more or order from Amazon.
This week in history Week of Jan. 14–20 Compiled by Dell Bert
1916 — PGA (Professional Golfers Association) is formed.
1919 — Prohibition takes effect.
1953 — Corvette unveiled at GM Motorama.
1972 — “American Pie” hits #1 on the pop charts.
1993 — Actress Audrey Hepburn dies at age 63.
1994 — Earthquake rocks Los Angeles, killing 54 people.
2009 — Capt. “Sully” Sullenberger performs Miracle on the Hudson.
Organize your RV’s shower! Quit hassling with shampoo and conditioner bottles RV showers are small! Hassling with bottles of shampoo, conditioner and soap are a pain! Make it easy with this Better Living Classic 3-Chamber Dispenser. It utilizes a “patented pump technology” and comes with a lifetime warranty. The liquid is stored in three 15 oz. refillable chambers. The right amount of product is dispensed with a stroke or two of the pump. Installs in minutes without tools. Learn more or order.
Bumper sticker of the week Inside every old person is a young person wondering what happened.
Funny/clever business slogan
Seen in several dentists’ offices: “Be true to your teeth or they will be false to you.”
Have you seen a funny bumper sticker or business slogan? Send it to Diane (at) RVtravel.com
Toss your colander. This is better! The adjustable Snap ‘n Strain silicone strainer fits nearly all pots and pans. Once snapped in, the pot can be tilted over a sink or bowl to do its magic. Leave it on the pan even while cooking! Works with heavier foods like potatoes. Super compact for storing, perfect for RVs. Dishwasher safe. Learn more or order or watch the video.
Good Sam Campground Guide With more than 12,500 locations listed across the USA and Canada, the Good Sam RV Travel & Savings Guide is the only print directory of RV parks and campgrounds. The 2017 edition features an expert rating system with all evaluations completed on site in the past 12 months. Park listings include amenities, services, restrictions, rates, contact info, Good Sam discount locations, hundreds of dollars’ worth of Camping World savings and pages of helpful information. Learn more or order.
Websites of the Week Here are two we like:
Where to find indoor fun in all 50 states this winter
Too cold or rainy to head out for a hike or a picnic? Try one of these great indoor attractions across the U.S. Some are free or cheap, and provide a full day of entertainment along with a little learning. Included are an amazing variety of museums, conservatories and lush indoor gardens, the world’s largest arcade, and more. From Cheapism and msn.com.
Best places to visit in the U.S. in 2017
This is Lonely Planet’s annual list of the 10 most exciting places to visit in the U.S. in 2017. Suggestions for an awesome RVing bucket list, perhaps? From Lonely Planet and msn.com.
Here is our “master list” of more than 700 websites we like, which we have compiled over the years.
Be prepared for a roadside emergency! Forget messing around with flares.
You’ll be thankful to have this set of three emergency flashers along with you if you’re forced to the side of a busy highway with a flat tire, mechanical or other issue. One FlareAlert™ provides about 20 hours of safety before a battery change (three AAAs in each). You’d need to strike 80 incendiary flares, one after another, to achieve the same thing.Learn more or order.
Good reading from RV123.com
• If you’re traveling to Hot Springs, Arkansas by RV, there’s no better place to stay than Catherine’s Landing.
• Everplaces is slick app that helps you keep track of all the places which you would like to remember.
• You’ll be the most popular person in the campground when you make this tasty treat!
Avoid moisture damage to your RV
DampRid FG50T Hi-Capacity Moisture Absorber, 4-Pound Tub eliminates musty odors in RVs and other spaces, protecting them from moisture damage for up to 60 days in areas up to 1000-square feet, and up to 6 months in a 250-square foot area. Don’t let your rig get damaged from moisture this winter. Learn more or order.
Ask the RV Shrink
Gun-shy about boondocking near Mexico border
Dear RV Shrink:
This is our first year living in our RV. We are not looking for the next RV resort with a pickleball team; we prefer the wide-open spaces. The problem is one you have talked about before: border safety. We have never camped down near the border on boondock BLM land because of all the stories we’ve heard about problems with illegals. We keep talking about going but then back out. Are we overreacting? Should we just try it?—Gun-shy in Glendale
2017 Traveler’s Guide to the Firearm Laws of the Fifty States JUST PUBLISHED: Learn how to prepare, carry & transport your firearm during travel in all 50 states, Canada & Mexico. Includes state breakdowns of firearms ownership, semi-auto gun ownership, castle doctrine, right to protect, open carry, concealed carry, state & national parks, permit reciprocity, loaded vs. unloaded, interstate transport restrictions, traffic stops, universal restricted areas, motorhome & RV issues, preemptive local laws & more. Learn more or order.
RV Tech Tips from Mark Polk
Care of rubber roofs on RVs
Rubber roofs on RVs should be cleaned three to four times a year, and depending on where you park or store your RV it may need to be cleaned more often. Regardless of the type of rubber roof you have, never use any cleaners or conditioners that contain petroleum solvents, harsh abrasives or citrus ingredients. These types of cleaners can cause permanent damage to any rubber or vinyl surface. Most manufacturers of rubber roofs recommend you use a medium bristle brush and a non-abrasive cleaner. For light cleaning you can use warm water and a mild detergent like Dawn dishwashing liquid. Hard-to-clean areas like stubborn stains caused by leaves, sap, mold or mildew may require a second treatment. Use caution to prevent the cleaners from getting on the sides of the RV. ALWAYS rinse the sides, front and back of your RV before and after rinsing the roof to prevent streaking or damage to the finish on your RV.
Mark Polk is the owner of RV Education 101, the premiere source of educational DVDs about buying, maintaining and using an RV. Learn more.
Latest fuel prices Here are the latest U.S. average prices per gallon of gasoline and diesel fuel: Regular unleaded gasoline: $2.39 (on Jan. 9). Change from week before: Up 1 cent; Change from year before: Up 39 cents. Diesel: $2.60 (on Jan. 9). Change from week before: Up 1 cent; Change from year before: Up 42 cents.
Pre-order now Locate services at Interstate exits The 2017 Next Exit is the most complete USA Interstate highway exit directory ever published for every exit of major and most minor routes. Find what’s located at upcoming exits on your route — gas, food, lodging, camping, shopping, hospitals, Walmarts and much more. A best-seller year after year. Learn more or order.
The RV Kitchen with Janet Groene
Homemade Breakfast Sausage Make your own sausage.
Don’t eat pork? Want less fat in your diet? Take control of your breakfast sausage. Get the recipe.
Fix it In Foil! Tasty Recipes. Easy cleanup! Easy prep, great taste, good nutrition, quick clean-up! “Fix It In Foil” includes 51 fantastic recipes to make in foil — plus instructions for cooking in an oven, on an outdoor grill, or on a campfire. Fix it in foil and forget about scrubbing pots and pans. And, with plenty of substitution suggestions, enjoy a whole new list of recipe possibilities! Great for RVing! Learn more or order.
The Digital RVer
Organizing and safely storing your photos If you have photos you want to keep safely stored and organized for easy access, read these tips from Chris Guld, of Geeks on Tour. She has 58,000(!) photos on file, all sorted and safe, so she has some great tips on how you can sort your photos into albums, and even make a slideshow from them. Learn how.
The special offer for RV Travel readers is back!
Become a member of Geeks on Tour and get a 20% discount. Click here.
Keep your food cool with this RV fridge fan Every RV refrigerator should have one of these!
This small refrigerator fan from Valterra Products will help keep the food in your RV fridge cool and from spoiling. It cuts down initial cool-down time by 50 percent. Runs for more than 30 days on 2 D batteries. Don’t leave home without this! Learn more or order from Amazon.com.
Ask the RV Doctor The RV Doctor, Gary Bunzer, answers your questions
RV generator cannot carry a load
Dear Gary,
I read your column with much interest and one question regarding inexpensive water heater bypass valves caught my attention as I had a similar problem with my fifth-wheel. In my unit the hot water pressure was very low and flow was slow but the cold water was full bore at all taps. Living here in Calgary, I had stored my unit for a lengthy period in a winterized condition and that was exacerbated by a delay. I now have an older Rialta and until this year all was fine. Now the generator will start and run with no problem and I can turn on low load lighting without trouble, but as soon as a load is placed on it like the air conditioning or microwave, it quits right away. Any ideas for a fix? —Hank G.
‘Best club for motorhome owners!’ The Family Motor Coach Association (FMCA) is THE “best club, hands down, for motorhome owners.” So says RVtravel.com editor Chuck Woodbury, who has been a member for 25 years! The group has many local & special interest clubs, rallies, valuable member-only web content & a great magazine. A normal first-year membership is $60 per family, but FMCA is offering a special rate of $50 to RV Travel readers who click this link to join.
Ask Boondock Bob with Bob Difley
RVer wants to boondock but nervous about isolation
Hi, Bob,
I have always wanted to try boondocking, but my husband is nervous about being out in the “boonies” away from all support when we’ve never tried it and don’t know what to expect. Is there a way to ease into this way of camping without cutting all ties to civilization? —Joyce A.
Essential for big RVs! 2017 Rand McNally Motor Carriers’ Road Atlas If you drive a big RV — extra long or extra tall — then this truck driver’s road atlas will be a huge help in knowing where you can drive without encountering a low bridge or getting stuck hanging over a cliff. This is an essential aid even if you have a GPS! Coverage: United States, Canada, and Mexico. Learn more or order.
Gadgets and Gizmos
Brighten or dim your RV’s interior lights with 3-way switch
You can now vary the brightness of your cabin lights with the simple flip of a switch — no dimmer required, a press release from SalVinCo reports. Bee Green LED’s new Three Way G4 bi-pin LED bulbs offer you the option to choose among three levels of lighting from one bulb. Learn more.
Intellitec Battery Disconnect Relay prevents dead batteries
It is not a pleasant surprise to find dead batteries in your RV after storing it for a few weeks. The phantom discharges will do that; However, you can prevent your batteries from becoming discharged with a switch-controlled battery disconnect. Read more.
Walmart Locator:
Find stores for shopping and overnight stays
This is an invaluable aid for RVers who occasionally spend a night in a Walmart parking lot. State maps identify where the stores are located in the USA. Includes city or town where each store is located, type of store (Walmart or Supercenter), availability of gas and diesel fuel, distance from Interstate if within 10 miles & more. Published 2016. Learn more or order.
Upcoming RV Shows
• Florida RV SuperShow, January 18-22, Tampa, FL • Inland Northwest RV Show & Sale, January 19-22, Spokane, WA • Tacoma RV Show, January 19-22, Tacoma, WA • Austin Boat & Travel Trailer Show, January 19-22, Austin, TX • Toronto RV Show & Sale, January 19-22, Toronto, ON, Canada • Northeast RV and Camping Show, January 20-22, Hartford, CT • Chattanooga RV Show, January 20-22, Chattanooga, TN • New Jersey RV & Camping Show, January 20-22, Edison, NJ • Quartzsite Sports, Vacation & RV Show, January 21-29, Quartzsite, AZ • Georgia RV & Camper Show, January 23-25, Atlanta, GA • Louisville Boat, RV Sport Show, January 25-29, Louisville , KY • Ft. Myers RV Show, January 26-29, Ft. Myers, FL • Atlanta Camping & RV Show, January 27-29, Atlanta, GA • Seattle RV Show, February 9-12, Seattle, WA
See the list of all upcoming RV shows.
SUPER HANDY! Add an outdoor water faucet to your RV! This lead-free outdoor faucet is really handy. If you don’t have one, here’s a super inexpensive way to add one. No tools required and it installs in a minute (just screw it on). Brass T included with the plastic faucet, just as it’s shown in the product photo. Learn more or order.
Joke of the Week True story: An assignment in a creative writing class at Slippery Rock University required students to write a concise essay containing the following elements: religion, royalty, sex and mystery. The winning essay: “My God,” said the Queen. “I am pregnant! I wonder who did it?”
Keep rodents out of your RV!
The overwhelmingly positive reviews on this make it a best bet for keeping your RV rodent-free. This is the only plant-based rodent repellent registered for inside use by the EPA. It effectively repels rodents up to 100 days with a “woodsy” scent that’s pleasant to humans but offensive to rodents. It’s safe around kids and pets so no safety warning is required. 98% biodegradable. Tested and endorsed by the Good Sam Club. Learn more or order.
Videos you’ll like
How do an RV electrical converter and inverter differ?
Chris Dougherty explains the difference between an RV electrical converter and an RV electrical inverter. Watch the video.
Why dual tires should be matched
Roger Marble of RVtireSafety.com discusses why dual tires should be matched and how to determine if they are. Watch the video.
Random RV Thought To help keep your RV fridge cold on hot days when traveling without having it turned on, place two or three frozen ice packs inside before departing. When you arrive and turn your refrigerator back on, place the ice packs back in the freezer compartment to freeze for your next journey.
Cooking with Convection Don’t know how to cook with your RV’s convection oven? Then this book is for you. Beatrice Ojakangas, an authority on convection cooking, explains how to use your convection oven to achieve perfect results in dramatically less time than with a conventional oven – from meat to side dishes to dessert — all at the same time. Learn more or order.
Trivia
Alfred Hitchcock’s “Psycho” (1960) is the first American film to show a toilet being flushed on screen.
Don’t come up short! Sometimes your 50 amp power cord is not quite long enough! That’s when this 15-foot extension cord will come in very handy. Sure, you can use a wimpy orange extension cord with an adapter, but don’t try using much power (like your air conditioner) or you’ll burn up the cord or maybe even your rig! Carry this cord along and you’ll be all set. Learn more or order.
Worth Pondering “Someone’s sitting in the shade today because someone planted a tree a long time ago.” —Warren Buffett
RV Travel staff Editor and Publisher: Chuck Woodbury. Assistant editor: Diane McGovern. Contributing editor: Russ De Maris. Contributing writers: Bob Difley, Richard Miller, Richard Mallery, Janet Groene, Roger Marble, Julianne Crane and Chris Guld.
ADVERTISE on RVtravel.com and/or in this newsletter. Contact Chuck Woodbury at Chuck(at)RVtravel.com.
About the RVtravel.com editor Chuck Woodbury has explored America by RV for nearly three decades. In the ’90s he published the quirky travel newspaper Out West, and was an “on the road” writer for the New York Times Syndicate. His book, “The Best from Out West” is available at Amazon.com. Woodbury’s RVing adventures have been profiled on ABC News, CNN, NBC’s Today Show, and in People Magazine, USA Today and in hundreds of newspapers. Nowadays, he lives near Seattle, where he drinks massive amounts of coffee and travels often in his motorhome and sometimes by plane when vast expanses of saltwater would turn his RV into a leaky submarine. He is the host of the Better Business Bureau DVD “Buying a Recreational Vehicle,” the definitive guide to purchasing an RV the right way.
Everything in this newsletter is true to the best of our knowledge. But we occasionally get something wrong. We’re just human! So don’t go spending $10,000 on something we said was good simply because we said so, or fixing something according to what we suggested (check with your own technician first). Maybe we made a mistake.Tips and/or comments in this newsletter are those of the authors and may not reflect the views of RVtravel.com or this newsletter.
Our offices are located at 610 5th Ave. S, Suite F, Edmonds, WA 98020.
This website utilizes some advertising services. Sometimes we are paid if you click one of those links and purchase a product or service. Regardless of this potential revenue, unless stated otherwise, we only recommend products or services we believe provide value to our readers. Amazon and the Amazon logo are trademarks of Amazon.com, Inc . RVtravel.com is a participant in the Amazon Services LLC Associates Program, an affiliate advertising program designed to provide a means for sites to earn advertising fees by advertising and linking to Amazon.com.
RVtravel.com includes links to other websites. We cannot control the content and/or privacy policies of those sites. Please be aware when you leave this newsletter or any other section of RVtravel.com to read the privacy statements of any of those websites that collect personally identifiable information. Our own privacy policy applies only to RVtravel.com and its affiliated blogs.
This newsletter is copyright 2017 by RVtravel.com
TODAY’S DEALS ON RV PARTS & ACCESSORIES AT AMAZON.COM. Click.
We have a winner. The correct answer is “A” — to create ruffles, etc.
What was this device from the late 1800s used for?
A. To create ruffles, or flutters, in dress sleeves and skirts.
B. Used in shoe making to strengthen and add texture to leather.
C. Mothers used it to remove wrinkles from cloth diapers.
D. To create edging for pie crust and other pastries.
THE 21ST PERSON TO ANSWER CORRECTLY WINS THE PRIZE
Only one entry per household.
Email your answer (A, B, C or D) on the subject line to rvcontests@gmail.com. Please include your mailing address and phone number. We will only use that info if you win. We’ll notify you if that’s you. Good luck.
The dry creek behind our RV came close to overflowing and flooding the park. Lucky for us, the rain stopped just in time.
It’s been raining cats and dogs here in San Juan Bautista for the last week, causing flooding, road closures and power outages. If we hadn’t signed up for a month at the Betabel RV Park and committed to some repair tweaks on the motorhome, we would have headed off before the storm and avoided the torrential rains and flooding.
Lucky for Gail and me, we fared well. The dry creek behind the RV park came close to overflowing and causing havoc, but the rains stopped in the nick of time. Now, Thursday afternoon, the worst of the storm is over and the creek is receding.
Nearby Hollister made headlines around the country for the rescue efforts to save residents in danger due to flooding. Tom Birmingham of Hollister RV, where we are getting some work done, spent 12 hours with the local sheriff’s rescue team transporting residents in flooded areas to higher ground.
We lost power once for a few hours Tuesday evening, no big deal because our 12-volt system kicked in, allowing us to live normally. Power was out in close by Gilroy for longer. Residents there were forced to burn candles and stay warm with blankets.
The sun is out today, and expected to remain so for at least four or five days. We plan to begin our migration south to Arizona on Monday.
We use cookies to ensure that we give you the best experience on our website. By continuing to use our site, you consent to accepting cookies. We NEVER have or will sell reader's data. For more info, please see our privacy policy page.


 If the fresh water system was not drained completely or properly, the water heater could have ruptured or, at the very least, a fitting could have been damaged. Check for water around the water heater tank first; be sure to feel around it as much as possible because the tank is surrounded by a foam shell. If the tank is damaged, the water may be somewhat contained by the foam. At the rear of the water heater, from inside the coach, check the outlet fitting at the top and the cold water inlet at the bottom. If you have a water heater bypass valve kit installed, check those valves for dripping also; likewise, for any water filter or purifier in the system.


 Here are the Mars books I read with their links to Amazon. If you have incurable wanderlust like me and are fascinated with space travel, then you may enjoy them, too.
  Many of you commented last week with horror stories about problems with your new RVs or service after the sale. I will keep working to do what I can to help these people and others from ending up in RV horror situations. It will be a battle. As is, RV makers can turn out crap and there is often little a buyer can do to get things right. I urge you to download and read my friend Greg Gerber’s series “The RV industry death spiral.” It’s free.


 Not surprisingly,
 For decades people have traveled to California’s Calaveras Big Trees State Park to see – and walk through – the giant sequoia named Pioneer Cabin. Alas, the giant rainstorms took down the giant tree on January 8. Also known as the Tunnel Tree, it was hollowed out sometime in the 1880s and was 33 feet in diameter when it fell. It was about 2,000 years old.


 Avoid nasty odors from your RV toilet
 Okay to overnight in an RV at a truck stop?
 Bring Grizzly Bears back to Cascade Range?
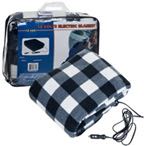 Stay warm with this 12-volt Warming Blanket
 Organize your RV’s shower!

 Good Sam Campground Guide
 Forget messing around with flares.

 Avoid moisture damage to your RV


 Fix it In Foil! Tasty Recipes. Easy cleanup!
 Keep your food cool with this RV fridge fan
 The Family Motor Coach Association (FMCA) is THE “best club, hands down, for motorhome owners.” So says RVtravel.com editor Chuck Woodbury, who has been a member for 25 years! The group has many local & special interest clubs, rallies, valuable member-only web content & a great magazine. A normal first-year membership is $60 per family, but FMCA is offering a special rate of $50 to RV Travel readers who


 Keep rodents out of your RV!
 Cooking with Convection
 Don’t come up short!

