
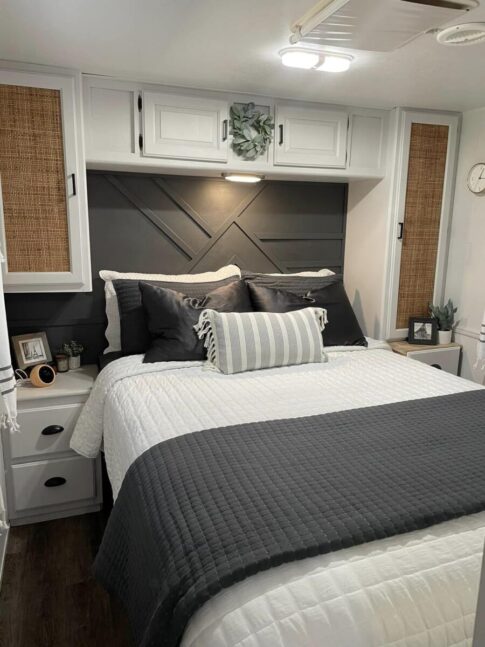
The before and after photos are amazing! If you follow RVing groups on social media, you’ve undoubtedly seen how a fresh coat of paint can elevate and revive an RV interior. Just look at the photo above!
If you’ve been dreaming of a fresh, new look for your RV’s interior, you’re not alone. Many RV enthusiasts want to breathe new life into their home on wheels but feel unsure about where to start. This step-by-step process will guide you.
Step 1: Plan and gather supplies
Plan your design. Before you pick up a brush, take some time to envision the final look. Are you aiming for a modern, bright space? Or something more subdued and cozier? Will you paint only the cabinets, just the walls, or both? Having a clear plan will help you choose the right colors and finishes.
Gather tools and materials. Here’s a checklist of what you might need:
- Paint and primer: Use a primer and paint that are formulated for safe and durable interior use. Sherwin Williams Extreme Bond or Kilz Adhesion Interior and Exterior Primer are highly recommended primers. Some “RV flippers” have discovered that a paint and primer all in one, like Sherwin Williams Emerald Acrylic Latex, works well on walls that have some texture. If this is the case, there’s no need for a separate primer product. (Note: Tell the paint pro what you plan to paint. He may suggest you use a different product for wood surfaces versus walls.)
- Sandpaper and putty: For smoothing out surfaces and fixing any imperfections.
- Cleaners and degreasers: To remove dust, grime, or old residues.
- Brushes, rollers, and painter’s tape: For application and protecting areas you don’t want to paint.
- Drop cloths or plastic sheeting: To cover floors, furniture, and fixtures.
Tip: Investing in high-quality supplies can make a huge difference in both the ease of the project and the final result.
Step 2: Prepare the interior
Clear the area. Remove or cover any furniture and personal items. This not only protects your belongings but also gives you more room to work efficiently.
Remove obstructions. Clear the walls of any hooks, nails, and screws. If you are painting cabinets, remove the hardware from all doors and drawers. Remove cabinet doors from hinges and take out all drawers for painting.
Clean thoroughly. Clean all surfaces to remove dust, grease, and any old flaking paint. A mix of warm water and a mild detergent (like original Dawn) often does the trick. For tougher spots, a degreaser can be beneficial. A clean surface is crucial for proper paint adhesion.
Wallpaper border. If your rig’s interior features a wallpaper border, you can remove it. A product like Goo Gone will help eliminate any glue residue that remains on the wall.
Do not, however, attempt to remove the wallpaper-like surface of the wall itself. This can be very difficult, if not impossible, to remove. If there are surface tears or gouges, remove any loose or bubbled pieces and patch over them with spackle.
Step 3: Repair and sand surfaces
Patch and repair. Inspect the walls, ceiling, and trim for any cracks, holes, or imperfections. Use putty or spackle to fill in these areas, then allow it to dry completely.
Sand for smoothness. Once repairs are dry, lightly sand the surfaces to create a smooth base for the new paint. This step helps the primer and paint adhere better and ensures a flawless finish. Tip: Remember to wipe away any sanding dust afterward.
Step 4: Apply primer
Why primer matters. Primer helps seal the surface and improves paint adhesion. This is especially important in an RV where surfaces might be exposed to varying temperatures and humidity.
Application. Use a roller or brush to apply a thin, even coat of primer. Allow it to dry as per the manufacturer’s instructions before moving on to painting. This step can really make your paint job look professional and last longer.
Step 5: Painting your RV interior
Choose your technique. Depending on the area and your comfort level, you might opt to use a brush for detailed areas or a roller for larger, flat surfaces. For a smooth, uniform finish, apply the paint in even strokes.
Multiple coats. Often, one coat isn’t enough. After your first coat dries, assess the coverage. A second (or even third) coat might be necessary to achieve the depth of color you desire. Patience is key!
Ventilation. Always ensure your RV is well-ventilated while applying primer and paint. Good ventilation (in low humidity) will also help to dry the paint. This not only speeds up the process but also helps to clear any fumes from the paint.
Step 6: Finishing touches and cleanup
Inspect and touch up. Once the final coat is dry, take a good look around. Touch up any missed spots or uneven areas for a seamless finish.
Clean your tools. Thoroughly clean brushes, rollers, and other tools immediately after use. Check the manufacturer’s recommendations printed on the primer/paint can. This extends the life of your tools for future projects.
Reassemble. After everything is completely dry and cured, replace your furniture and personal items. Get ready to enjoy your refreshed space!
Go for it!
Revamping your RV interior with a new coat of paint can be a rewarding DIY project that not only enhances your living space but also increases your RV’s overall appeal.
By planning carefully, preparing thoroughly, and following these step-by-step instructions, you can achieve a professional-looking finish that reflects your personal style.
Whether you’re a full-time RVer or an occasional traveler, these tips can help you create an inviting and refreshed interior.
RELATED
- We had our RV custom painted. Here’s what the process was like
- Have a paint nick or chip on your RV? Here’s an easy trick
- Paint your RV hitch for easy hitch-ups
- Using painter’s tape while RVing in brilliant ways you’ve never thought of
- How to paint an RV for less than $300
More articles you might really like
• RVers, if you see purple paint on trees, stay away
• Has ‘greedflation’ taken over RV campgrounds?
• $245 a night at a KOA—Where will it end??
• Child dies from electrocution from touching the family RV
• Why Moose and Elks lodges are the way to go for RVers
• RV inspector’s picks: 3 best RV brands for travel trailers
##RVT1198

I would LOVE to re-do the interior of our 12 year old dark interior trailer. But, I’m not the one to do it. I would gladly hire a professional for that. But finding one might be a problem. My bones, joints, and ‘gumption’ are just not up to it.
Unlike the modern trend to paint everything, my wife and I prefer the look of natural wood. Growing up, paint was used to cover cheap wood, while the stain and varnish was used to show off the natural beauty of quality wood.
I agree completely! If I could afford a new Class A DP, I would not even consider one with painted cabinets. Years ago, we had a $14,000 travel trailer with stained, REAL wood cabinets. Now every reasonably-priced RV has “prison gray”-painted, fake wood (particle board) cabinets.
Thank you for so carefully listing and discussing the steps of redecorating, Gail! Doing it well certainly is a lengthy process. Have a great week and safe travels!
Removed and replaced cabinets, countertops, wallpaper border, lights, flooring, window shades, chairs, couch, stove/oven, microwave, bath and kitchen sinks along with faucets, bath countertop, and one of two bath doors, dinette. Installed new cabinets, vinyl plank flooring, chevron butcherblock countertops all around except bath, went standard there, bath vessel sink, deep single kitchen sink, new faucets, new LED puck lighting, curtains, mother of pearl backsplash, convection/microwave, two burner stove top, left over countertop become new dining table for two with standalone chairs.
not only painted…doesn’t look like an RV inside much. Don’t be afraid of taking on your remodel, plan it out and jump in!
Way to go, Robin!
“Why doesn’t anybody paint their RV’s interior?” Right off the bat, I can think of 3 reasons-
If FT, you almost have to move out during the work. In a house, you clear a room (or pull the furniture to the middle). Not practical in an RV.
If PT, you need good access to power and water and live nearby. Hard to do from most storage lots. Temperate weather also helps.
If a weekender- hey, I just want to use the thing. Function is more important than looks.
Of the two pictures shown at the begining of the article I much prefer the wood. If it was a dark wood like walnut then maybe not so much. Once painted it is nearly impossible to go back to the natural look.
Article doesn’t discuss how to deal with melamine laminate – the “fake paper” on top of particle board cupboards in an RV. This peels when it gets damp enough. It seems like you would have to remove all this and paint the particle board, or it would just peel up.
I would never paint real wood and to go to white? Sounds like much more dirt would show and any chip or scratch. To each their own but I like wood.