America’s Original RV Newsletter. Since 2001
Issue 1256
If you find this newsletter helpful, please consider supporting our work with a donation of your choice. Thank you!
Today’s thought
“Man cannot discover new oceans unless he has the courage to lose sight of the shore.” —André Gide
Need an excuse to celebrate? Today is National Grilled Cheese Sandwich Day! Like grilled cheeses? Then you will looooove all of these.
On this day in history: 1937 – Sir Frank Whittle ground-tests the first jet engine designed to power an aircraft, at Rugby, England.
RVtravel.com readers discuss staying at Love’s RV Stops. Stay or pass? Worth it or not?
By Tony Barthel
Last week, I shared my honest thoughts about staying overnight at Love’s RV Stops, and you all weighed in. Heavily! I was surprised how popular the story was, and there were some great comments which I’d like to address. Here are the things you love about Love’s, and the things that you don’t. Some of you say you’d never stay at a Love’s again, so let’s dive in.
Rising costs push RVers to rethink how they travel
By Emily Woodbury
If you’ve been RVing for a long time, you already know how to stretch a dollar. But lately, many of us are pausing before turning the key. Fuel prices are unpredictable and climbing quickly, campground rates are creeping up, and those “quick getaways” don’t feel as inexpensive as they used to. So what are RVers doing about it? Find out here.
You can be TOO nice of a campsite neighbor. Don’t do these four things.
By Nanci Dixon
Be a good campsite neighbor and don’t do these four things. There are a number of simple etiquette things to do or not to do to be a good RVer that we all know… or at least should know. I recently learned some new things and these four things are now at the top of my not-to-do list. I found out you can be too nice of a campsite neighbor…
 Today’s RV review…
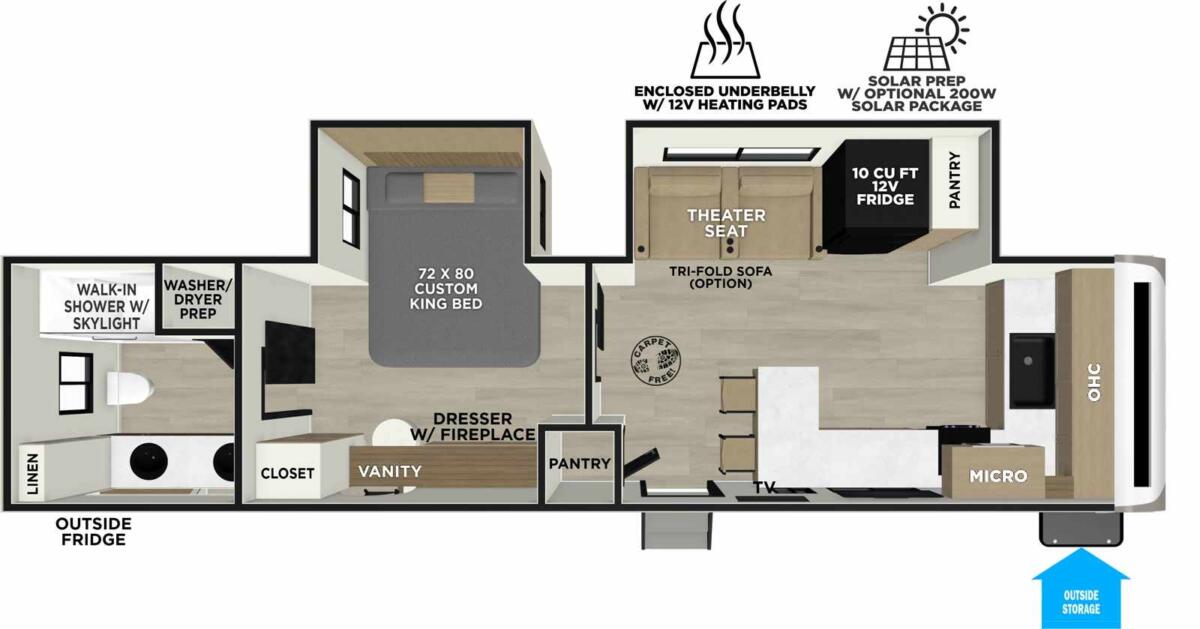
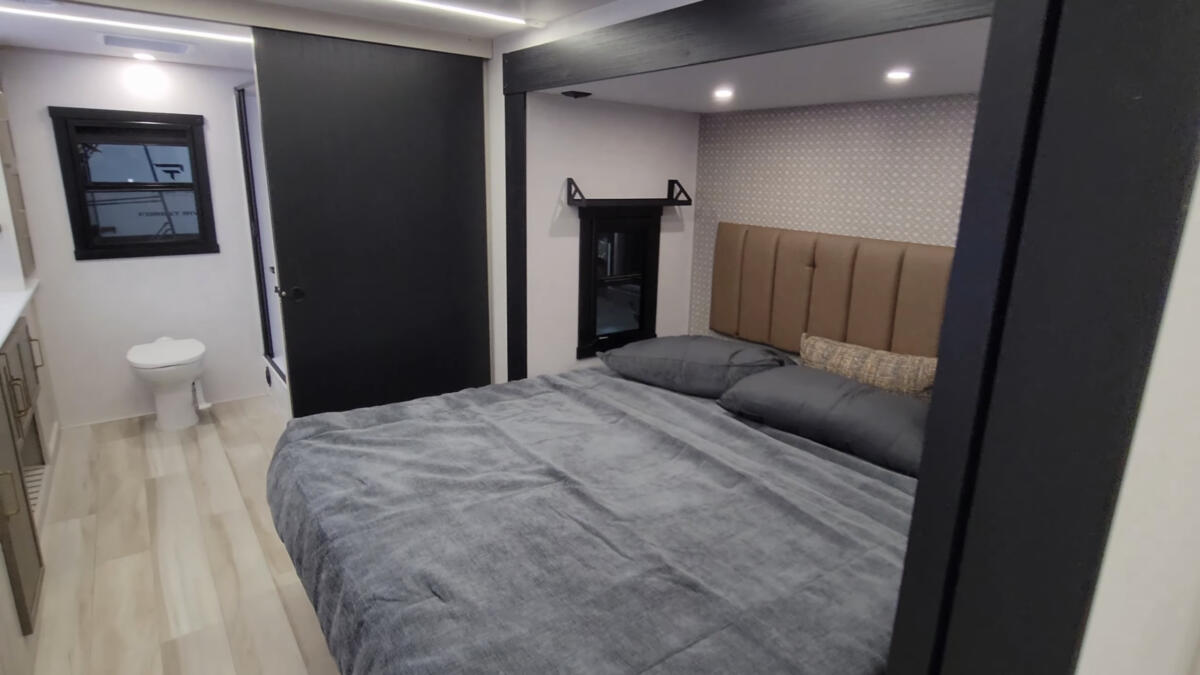
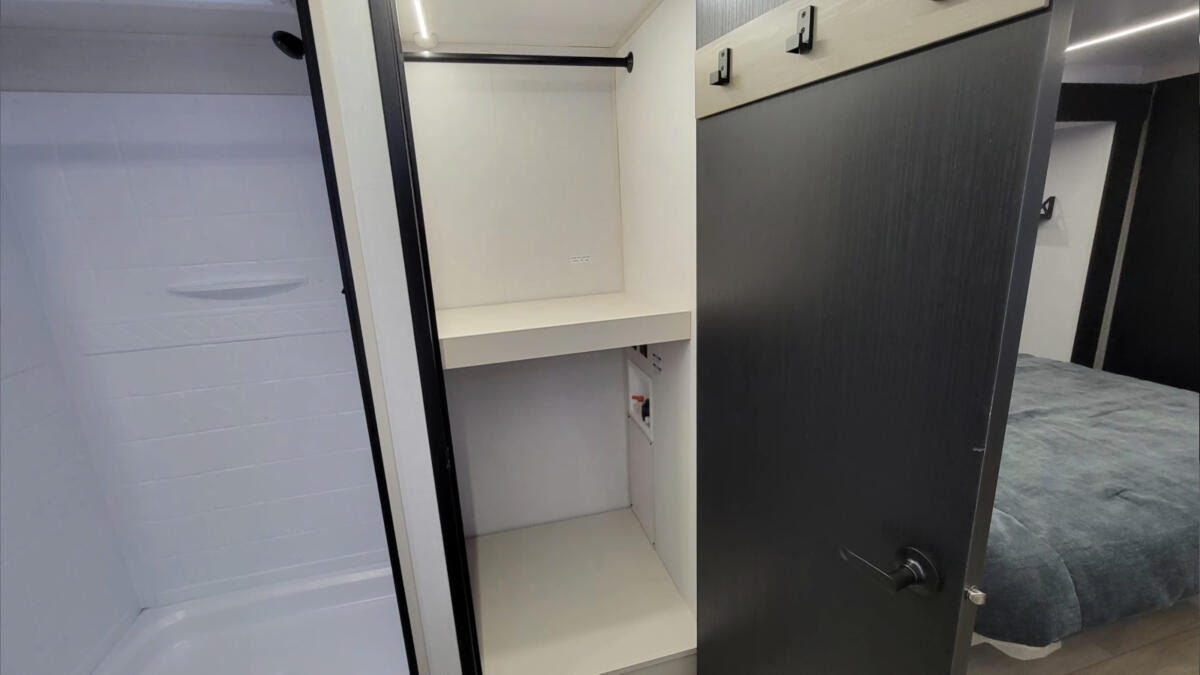
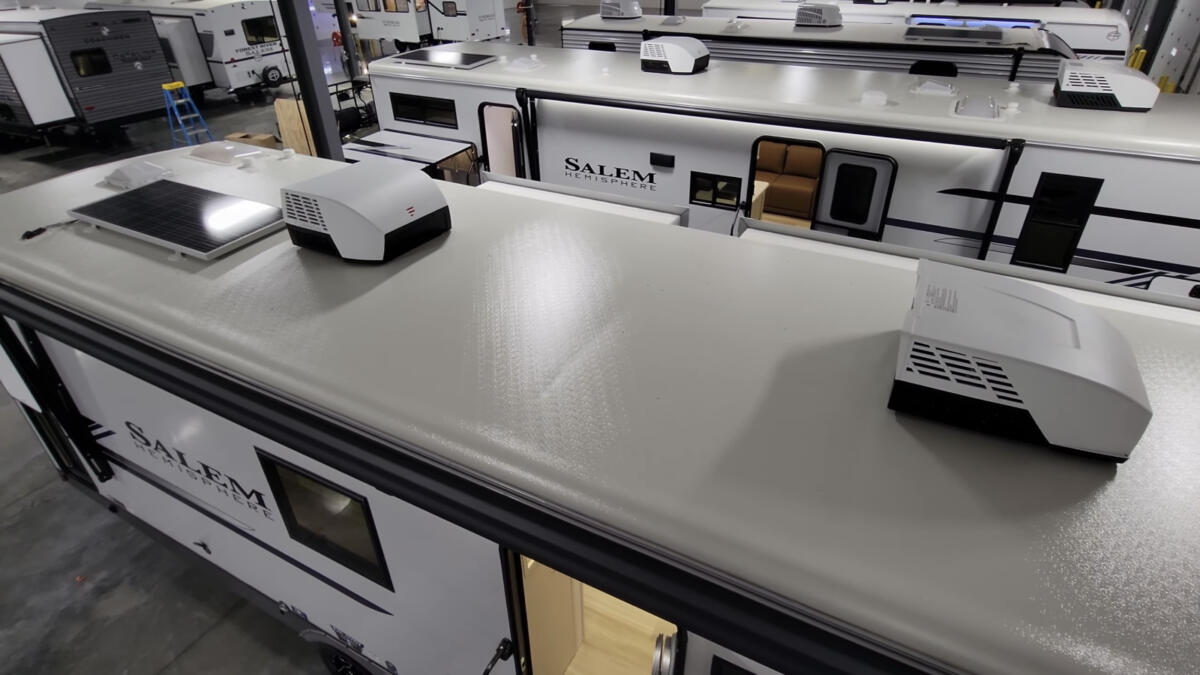
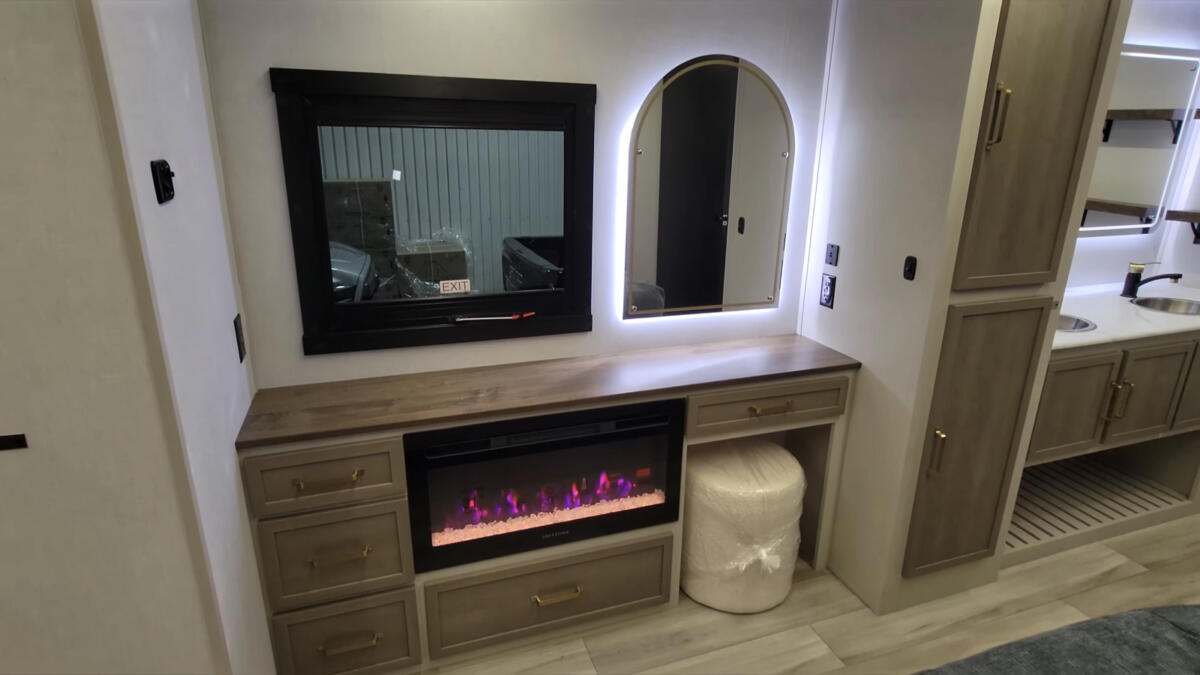
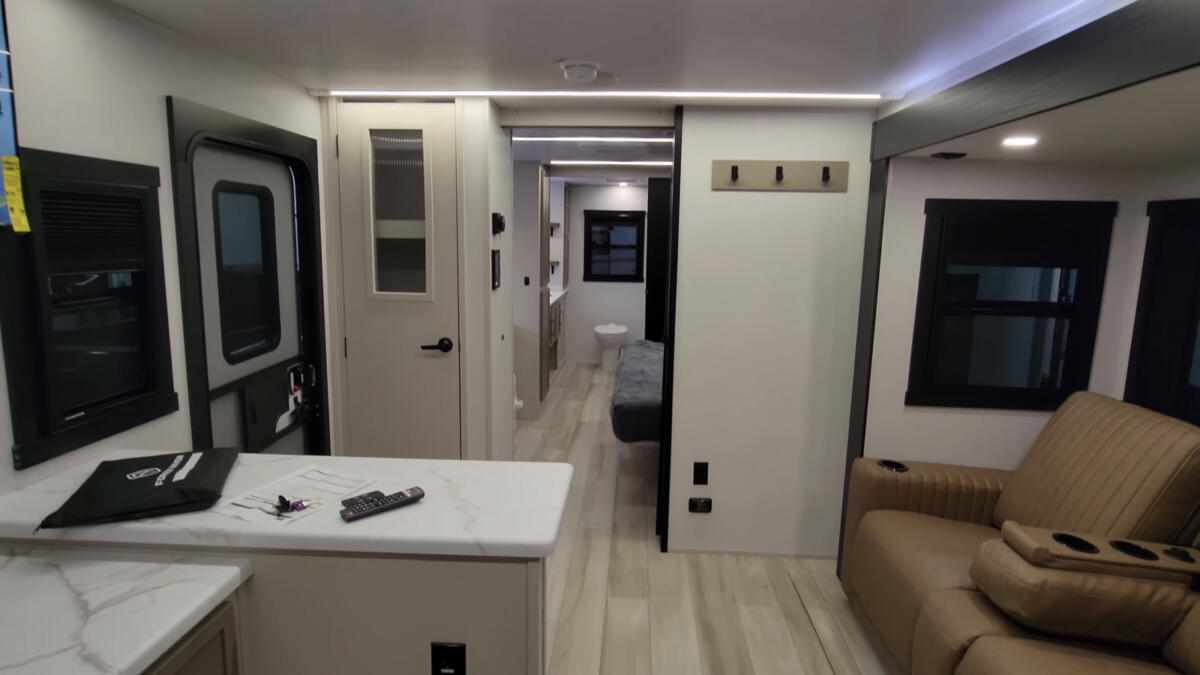
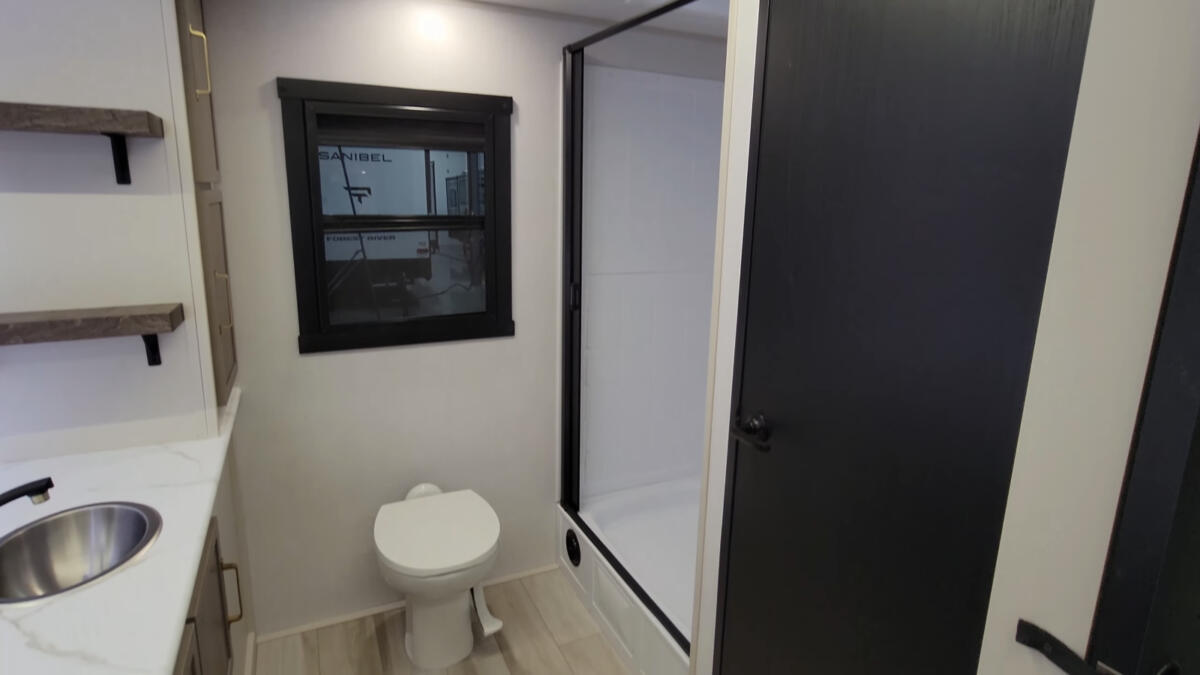
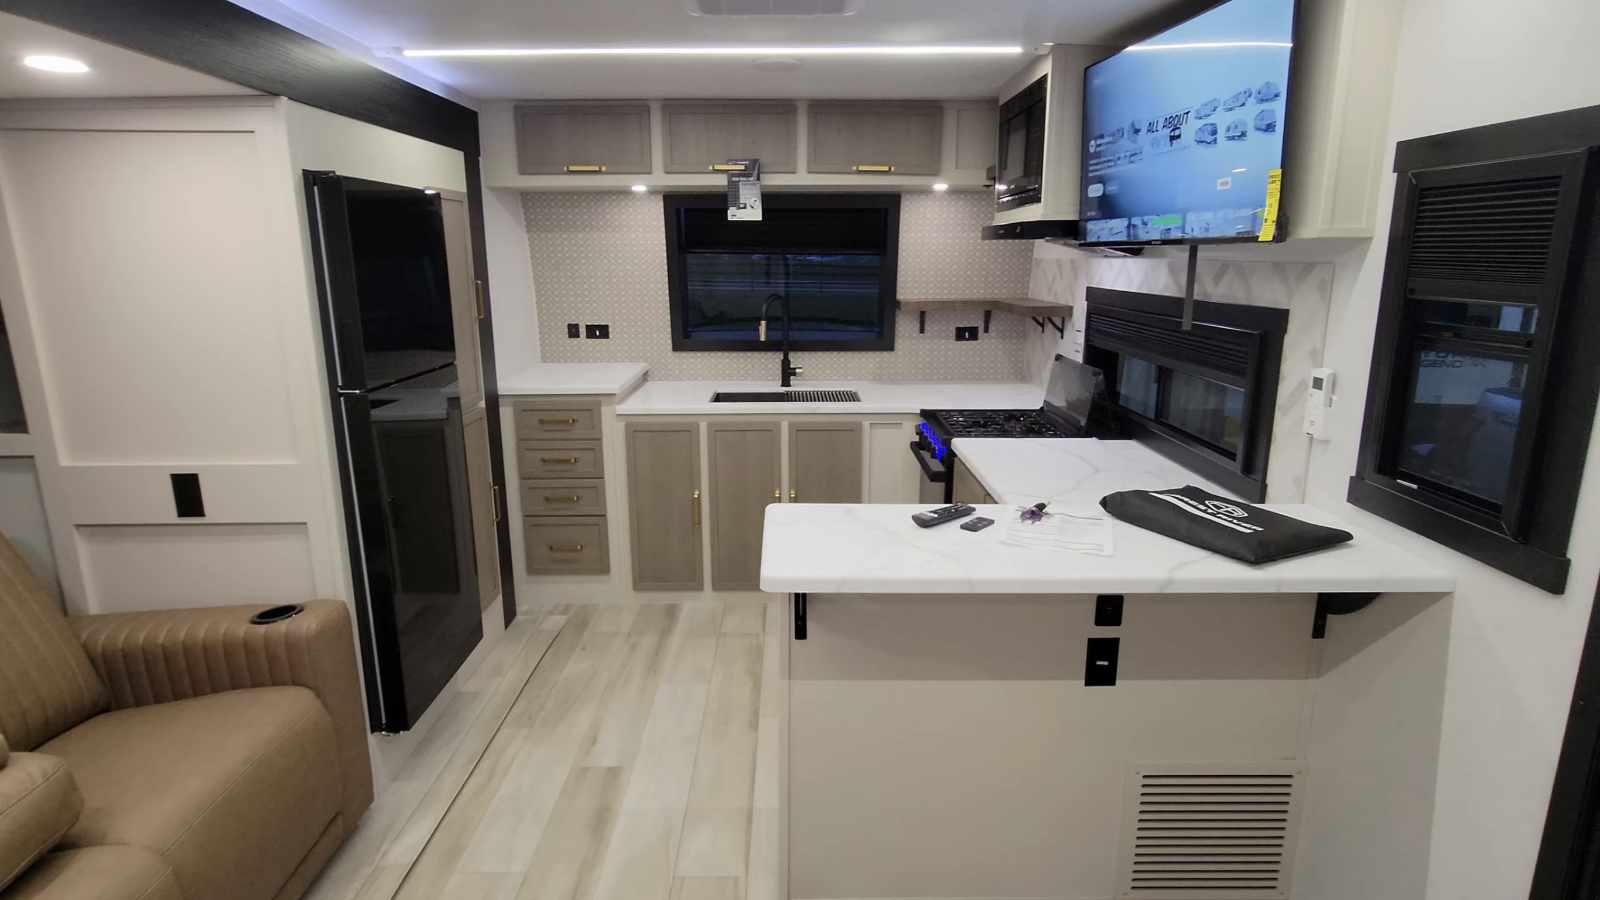
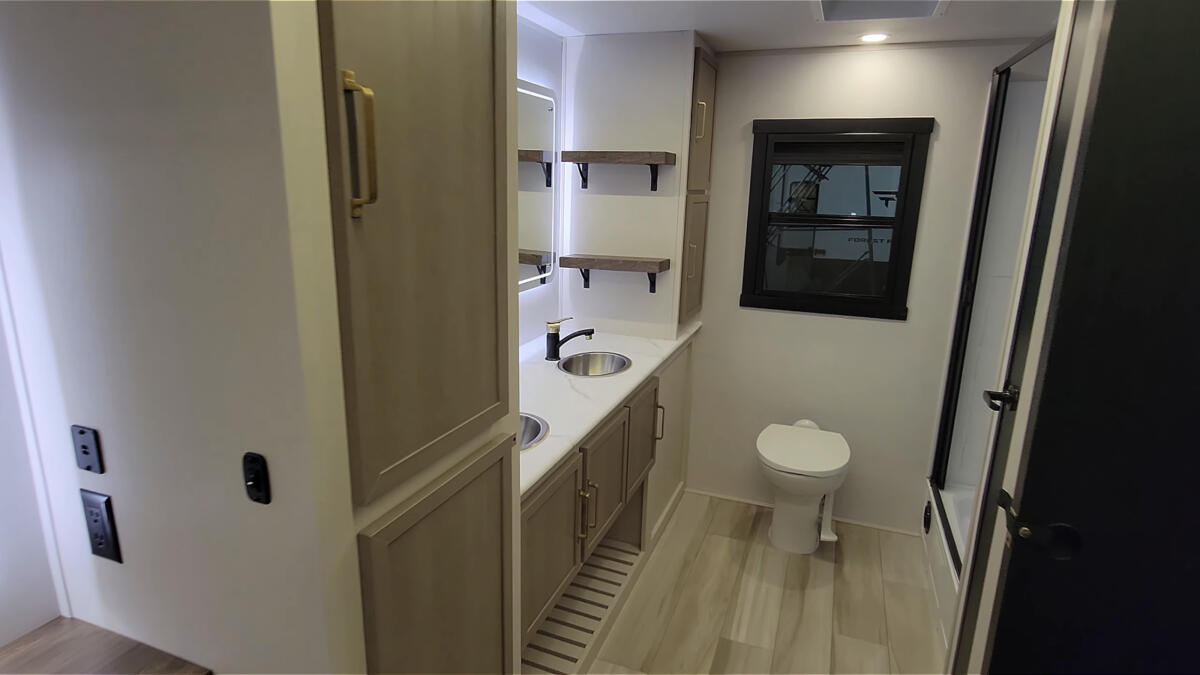
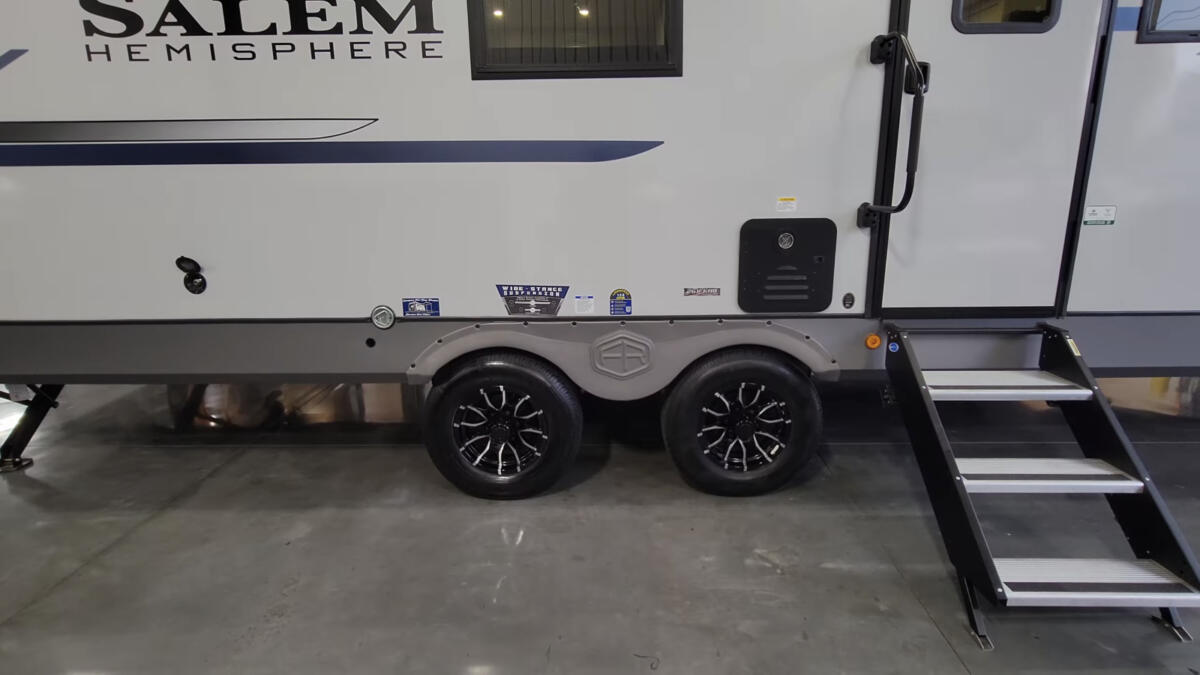
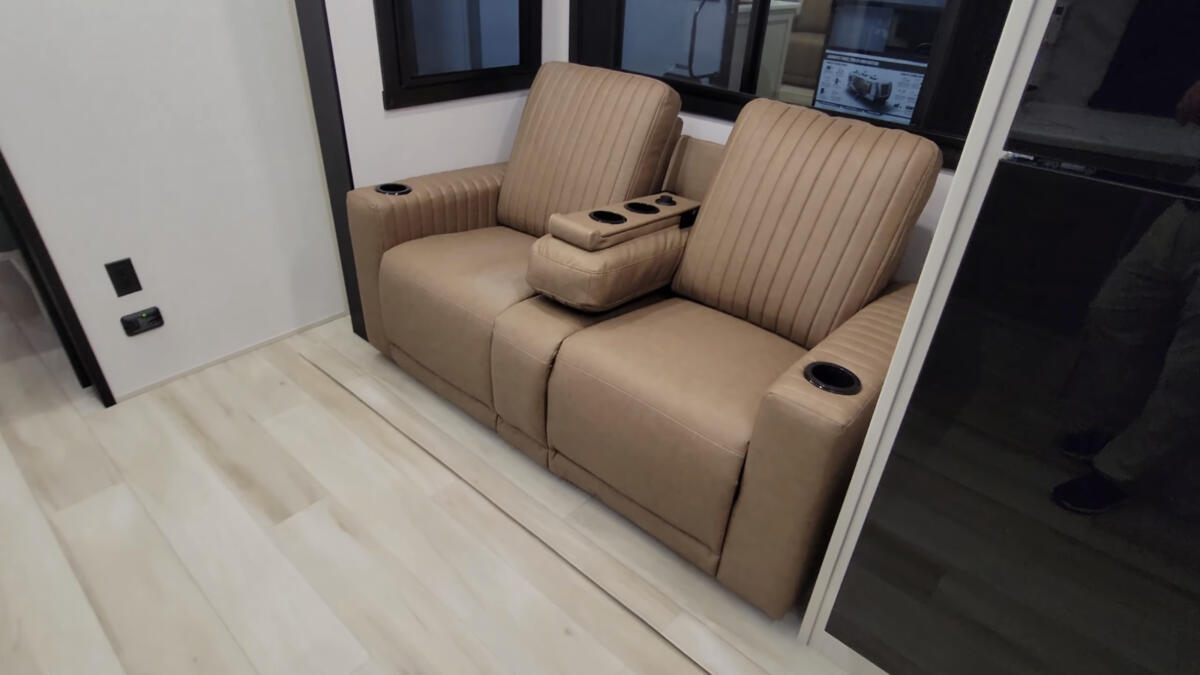
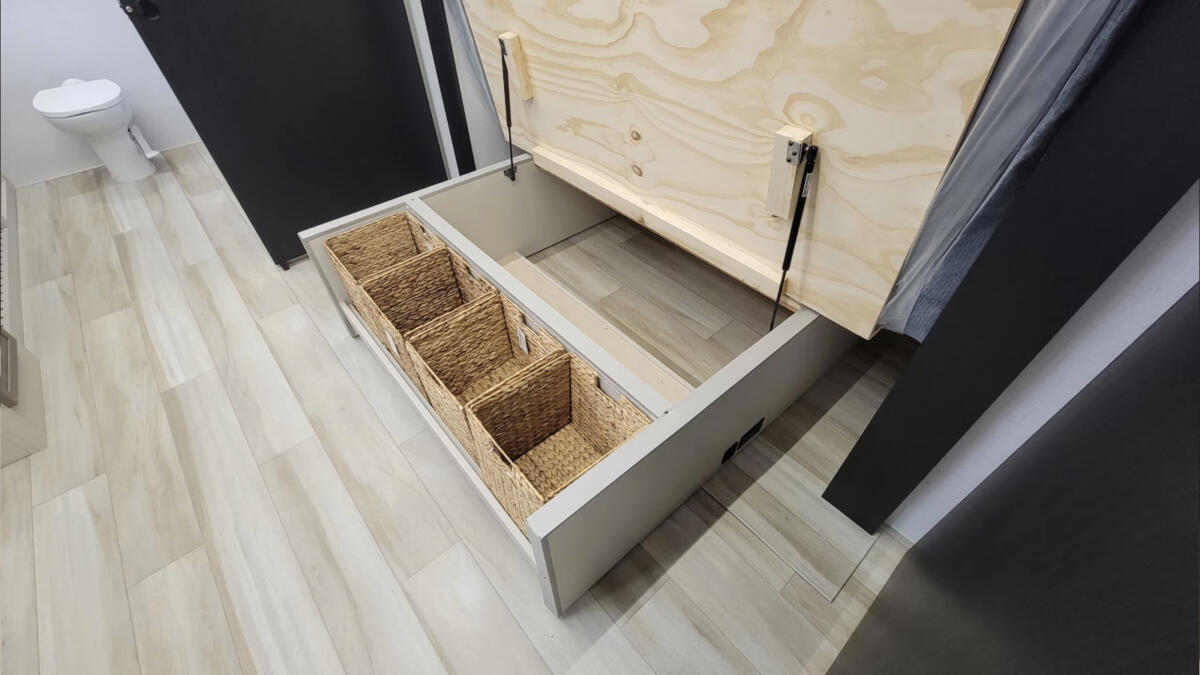
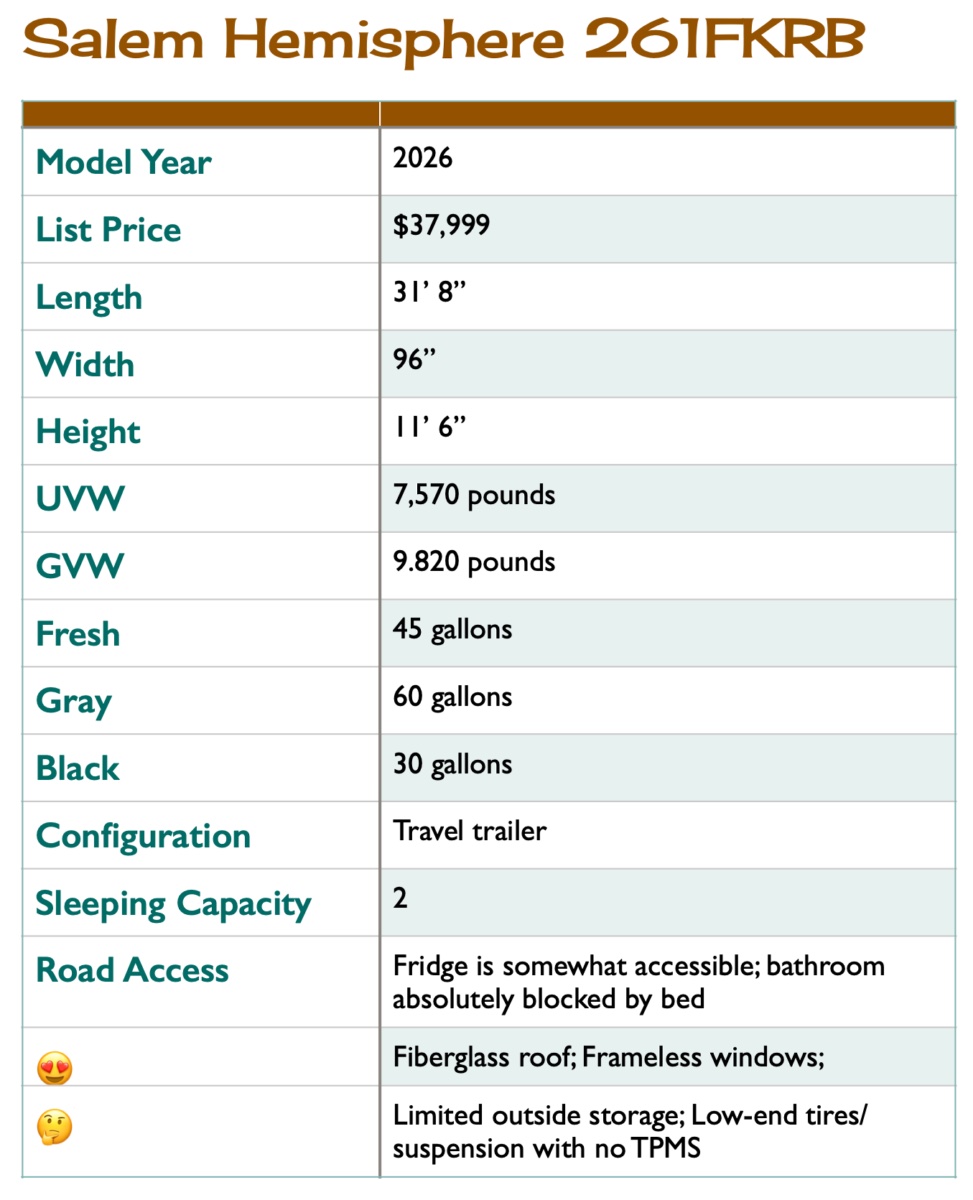
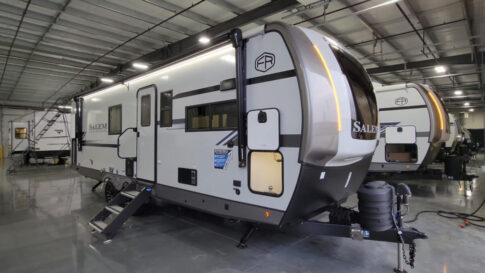
2026 Salem Hemisphere 261FKRB—a nice long-term choice with premium features
By Tony Barthel
Today’s RV review is of the 2026 Salem Hemisphere 261FKRB—a couple’s trailer with an unusual floor plan. I know many of you who read this have seasonal sites, and I could see this being a great choice for that type of use. This also has some layout features I haven’t seen in a while. It hits the mark on a number of premium features without a really premium price tag. Check it out.
Yesterday’s top news for RVers
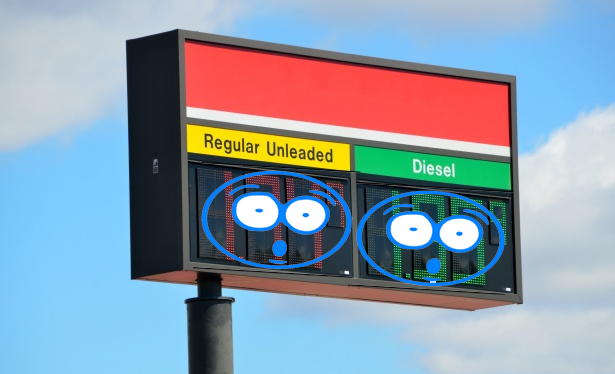
- U.S.–Iran ceasefire talk hasn’t lowered fuel prices much. Here’s why
- Gas prices are climbing, but diesel is jumping faster. Here’s why it matters.
- That “pause” on Starlink could cost you hundreds—or more
- New Starlink hybrid plan promises simpler internet for RVers
- Love’s rolls out RV tire and battery service across 27 states
- Beyond the headlines with Tony Barthel: New TPMS standard, smart trailer concerns, Battle Born update
Read the rest of the news in yesterday’s newsletter here.
$2 and UNDER FLASH DEALS! This is crazy (as in good-crazy!). Check out all these super bargains before they’re gone.
The simple fix for a rocking RV
It doesn’t take much to make a parked RV feel like it’s floating. Even with RV wheel chocks in place, that slow rocking can still show up. Somebody walks from the kitchen to the bedroom. A gust of wind hits the sidewall. Maybe you just shift your weight in the recliner. What’s missing is control of the one kind of movement that leveling doesn’t really handle: that gentle forward-and-back creep in the tires. Here’s what you need.
Slide room in a van?! Tour the expanding DIY RV van build
In the video at the bottom of this article, Bob Wells from Cheap RV Living interviews Kelly, an engineer by trade, who created just about the most advanced DIY camper van you will ever see. He even installed a slide room on a van! As Bob says, “Everything you could want in a van is in this van!” Wow! Check it out.
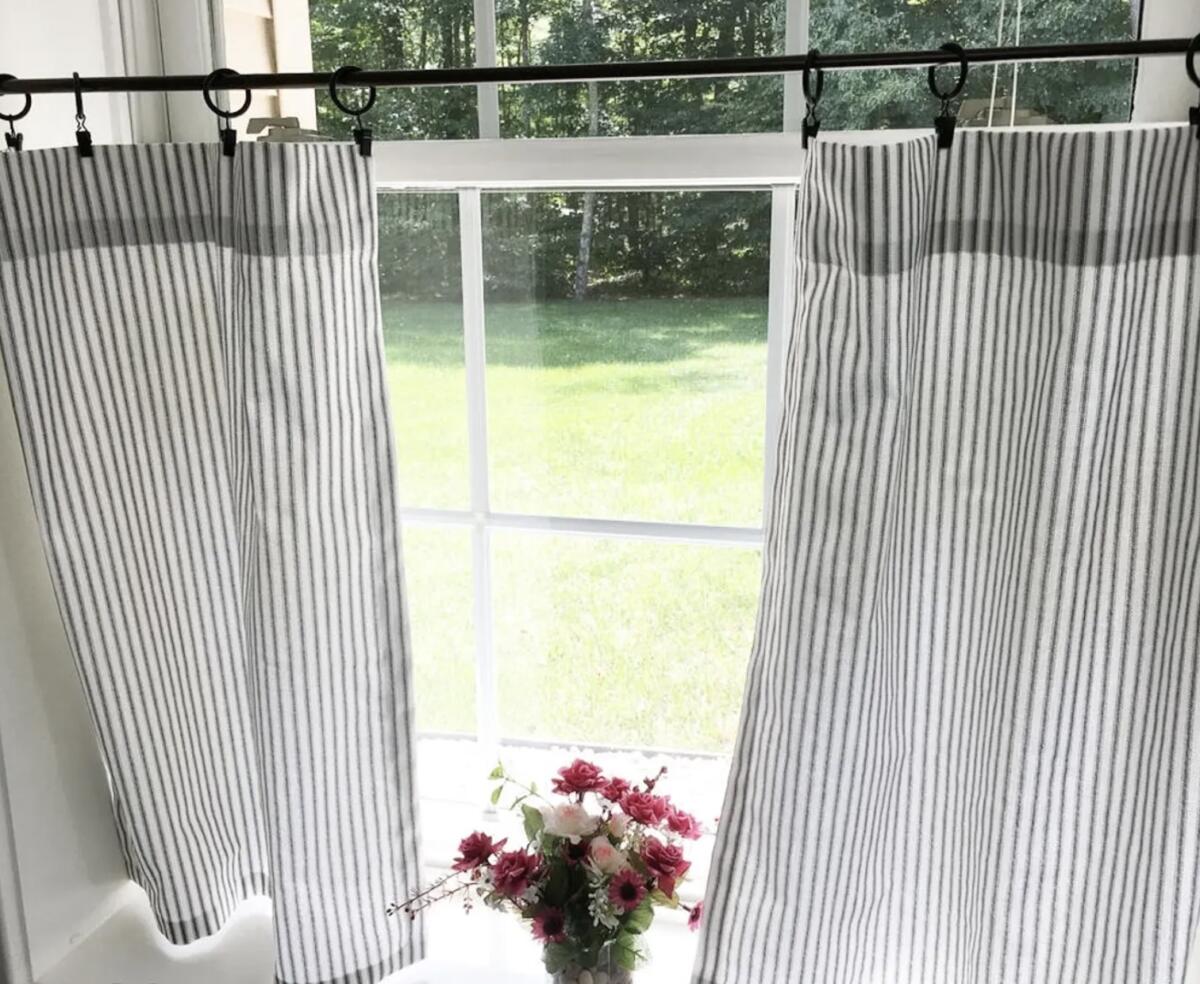
Easy, no-sew DIY curtain ideas for your RV’s windows
If you’ve spent any time inside your RV staring at bulky, dated window valances, you’re not alone. They’re one of the most commonly disliked design features in RVs. The good news is you don’t have to live with them. Whether you want to soften the look, brighten your space, or go full modern minimal, your windows are one of the easiest places to start. Check out these easy DIY ideas.
Tanner Toons
With Tanner Woods
Our amazing readers
RVtravel.com readers reveal the special times in their lives
By Chuck Woodbury
A few weeks ago, I asked you to write me about some of your special life moments or accomplishments of which few, if anybody you know, were aware. Here are your stories. Thank you for sharing, and keep ’em coming. Don’t be shy!
Blast from the past
This short item appeared in this newsletter’s November 1, 2001, edition:
RVers BENEFITING FROM LOWER GAS PRICES
Nationwide, AAA reports that gas prices have dropped to $1.30 a gallon, providing motorists with a much-needed break at the gasoline pumps. The prices are the lowest since January 2000, due mainly to a dramatic drop in crude oil prices since mid-September. (Sigh.)
 🔥 Reader favorite
Have a hard time opening water bottle lids?
These will help! Simply push one of these “lids” onto the water bottle lid, and voila, it’ll be much easier to twist off. These are designed with seniors and those with arthritis in mind, and they really help! Here’s an affordable pack of 3.
 Tony’s tips
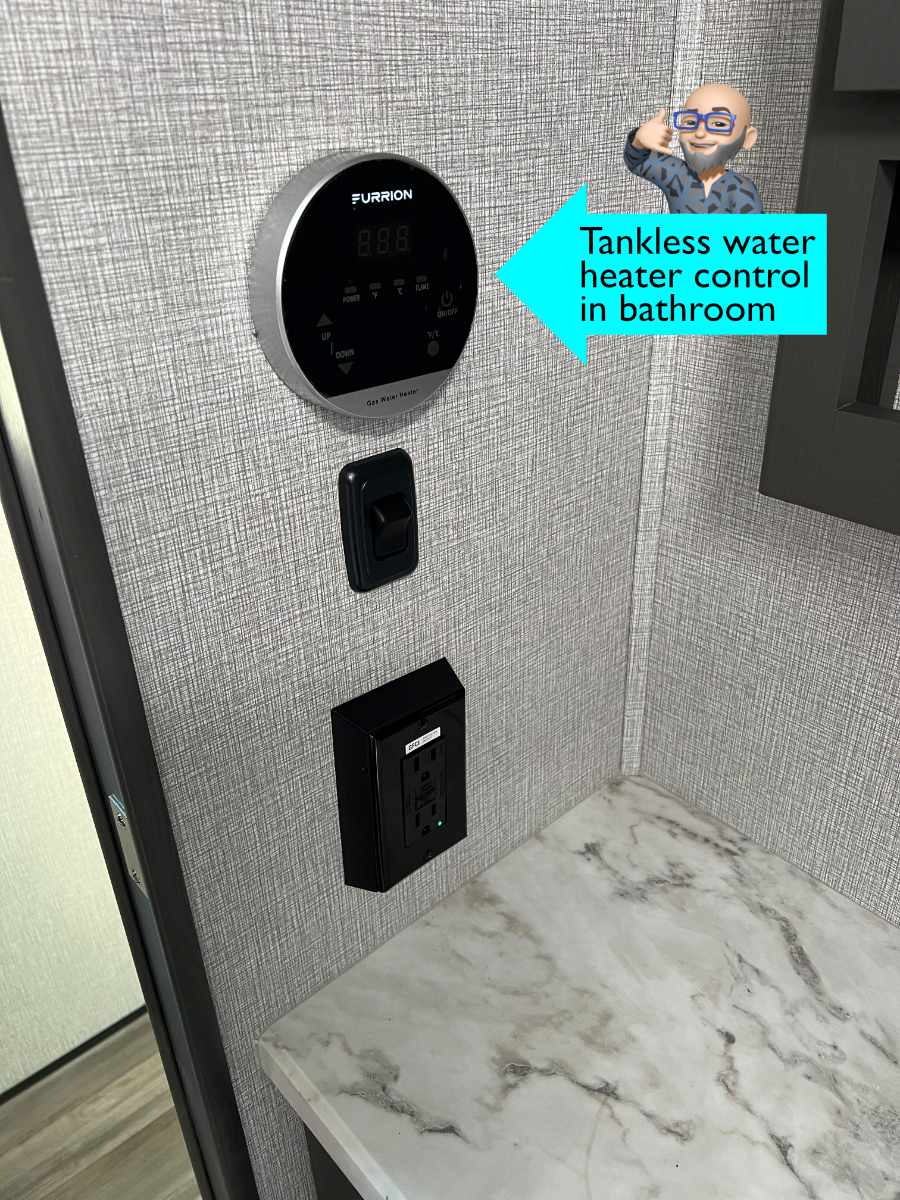
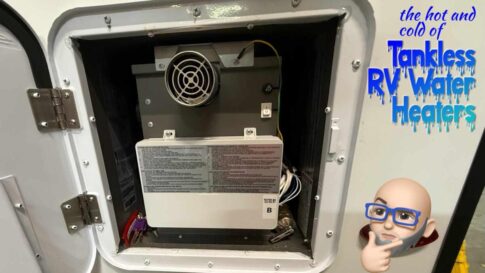
The hot and cold of tankless RV water heaters
Why are you seeing tankless water heaters suddenly being included in so many RVs? A few years ago, these were luxury items, and now they’re everywhere. Is the RV industry becoming more generous with what they’re offering? Have you stopped laughing at that question yet? So what’s the deal? I’ll tell you here.
Reader poll (and article)
To tell or not to tell: Would you tell other RVers about the “perfect” campground?
After RVing for years, you stumble upon the perfect RV campground. Do you tell other RVers about your find? Or do you keep information about the campground all to yourself? Respond here.
POLLS FROM THIS PAST WEEK
- Would you attend an RV show in the next month if it were within an hour’s drive of you?
- When RVing, do you rely on income from employment to afford to travel?
- When RVing, do you collect souvenirs?
- How often do you go out to dinner?
- Will you plan a special outing (or drive) this month to view flowers?
 Times are challenging. Can you help?
RVtravel.com readership has dropped. Why? Google no longer shows our stories in its search results, which has had a big impact on us. It’s the same story with a million other independent websites. We’re doing okay because of our loyal readers, but we are hugely challenged. Would you please become a voluntary contributor? It would really help. As a thank you, you’ll receive our Saturday and Sunday newsletters ad-free. Thank you very much, and thank you for being a valued reader.
 Sunday giveaway
How would you like to win this “old-fashioned” telescoping campfire popcorn popper?
How to win
We’ll select a winner at random out of all entries we receive today by 7 p.m. Pacific time. You can only enter once and after we notify you by email that you won, you have 24 hours to respond. Click here to enter or see last week’s winner.
Travel destinations
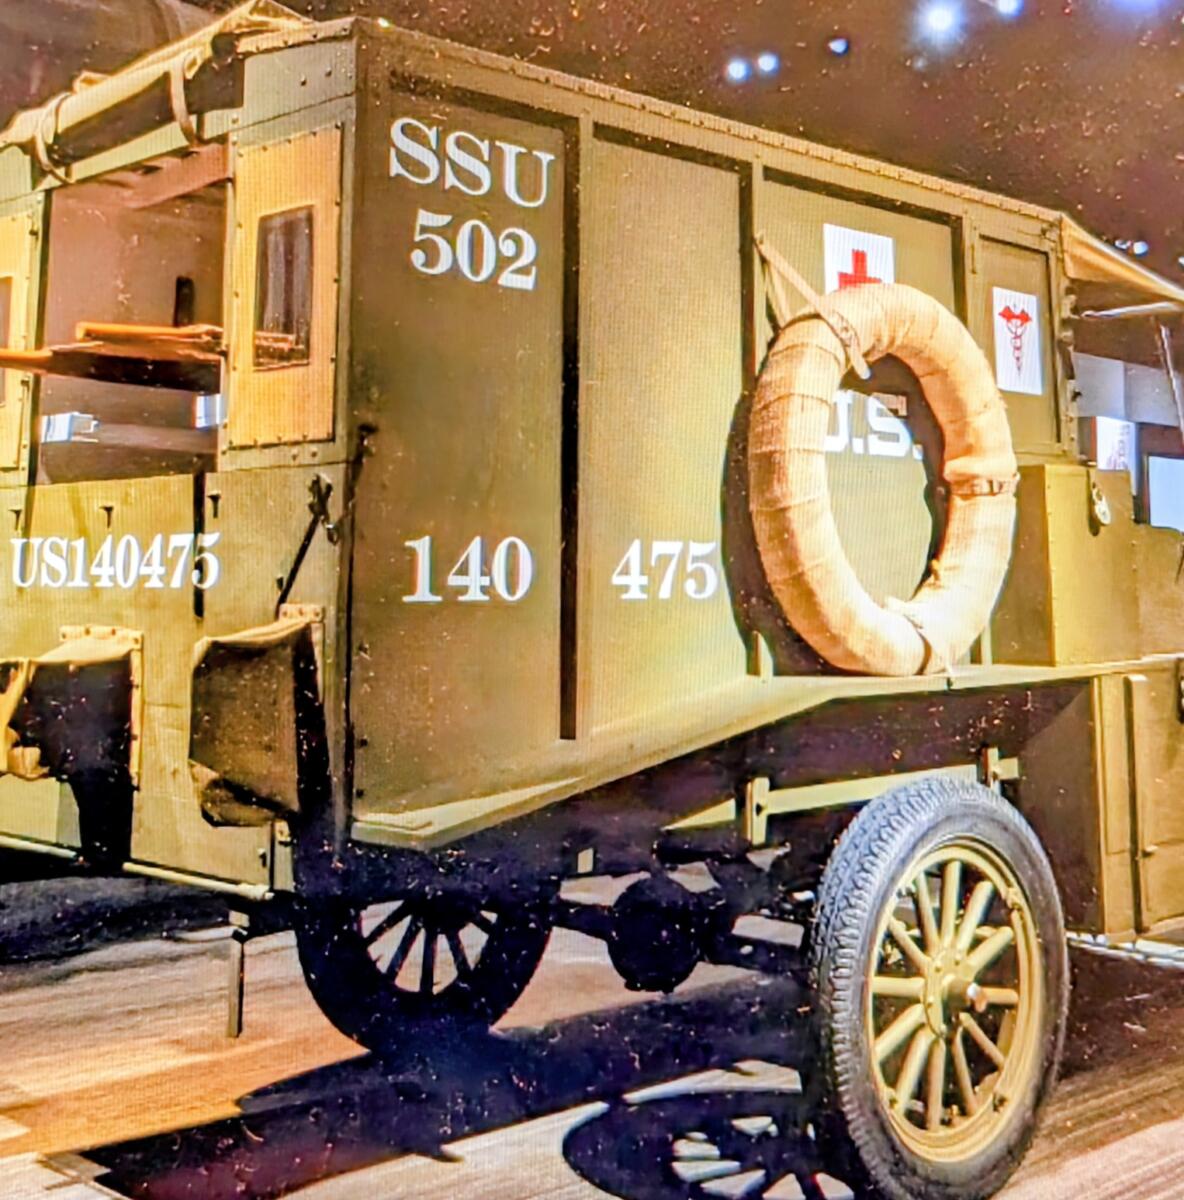
A visit to the incredible National Museum of Military Vehicles
Just outside the small town of Dubois, Wyoming, you’ll discover a big surprise—The National Museum of Military Vehicles. This 160,000-square-foot museum features an extensive collection of meticulously restored military vehicles, artifacts, and firearms. Dedicated to honoring our U.S. military forces, the National Museum of Military Vehicles makes history truly come alive. Learn more.
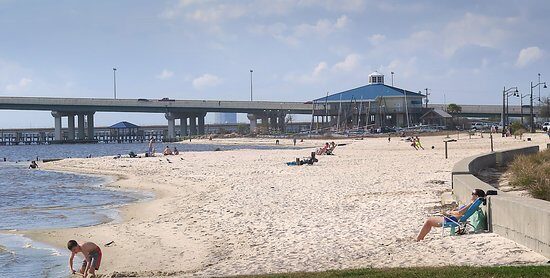
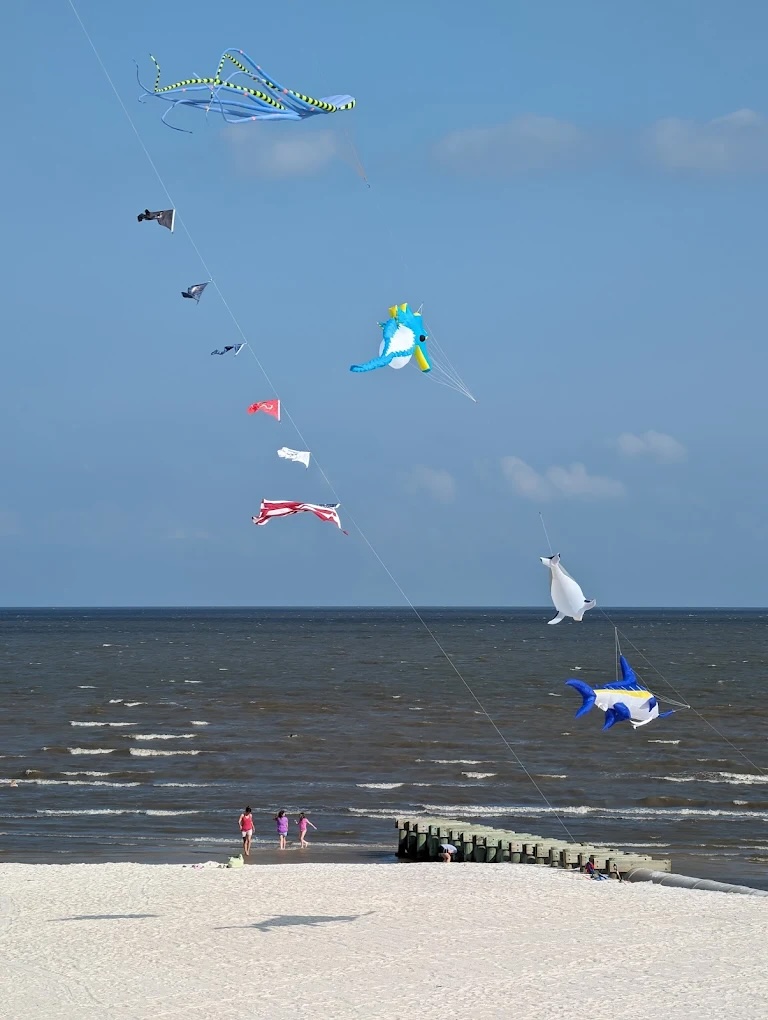
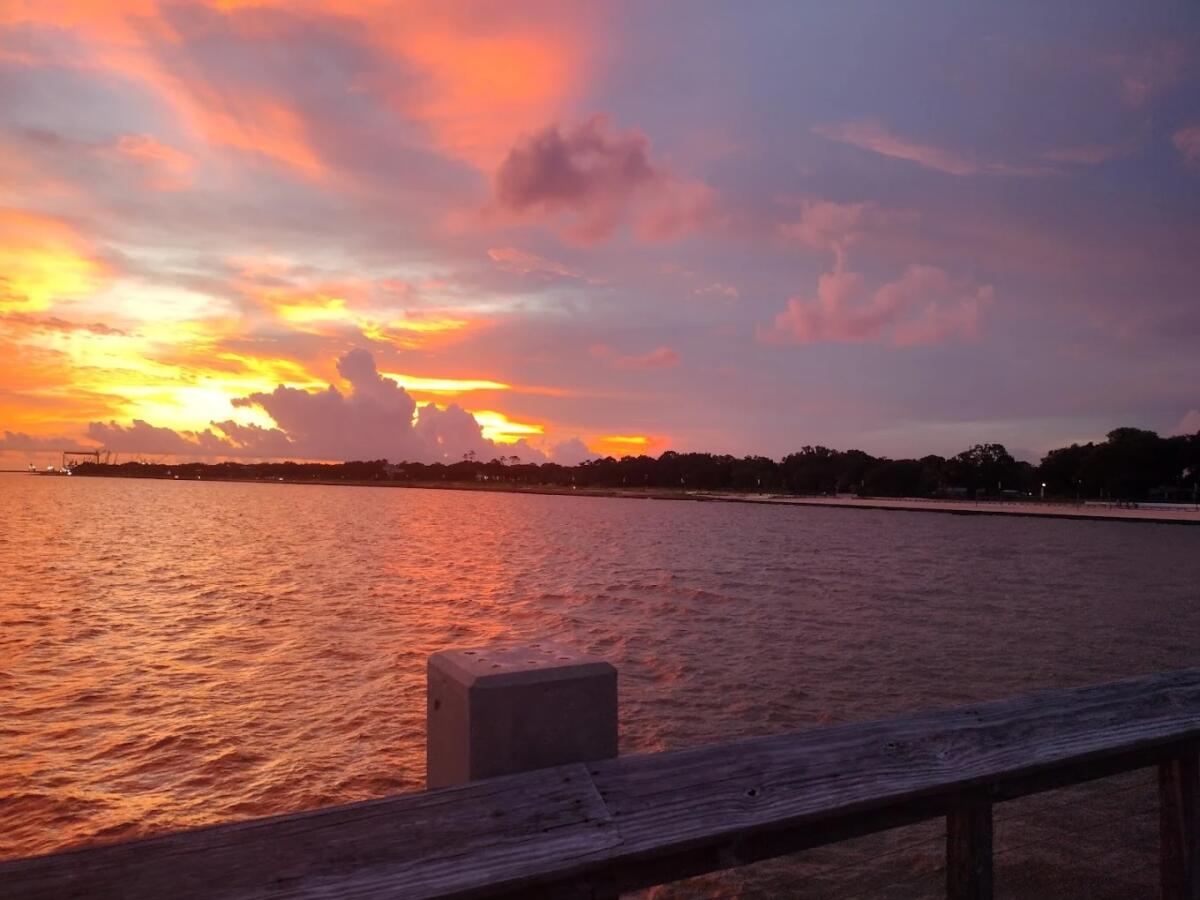
Mississippi’s forgotten tropical paradise
Most people think “beach trip” means Florida or California, but Mississippi’s Gulf Coast offers soft sand, calm water, and hometown southern hospitality. Mississippi Sound’s barrier islands keep waves mellow and the atmosphere laid back. Read on to see why RVers love Mississippi’s beaches.
? MYSTERY PRODUCT OF THE DAY ?
How in the HECK would you drive around like this at night—how could you see anything? This is one of the dumbest, craziest inventions we’ve ever seen. But it has thousands and thousands of rave reviews. Maybe it’s not as bad as we think! What do YOU think?
Highlights from this week’s RV Daily Tips Newsletter
- How to adjust your RV toilet seat height
- The best apps to use to find RV dump stations
- 10 smart ways to repurpose empty tissue boxes
- How to get rid of, and prevent, RV drain fly infestations
- Why you need a multimeter for your RV
BORED?? Well, there is no excuse! Read back issues of our RV Daily Tips Newsletters! More than 2,000 to choose from!
In the RV shop with Dustin
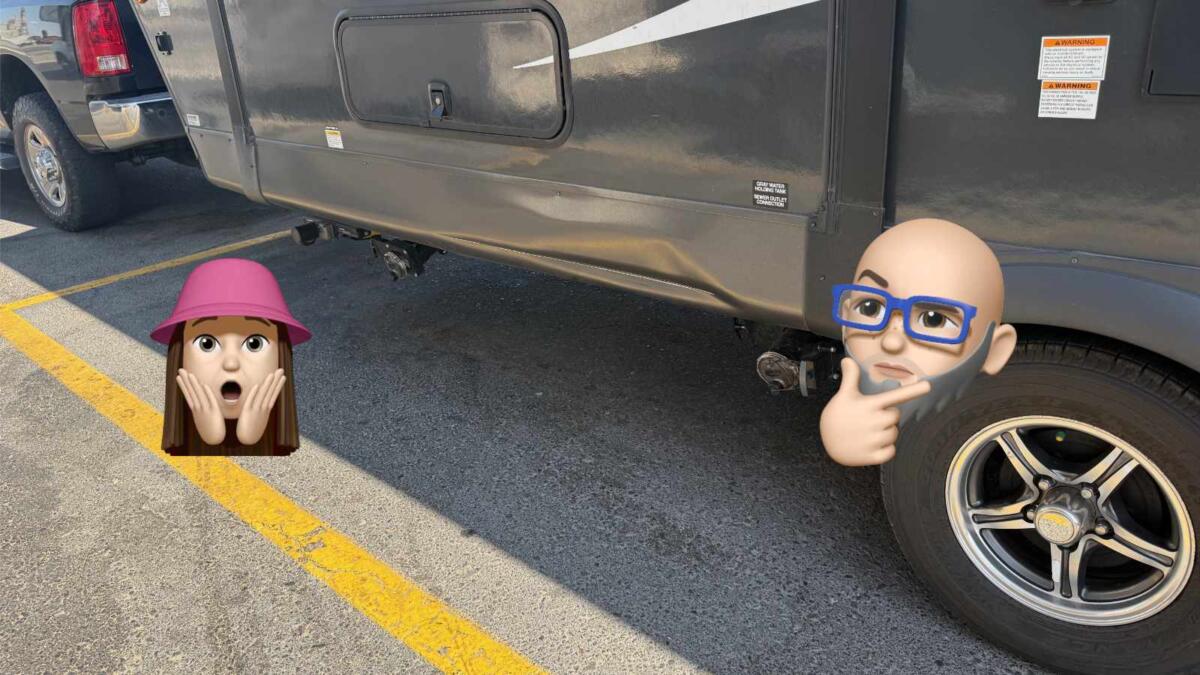
Dry-rotted floors in RVs and what it would take to fix them
Water damage is one of the most common—and costly—issues RVers face. When one reader discovered a dry-rotted subfloor in his trailer, he turned to a repair shop for answers. How bad could the damage be, and what would it take to fix it? In this video, the experts break it down and explain what every RVer should know before a small problem turns into a major repair.
RV tire safety
Change load range on tires to prevent “blowouts”?
By Roger Marble
I recently read a post on an RV forum from a guy who said he wanted to prevent “blowouts,” so he was switching from ST 235/80R16 LR-E to LR-G tires. However, he would continue to run the 80 psi specified for his RV, because his wheels were only rated for 80 psi. Continue reading.
Ask Dave
This past week’s questions that Dave answered:
Dealer says I can’t use my RV slide room unless fully extended? • Does anyone offer an LP/120-volt RV refrigerator anymore? • What tools are still made in America? • LED lights flicker in my RV. What should I look for? • Why does the trailer model number not match the length?
DO YOU LIKE GADGETS? Good! So do we! That’s why we publish an entire newsletter dedicated to gadgets for RVers! Yep, it’s true! Read the latest issue here, and make sure you’re subscribed.
Remember this?
From the archives: Tricks to using paper towel holders in and around an RV
By Gail Marsh
Recently, when cleaning cupboards, I found an unused paper towel holder. Just as I placed the extra holder into the “donate” box, I stopped to think. I quickly grabbed the paper towel holder back out of the box. I knew I could come up with some creative tips and tricks for using paper towel holders in an RV. So here they are!
RVer health
Scientists turn plastic bottles into Parkinson’s drug
Scientists have found a surprising new use for discarded plastic bottles: turning them into a key medication used to treat Parkinson’s disease. Researchers at the University of Edinburgh developed a process that converts a common plastic used in water and food containers into L-DOPA, the most widely prescribed drug for managing Parkinson’s symptoms. Continue reading.
 Heavy-duty Wrap-It storage straps are a must-have for RVers
Tired of all your cords getting tangled? That shouldn’t happen, and it won’t if you use these Wrap-It storage straps! Family-owned and made in the USA, these polypropylene straps hold up to 50 lbs.—perfect for RV hoses, extension cords, tools, and garage gear. One simple solution for a clean, pro-level organization. Come in a 6-pack! Learn more or order.
Comments this week from readers
“Just a reminder, some showers won’t drain properly if your camper is too far off-level. We have this issue when parked in our gently sloping driveway. Using the levelers to raise the front end a few inches eliminates the problem.” —Brian N.
“Normally, we do plan a special drive to see flowers this season, but due to high fuel prices, we’re keeping our driving to a minimum. Already canceled our first trip out for this season😢” —Wayner
“As is often the case, the movie doesn’t do the slightest justice to the book (“A Walk in the Woods”). The first time I read it was on a cruise while lounging on the sun deck. I laughed out loud so hard that the tears of laughter streamed down my leg. My laughter prompted several conversations from passersby… Read this book!” —Artful Dodger
“Do we collect souvenirs when we travel? I guess bugs on the nose cap of our motorhome don’t count. They seem to stay with us forever.” —Dan
“I find it amazing how many people leave chairs, canopies, awnings, and other things out when they leave or go in for the night. We stayed in one campground where at least four awnings were destroyed by a sudden storm, and chairs ended up in the roads.” —Bob
Live cam
Barred Owl Nest Cam
Readers’ pets of the day
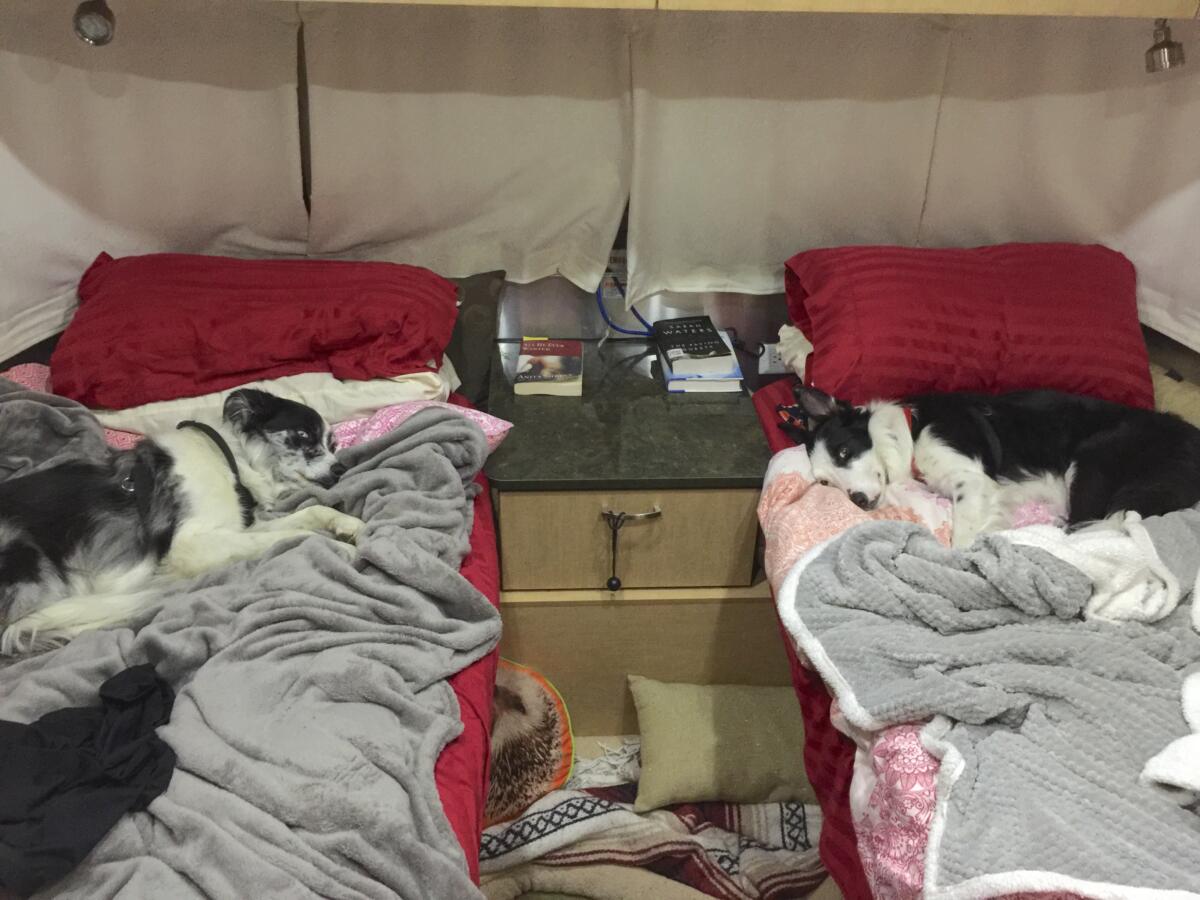 “Merlin and Daisy Mae (ages 12 and 10). They said to get a twin bed configuration so the dogs could sleep on the floor between the beds… NOT HAPPENING! BORDER COLLIES ARE SMARTER THAN THAT!” —Thomas Orcutt
• RVing with Dogs group on Facebook. You’ll love it.
Want to see your pet in this newsletter? Please send us a photo of your pet with a short description. No blurry photos and please do not submit your photo more than once.
Trivia
 The tallest planetary mountain, Olympus Mons, is located on Mars. The mountain rises an astounding 13 miles above the Martian sea level and 13.6 miles off the dry sea beds. Even without the extra elevation from the sea bed, Olympus Mons is two and a half times as tall as Earth’s tallest mountain, Mount Everest.
MUG OF THE DAY: This is an interesting, funny, and patriotic way to start your day! Maybe with your clever wit, you, too, could create a presidential slogan after your first cup o’ joe! Check this mug out. We love it!
Sunday funny

Did you miss last week’s RVtravel.com newsletter?
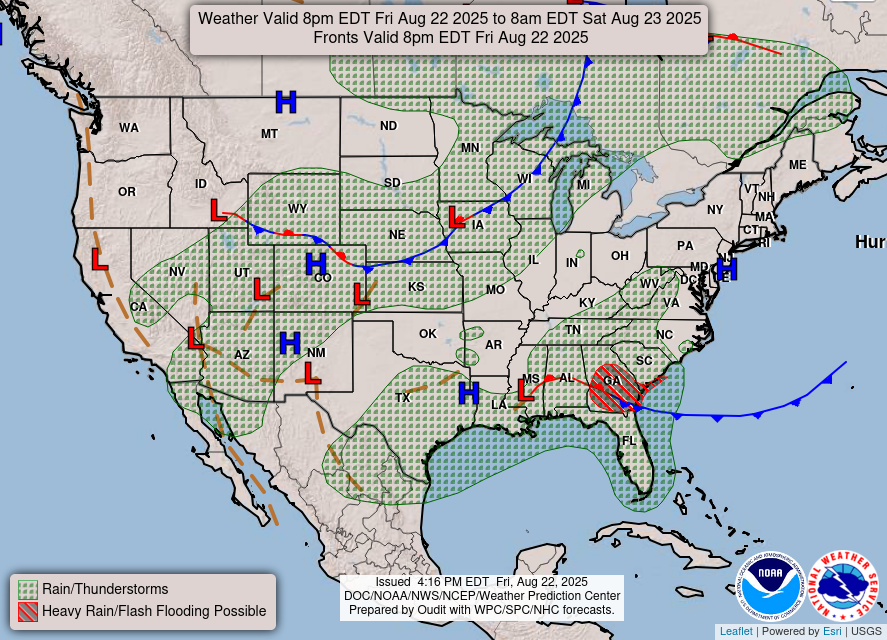
Today’s weather forecast across the nation
THIS MAP UPDATES TWICE A DAY
Visit Current National Radar Weather Map
And finally… A song from the past
RVtravel.com All Star Team
Click here for information about our staff and how to contact us.